

It’s Thanksgiving morning, and my oven is completely packed. Turkey, casseroles, pies – there’s literally no room left. But I need candied pecans for the sweet potato dish.
That’s when I threw everything in a skillet.
And honestly? It changed everything.
Now I make these pecans all the time. Not just for holidays. We’re talking random Tuesday afternoons when I want something crunchy and sweet. Morning oatmeal that needs a little excitement. Green salads that could use some pizzazz.
Ten minutes. That’s all it takes.
The smell alone is worth making them. Your whole kitchen fills up with this warm, cozy cinnamon-maple aroma. It’s like bottled autumn in your house.
Here’s What Makes These Different
Most candied nut recipes want you to:
- Preheat your oven
- Wait forever while they bake
- Stir them multiple times
- Cool them down slowly
Forget all that.
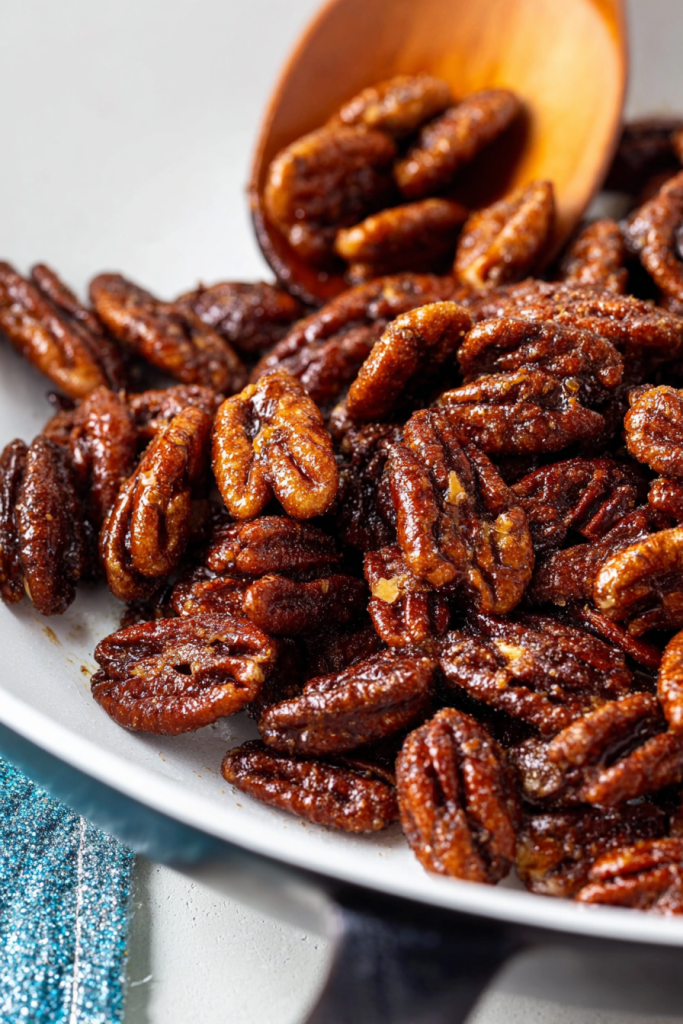
This method? You’re literally just stirring stuff in a pan for a few minutes. The maple syrup bubbles and caramelizes right there on the stovetop. The brown sugar melts into it and creates this gorgeous glossy coating.
When they cool, they get perfectly crunchy.
Not sticky. Not chewy. Just crisp and sweet with that warm spice kick.
I’ve made probably 30 batches testing the timing. Because here’s the thing – you can’t walk away. You need to stay there and stir. But it’s only five minutes of actual cooking, so who cares?
The Best Homemade Gift Ever
Last Christmas, I made triple batches of these.
Packed them in little mason jars with red ribbon. Gave them to neighbors, teachers, my mail carrier. Everyone loved them. One person actually asked if I bought them from some fancy store.
Nope. Just me, a skillet, and ten minutes.

Want to make a big batch? Super easy. Just use a bigger pan. The recipe doubles or triples without any issues.
Beyond Just Snacking
Sure, eating these straight from the jar is fantastic.
But I also:
- Crumble them over roasted sweet potatoes
- Mix them into banana bread (trust me on this)
- Top ice cream sundaes
- Add crunch to boring salads
They work everywhere you need sweetness and texture.
And that cinnamon smell while they’re cooking? Better than any candle you can buy.
Let’s Make These Pecans
What You’ll Need
| Ingredient | Quantity | Notes |
|---|---|---|
| Maple syrup | 1/4 cup | Get the real stuff – not pancake syrup |
| Brown sugar | 1/4 cup | Light or dark, both work fine |
| Ground cinnamon | 1/2 teaspoon | Fresh is better but use what you have |
| Pecan halves | 1 cup | Raw and unsalted only |
| Cayenne pepper (optional) | Small pinch | For people who like a little heat |
| Chili powder (optional) | Small pinch | Milder than cayenne |
Grab These Tools
You need a non-stick skillet. Or a well-seasoned cast iron if that’s what you’ve got.
A wooden spoon works great for stirring. Silicone spatula is good too.
And here’s the important part – line a baking sheet with parchment paper before you start cooking. Once these pecans are done, you need to move fast. No time to scramble around looking for parchment.

How to Make Them (The Real Process)
Step 1: Get Everything Ready
Seriously. Measure everything first.
Line that baking sheet.
This recipe moves fast. Like, blink-and-you-miss-it fast. Having everything measured and ready saves you from chaos later.
Step 2: Start the Sweet Base
Toss your maple syrup, brown sugar, and cinnamon into the skillet.
Turn the heat to medium.
Walk away? Absolutely not.
Stand there and watch it. Give it a stir every 30 seconds or so. The sugar needs about two minutes to dissolve into the maple syrup. You’ll see it start bubbling gently – little bubbles, not crazy volcano bubbles.
That’s your cue.
Step 3: Add Those Pecans
Pour in all the pecans at once.
Stir immediately. Get every single pecan coated in that sweet mixture.
Now comes the important part.
Don’t. Stop. Stirring.
Keep moving those pecans around for the next two minutes. The coating gets thicker. It starts looking glossy and amazing. If you stop stirring, the bottom will burn.
I learned this the hard way.

Step 4: Watch for the Magic Moment
The pecans will suddenly look different.
They develop this beautiful shine. The mixture goes from runny to thick and sticky. Everything smells incredible.
That’s when you yank the pan off the heat.
Don’t wait. Don’t think “maybe one more minute.” Just remove it.
Step 5: Spread and Cool
Dump everything onto your prepared baking sheet.
Work fast here. Use your spatula to spread them out in one layer. Break apart any big clumps while they’re still hot and pliable.
Then leave them alone.
Let them cool for about 15 minutes at room temperature. As they cool, that coating hardens into the perfect crunchy shell.
Things That’ll Save You From Disaster
The Heat Thing
Medium heat. Not medium-high. Not high. Just medium.
Too hot? You’ll burn the coating before the pecans are even warm.
Too low? Nothing caramelizes properly and you end up with sad, sticky nuts.
The Stirring Thing
I cannot stress this enough.
Do not walk away.
Those five minutes of cooking require your full attention. Keep stirring. Keep moving things around. This is literally the difference between perfect pecans and a burnt mess.
The Speed Thing
Once you pull that pan off the heat, move quickly.
Transfer to the baking sheet right away. The pan stays hot and keeps cooking the pecans even when the burner is off. You don’t want that.
The Clump Thing
Big clusters forming? Just break them apart after they cool.
They snap easily once hardened. No big deal.
Keeping Them Fresh
Store in an airtight container at room temperature.
They’ll stay crunchy for two weeks.
But real talk? I’ve never had a batch last longer than four days. My family devours them too fast.
Ways to Switch It Up
Make Them Your Own
Want Some Heat?
Add cayenne or chili powder. Start with just a pinch. You can always add more next time.
The sweet-spicy combo is surprisingly addictive.
Love Cinnamon?
Double it. Use a full teaspoon instead of half.
Some people (like my mom) want all the cinnamon flavor. This is for them.
Try Different Nuts
Swap half the pecans for walnuts. Or almonds.
Different nuts = different textures and flavors. All good.
Vanilla Lovers
Add half a teaspoon of vanilla extract with the maple syrup.
It adds this extra depth that’s really nice.
How I Actually Use These
Here’s where these pecans shine:
- Butternut squash soup (the crunch is perfect)
- Chicken salad (unexpected but amazing)
- Yogurt parfaits in the morning
- Roasted Brussels sprouts (yes, really)
- Cookie dough or brownie batter
- Pumpkin pie topping
- Apple crisp garnish
Basically anywhere you want crunch and sweetness.
When Things Go Wrong
Sticky Instead of Crunchy?
You didn’t cook them long enough.
The sugars need to fully caramelize before you pull them off the heat. Next time, cook for an extra 30 seconds.
Burnt Taste?
Heat was too high.
Stick to medium heat. I know it’s tempting to crank it up, but don’t. Lower and slower wins here.
Giant Pecan Blob?
You didn’t spread them fast enough.
Work quicker when transferring to the baking sheet. Those few seconds matter.
Questions People Always Ask
Can I use walnuts or almonds instead?
Yep! Any nut works with this method. Cooking time stays the same. I’ve done cashews, walnuts, almonds – all great.
What’s the deal with real maple syrup vs. pancake syrup?
Big difference.
Real maple syrup comes from actual tree sap. It has this rich, complex flavor you can’t fake.
Pancake syrup? That’s basically corn syrup with artificial maple flavoring. It won’t taste the same. Trust me, spend the extra money on real maple syrup.
Can I make these ahead of time?
Absolutely.
Make them up to five days before you need them. Store in an airtight container. They’ll stay perfectly crunchy.
They’re too sweet for me. Help?
Add salt.
Either mix a pinch of sea salt into the coating before cooking, or sprinkle flaky salt on top right after spreading them on the baking sheet. Salt balances the sweetness beautifully.
What if I want to double the recipe?
Go for it.
Just use a bigger skillet so everything fits in one layer. Timing stays mostly the same, though you might need an extra minute of stirring to coat everything properly.
Any dietary stuff I should know?
These are naturally gluten-free and dairy-free.
They do contain nuts and sugar though. So if you’re allergic to either, this isn’t for you.
My Final Thoughts
Look, I’m not saying this is the fanciest recipe in the world.
It’s not.
But it’s one of those simple things that just works. Every single time. And people are always impressed when you tell them you made candied pecans from scratch.
The whole process takes ten minutes. You probably have all the ingredients in your pantry right now. And once you get the hang of it, you’ll be making these constantly.
I started making them out of necessity during that chaotic Thanksgiving.
Now? They’re part of my regular routine. Sunday afternoons. Weeknight snacks. Gifts for friends. Salad toppers. Ice cream additions.
The possibilities are endless once you have a jar of these sitting in your kitchen.
So grab your skillet. Get that maple syrup out. And make yourself a batch.
Your kitchen will smell amazing. You’ll have a delicious snack ready in minutes. And you’ll probably end up making them again next week.
Enjoy!

Easy Skillet Candied Pecans
Ingredients
- 1/4 cup maple syrup real maple syrup, not pancake syrup
- 1/4 cup brown sugar light or dark
- 1/2 teaspoon ground cinnamon
- 1 cup pecan halves raw and unsalted
Optional Add-ins
- 1 pinch cayenne pepper for heat
- 1 pinch chili powder milder than cayenne
- 1/2 teaspoon vanilla extract optional, for extra depth
Instructions
Prepare
- Line a baking sheet with parchment paper and set aside. Measure all ingredients before starting.
Make the Sweet Base
- Add maple syrup, brown sugar, and cinnamon to a non-stick skillet or well-seasoned cast iron pan.
- Turn heat to medium and stir every 30 seconds. Cook for about 2 minutes until sugar dissolves and mixture starts bubbling gently.
Cook the Pecans
- Add all pecans at once and stir immediately to coat every pecan in the sweet mixture.
- Stir constantly for 2-3 minutes without stopping. The coating will become thicker and glossy. Do not walk away or the bottom will burn.
- When pecans develop a beautiful shine and the mixture goes from runny to thick and sticky, immediately remove pan from heat.
Cool
- Quickly dump everything onto the prepared baking sheet. Use a spatula to spread pecans in one layer, breaking apart any large clumps while still hot.
- Let cool at room temperature for about 15 minutes. The coating will harden into a perfectly crunchy shell as it cools.
- Once completely cool, break apart any remaining clusters and store in an airtight container at room temperature for up to 2 weeks.


