Okay, can we talk about shrimp for a second?
When they’re cooked right, they’re tender and sweet. They soak up every flavor you throw at them. But here’s the thing – I spent years making shrimp the traditional way. Then my air fryer changed everything.
Let me tell you how this happened.
It was a Tuesday. I was dead tired from work. My air fryer was just sitting there on the counter, and I had this pound of gorgeous shrimp in my fridge. I thought, “Why not?”
25 minutes later?
My family was asking for seconds. The shrimp had this golden butter sauce that tasted like something from a fancy restaurant. My dinner routine has never been the same since.
Here’s what I love about this recipe.
You don’t need fancy chef skills. You don’t need expensive gadgets. Your air fryer does the heavy lifting while you whip up a quick butter sauce.
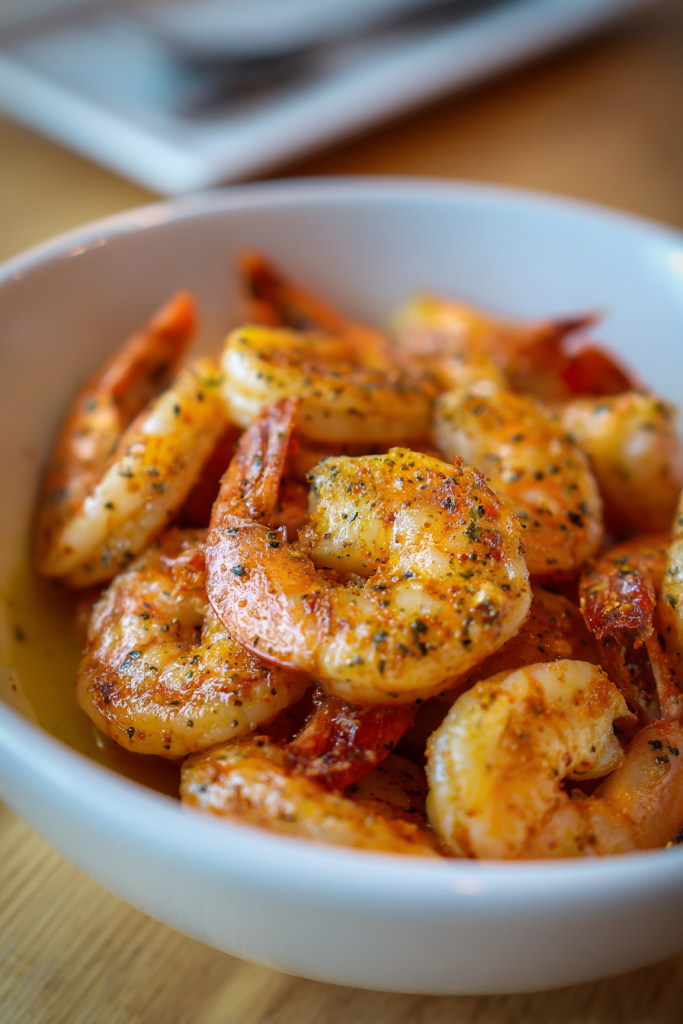
The result?
Shrimp with a slight crisp on the outside. Juicy on the inside. Perfect every single time.
Why Air Fryer Shrimp Works So Well
Traditional pan-frying is tricky. Too hot? Rubbery shrimp. Too cool? They get soggy. It’s frustrating.
But the air fryer? It circulates hot air evenly around each piece. The shrimp curl into that classic “C” shape – which is exactly what you want. That’s your sign they’re cooked just right.
I’ve served this dish dozens of ways:
- Over fluffy white rice with steamed broccoli
- Tossed with pasta for a quick scampi dinner
- As an appetizer with cocktail sauce (my kids’ favorite)
Why You’ll Keep Making This
Let me break down what makes this my weeknight go-to.
Speed. Start to finish? 25 minutes. That includes prep, cooking, and making the sauce. When you’re tired and hungry, this is a lifesaver.
Flavor. The garlic powder and onion powder build this savory base. Then the fresh garlic butter sauce comes in with richness and brightness. Add that squeeze of lemon? Chef’s kiss.
Want a little heat? Toss in some red pepper flakes. They give a gentle kick without overpowering the delicate shrimp.
Easy cleanup. This is huge for me. You’re only dirtying:
- One bowl for seasoning
- Your air fryer basket
- A small pan for the sauce
No splattered stovetop. No pile of pots and pans. After dinner, I’m not stuck scrubbing for 20 minutes.
Budget-friendly. Most of these ingredients? Already in your pantry. You only need to grab fresh shrimp, garlic, a lemon, and maybe some parsley. Shopping takes five minutes tops.
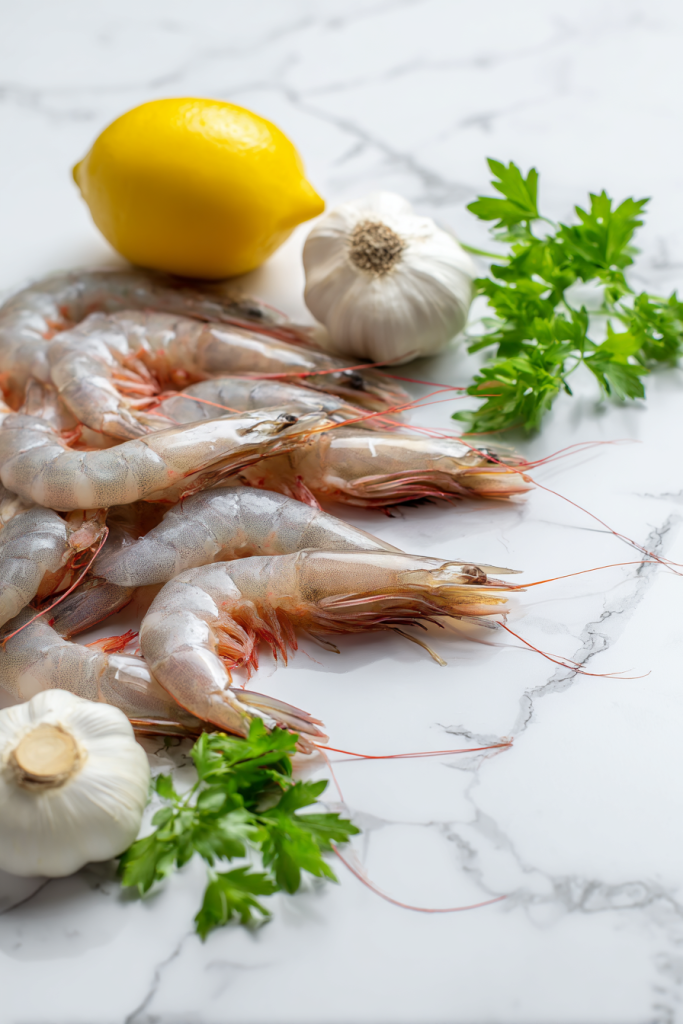
Let’s Talk Ingredients
I use large shrimp – the 21-30 count per pound size. They’re meaty enough to stay tender but not so huge that timing gets weird. Get them peeled and deveined with tails on. Makes eating easier.
The seasoning blend is simple. Olive oil makes the spices stick. Salt, black pepper, garlic powder, and onion powder create this savory coating. It complements the natural sweetness without taking over.
Now, the garlic butter sauce?
This is where the magic happens.
You need fresh garlic here. I know jarred minced garlic is convenient. I use it sometimes too. But for this recipe, take the extra minute to mince fresh cloves. When you cook them in butter, the aroma fills your entire kitchen. Nothing beats that.
Lemon juice brightens everything. Parsley adds a fresh, herbaceous note. Together? Incredible.
What You’ll Need
| Ingredient | Quantity | Notes |
|---|---|---|
| Large shrimp | 1 pound | Peeled, deveined, tails on (21-30 count) |
| Olive oil | 1½ teaspoons | For coating shrimp |
| Salt | ½ teaspoon | Plus more for sauce |
| Ground black pepper | ¼ teaspoon | Freshly ground preferred |
| Garlic powder | ½ teaspoon | Plus more for sauce |
| Onion powder | ½ teaspoon | Adds savory depth |
| Unsalted butter | ½ cup | For the sauce |
| Fresh garlic | 4 cloves | Minced finely |
| Lemon juice | 2 teaspoons | Freshly squeezed |
| Red pepper flakes | ¼ teaspoon | Optional, for heat |
| Fresh parsley | 1 tablespoon | Optional, finely chopped |
How to Make It (The Easy Way)
Ready? Let’s cook.
Step 1: Get Your Shrimp Ready
First things first. Pat your shrimp dry with paper towels if they’re wet.
Why does this matter?
Excess moisture stops the seasonings from sticking. Plus, wet shrimp steam instead of getting that nice texture we want.
Grab a large bowl. Add your shrimp.
Drizzle the olive oil over them. Sprinkle in the salt, black pepper, garlic powder, and onion powder.
Now here’s the fun part – get your hands in there. Toss everything together until each shrimp has an even coating. The oil acts like glue for the spices. You should see a light dusting on every piece.
Step 2: Time to Cook
Turn your air fryer to 400°F. Let it preheat for 3-4 minutes.
I know you’re tempted to skip this step. Don’t. Preheating ensures even cooking from the second your shrimp hit the basket.
While it heats up, spray the basket lightly with olive oil. This prevents sticking.
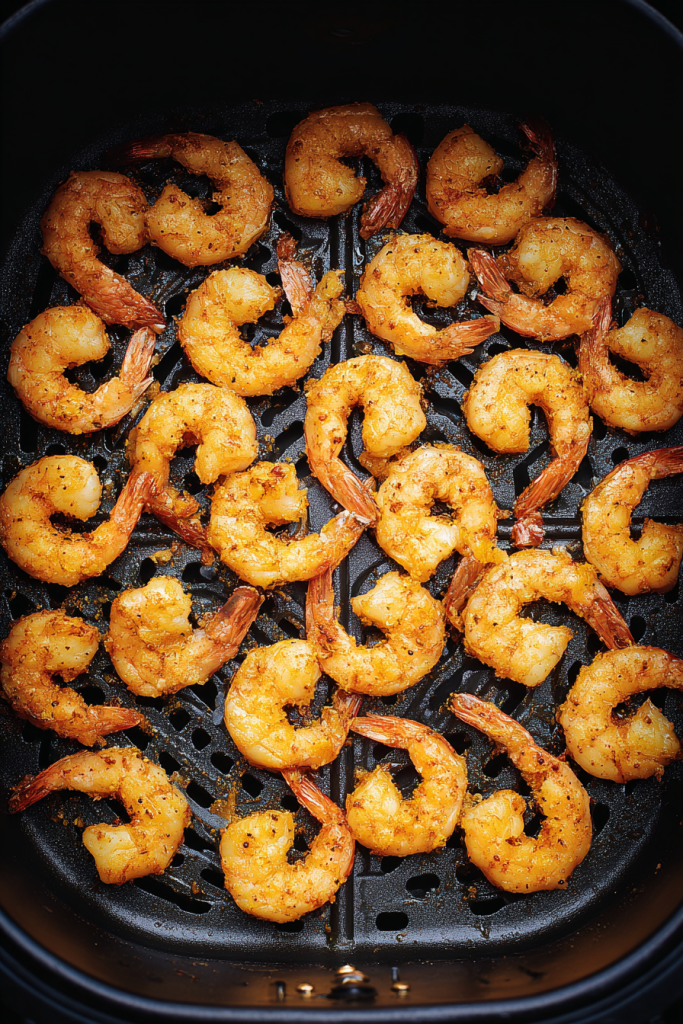
Now arrange your shrimp in a single layer.
This is crucial.
Overlapping shrimp won’t cook evenly. Some will be perfect, others won’t. Depending on your air fryer size, you might need two batches. I get it – you want to cram everything in. But trust me on this one. Patience wins.
Set your timer for 6 minutes.
Watch for these signs:
- The shrimp turn pink
- They become opaque (not see-through)
- They curl into a “C” shape
If they curl into a tight “O”? They’ve gone too far. They’ll be tough and chewy.
For your second batch, you’re good to go. No need to preheat again. Just add the remaining shrimp and cook for another 6 minutes. The basket is already hot, so timing stays the same.
Step 3: Make That Butter Sauce
While your shrimp are cooking, let’s make the sauce.
Grab a small skillet or saucepan. Put it on the stove over medium-low heat. Add your butter and let it melt slowly.
Don’t rush this. You don’t want brown butter. You don’t want burnt butter. Just melted butter.
Once it’s completely liquid, add your minced garlic. Stir it around for about 30 seconds.
Your kitchen will smell amazing right now.
The garlic should soften and get fragrant. But it shouldn’t brown. Watch it carefully.
Pull the pan off the heat as soon as that garlic aroma hits you.
Add:
- The lemon juice
- Another half teaspoon of garlic powder
- Half teaspoon of salt
- Red pepper flakes (if you’re using them)
Whisk everything together. The lemon juice will make the butter sizzle a bit. That’s totally normal.
Got fresh parsley? Stir it in now. The leftover heat will wilt it slightly and release all that flavor.
Step 4: Bring It All Together
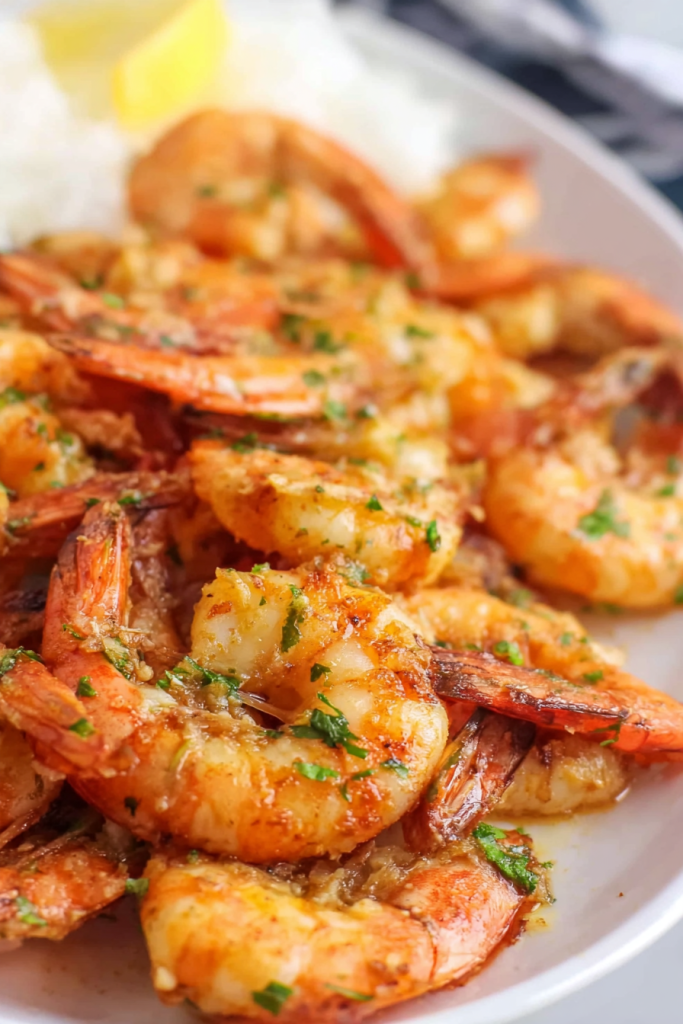
Transfer your cooked shrimp to a serving bowl or platter.
Drizzle that warm garlic butter sauce all over the top. I like to toss everything gently so each shrimp gets coated with sauce.
Serve it immediately while everything’s hot.
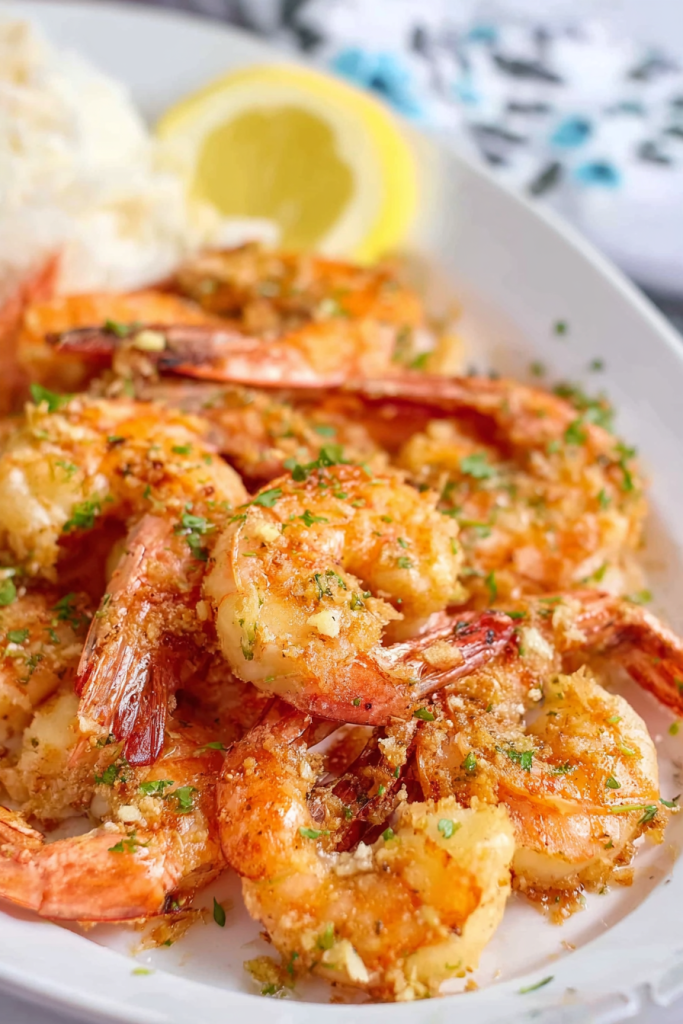
The shrimp taste best straight from the air fryer. They’re tender. The butter is silky. The flavors are at their peak.
I always put out extra lemon wedges on the side. People love squeezing fresh lemon over their portions.
Tips I’ve Learned the Hard Way
Temperature matters. Don’t skip preheating. I tried it once to save time. The shrimp cooked unevenly. Some pieces were perfect, others were rubbery. Not worth it.
Size matters too. Use shrimp that are similar in size. Mixed sizes cook at different rates. You’ll end up with some overcooked pieces and some undercooked ones.
Give them space. Overlapping shrimp steam instead of getting that nice air fryer texture. Cook in batches if you need to. The wait is worth it.
Fresh garlic wins. Pre-minced jarred garlic doesn’t have the same robust flavor. I know it’s convenient. But for this recipe, take 30 extra seconds to mince fresh cloves. The difference is night and day.
Watch the clock. Shrimp cook fast. Even one extra minute can take them from perfect to rubbery. Set a timer. Check at 6 minutes. Don’t walk away.
Storing Leftovers (If You Have Any)
Leftover shrimp can hang out in your fridge for up to three days. Store them in an airtight container. You can keep the garlic butter sauce separate or together – both work fine.
Reheating tips:
Use your air fryer again at 350°F for 2-3 minutes. This keeps the texture way better than a microwave. Microwaves make shrimp rubbery. Nobody wants that.
Or here’s another idea – enjoy them cold. Toss them in salads. Mix them into pasta dishes. They’re delicious at room temperature too.
What to Serve With These Shrimp
This dish is super versatile. Here are my favorite pairings:
Rice options:
- Steamed jasmine rice (the garlic butter soaks into the grains – so good)
- Cauliflower rice for a lighter meal
Vegetable sides:
- Roasted asparagus
- Sautéed green beans
- Simple garden salad with vinaigrette
Other ideas:
- Crusty bread for soaking up extra sauce
- Angel hair pasta for a quick scampi-style meal
- Zucchini noodles if you’re watching carbs
Ways to Mix It Up
Want it spicy? Double the red pepper flakes. Or add a pinch of cayenne to the seasoning blend. Your call.
Love herbs? Add fresh thyme or basil to the butter sauce along with the parsley. Oregano works too.
Citrus twist: Swap the lemon juice for lime juice. Gives it a totally different vibe.
Extra crispy: Spray the shrimp lightly with oil halfway through cooking. They’ll get even crispier.
Questions People Always Ask Me
Can I use frozen shrimp?
Yep. But thaw them completely first.
Here’s how: Place frozen shrimp in a colander under cold running water for about 10 minutes. Then pat them really dry with paper towels before seasoning.
Why the emphasis on drying? Excess moisture stops the seasoning from sticking. Plus, it prevents proper cooking.
What if I don’t have an air fryer?
No worries. Bake these in your regular oven at 425°F for 8-10 minutes on a baking sheet. They won’t have exactly the same texture, but they’ll still taste great.
Want to get closer to that air fryer crisp? Broil them for the last minute.
Do I have to leave the tails on?
Not at all.
Tails are mostly for looks. They also make shrimp easier to pick up as an appetizer. But if you’re serving this over rice or pasta, go ahead and buy tail-off shrimp. Or just remove them yourself before cooking.
How do I know when they’re perfectly cooked?
Look for three things:
- Pink color (not gray)
- Opaque throughout (not translucent)
- Curled into a “C” shape
If they curl into a tight “O”? That means overcooked. They’ll be tough.
Still not sure? Cut one open. The inside should be white and firm. Not gray. Not mushy.
Can I make the butter sauce ahead?
You can make it a few hours ahead. Keep it warm in a small pot on the lowest heat setting. Stir it occasionally so it doesn’t separate.
But here’s the truth – garlic tastes best when freshly cooked. That’s why I recommend making the sauce while your shrimp cook. The flavors are just better that way.
The Bottom Line
This recipe proves something important.
You don’t need complicated techniques to make impressive food. You don’t need hours in the kitchen. You just need good ingredients and a simple method.
These air fryer shrimp? They’re restaurant-quality. But you’re making them at home in 25 minutes.
The garlic butter sauce is rich and bright. The shrimp are tender with a slight crisp. Your family will think you spent way more time on this than you actually did.
Give it a try this week. I promise you’ll be adding it to your regular rotation.
Happy cooking!
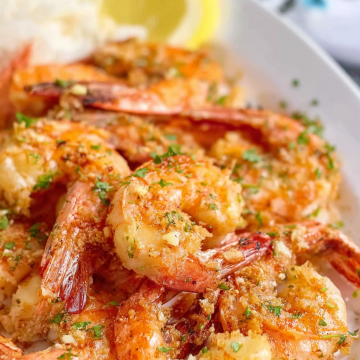
Air Fryer Shrimp with Garlic Butter
Ingredients
For the Shrimp
- 1 pound large shrimp peeled, deveined, tails on (21-30 count)
- 1.5 teaspoons olive oil for coating shrimp
- 0.5 teaspoon salt plus more for sauce
- 0.25 teaspoon ground black pepper freshly ground preferred
- 0.5 teaspoon garlic powder plus more for sauce
- 0.5 teaspoon onion powder adds savory depth
For the Garlic Butter Sauce
- 0.5 cup unsalted butter
- 4 cloves fresh garlic minced finely
- 2 teaspoons lemon juice freshly squeezed
- 0.5 teaspoon garlic powder for sauce
- 0.5 teaspoon salt for sauce
- 0.25 teaspoon red pepper flakes optional, for heat
- 1 tablespoon fresh parsley optional, finely chopped
Instructions
- Pat shrimp dry with paper towels if wet. Place shrimp in a large bowl.
- Drizzle olive oil over shrimp. Add salt, black pepper, garlic powder, and onion powder. Toss with hands until each shrimp is evenly coated.
- Preheat air fryer to 400°F for 3-4 minutes. Spray the basket lightly with olive oil.
- Arrange shrimp in a single layer in the air fryer basket (don’t overlap). Cook for 6 minutes until shrimp turn pink, opaque, and curl into a “C” shape.
- If cooking in batches, add remaining shrimp to the hot basket and cook for another 6 minutes.
- While shrimp cook, melt butter in a small skillet over medium-low heat. Don’t let it brown.
- Add minced garlic to melted butter and stir for 30 seconds until fragrant but not browned.
- Remove pan from heat. Add lemon juice, garlic powder, salt, and red pepper flakes (if using). Whisk together. Stir in fresh parsley if using.
- Transfer cooked shrimp to a serving bowl. Drizzle warm garlic butter sauce over top and toss gently to coat. Serve immediately with extra lemon wedges.