

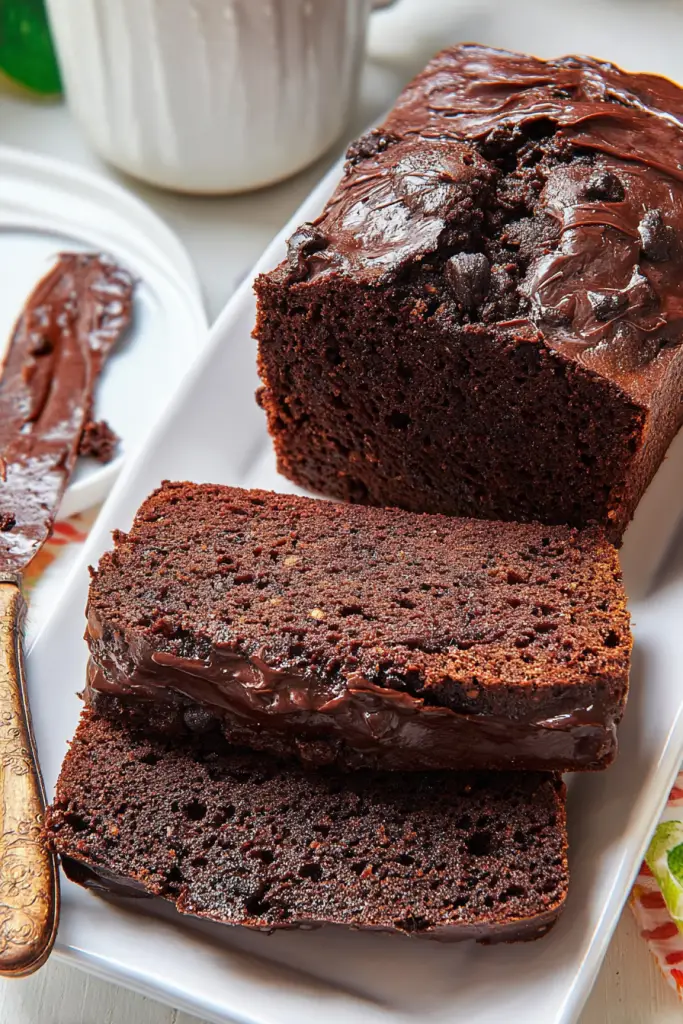
There’s something magical that happens when chocolate meets banana in a warm, freshly baked loaf. I’ve been perfecting this chocolate banana bread recipe for years, and I can confidently say it’s become my absolute favorite way to use up those overripe bananas sitting on my counter.
If you’re like me and love banana-based treats, you’ll want to check out my other favorites too – they’re all crowd-pleasers that never disappoint!
Why You’ll Absolutely Love This Chocolate Banana Bread
I’ve made this recipe countless times, and here’s why it never gets old:
Made with simple pantry ingredients – I designed this recipe around items you likely already have at home. No need for specialty trips to the grocery store or expensive ingredients that you’ll only use once.
Naturally sweetened with maple syrup – Instead of relying heavily on refined sugar, I use pure maple syrup as the primary sweetener. This creates a more complex flavor profile and keeps the bread moist without being overly sweet.
Rich chocolate flavor with perfect texture – The combination of unsweetened cocoa powder and mini chocolate chips gives you that deep chocolate taste with delightful bursts of sweetness in every bite. The texture is beautifully moist and almost fudgy.
Perfect for chocolate lovers – If you’re someone who believes chocolate makes everything better (like me!), this bread delivers that rich, decadent flavor while still being a relatively wholesome treat.
Incredibly versatile – I love that this recipe works whether you’re making it for a cozy weekend breakfast, an afternoon snack, or even dessert. It’s also fantastic toasted with a little butter.
The Magic Behind These Ingredients
What makes this chocolate banana bread so special isn’t just one ingredient – it’s how they all work together. I’ve spent time tweaking the ratios to get the perfect balance of moisture, sweetness, and that rich chocolate flavor that makes this bread irresistible.
The overripe bananas are absolutely crucial here. I always tell people to wait until their bananas are covered in brown spots, maybe even a little black. Those bananas might not look appetizing on their own, but they’re pure gold for baking. They’re naturally sweeter and break down more easily, creating that tender crumb we’re after.
The cocoa powder I use is unsweetened, which might seem counterintuitive, but it’s essential for that deep, rich chocolate flavor without adding extra sugar. Combined with the natural sweetness from the bananas and maple syrup, it creates this beautiful balance that’s not overpowering.
Complete Ingredients List
Here’s everything you’ll need for this incredible chocolate banana bread. I’ve organized it the way I always prep my ingredients – it makes the whole process so much smoother.
| Ingredient | Quantity | Notes |
|---|---|---|
| Gluten-free 1:1 baking flour | 1 cup + 2 TBSP | Must include xanthan gum; can substitute with whole wheat flour |
| Unsweetened cocoa powder | 2/3 cup | Do not use Dutch process cocoa powder |
| Baking soda | 1 teaspoon | Essential for proper rise |
| Fine sea salt | 1/2 teaspoon | Balances sweetness and enhances chocolate flavor |
| Mashed bananas | 1 1/4 cups | About 3 medium extra-ripe bananas |
| Pure maple syrup | 1/3 cup | Can substitute with agave or honey |
| Granulated sugar | 1/4 cup | Optional but recommended for perfect sweetness |
| Avocado oil | 1/4 cup | Can use light olive oil or coconut oil |
| Large eggs | 2 | Room temperature, especially if using coconut oil |
| Vanilla extract | 1 tablespoon | Pure vanilla works best |
| Non-dairy milk | 1/2 cup | Any type works – almond, oat, soy |
| Mini chocolate chips | 1/2 cup | Plus extra for topping |
Prep Time: 15 minutes | Cook Time: 50 minutes | Total Time: 65 minutes
Servings: 12 slices | Difficulty: Easy
My Step-by-Step Method
I’ve refined this process over many batches, and this method consistently gives me the best results:
Step 1: Prep Your Kitchen Preheat your oven to 350°F. This is crucial – I always preheat first because the oven needs time to reach the right temperature. Line a 9×5-inch loaf pan with parchment paper, leaving some overhang for easy removal. I learned this tip the hard way after having a few loaves stick to the pan!
Step 2: Mix the Dry Ingredients In a medium bowl, whisk together the gluten-free flour, cocoa powder, baking soda, and salt. I like to really whisk these well to ensure there are no cocoa clumps – they can create uneven flavor pockets in the finished bread. Set this aside.
Step 3: Prepare the Wet Ingredients This is where the magic starts. In a large bowl, mash your bananas until they’re smooth and creamy. I use a fork and really work at it until there are no large chunks. Then whisk in the maple syrup, granulated sugar (if using), and oil until everything is well combined and smooth.
Step 4: Add Eggs and Vanilla Crack your eggs into the banana mixture and whisk them in thoroughly. Add the vanilla extract and mix until everything is beautifully combined. The mixture should look smooth and smell amazing at this point.
Step 5: Combine Wet and Dry Here’s a critical technique I’ve learned: add half of your dry ingredient mixture to the wet ingredients and gently stir with a rubber spatula. Don’t overmix! Then pour in the non-dairy milk, followed by the remaining dry ingredients. Stir just until combined – you should still see a few flour streaks, and that’s perfect.
Step 6: Fold in the Chocolate Gently fold in the chocolate chips with your spatula. I like to reserve a few extra chips to sprinkle on top before baking – it makes the finished loaf look bakery-worthy.
Step 7: Bake to Perfection Pour the batter into your prepared loaf pan and smooth the top gently. Sprinkle those reserved chocolate chips on top. Bake for 45-55 minutes, but here’s my pro tip: tent the loaf with foil at the 30-minute mark to prevent the top from browning too much.
Start checking for doneness at 45 minutes with a toothpick inserted in the center. It should come out with just a few moist crumbs – no wet batter, but don’t wait for it to be completely clean either.
Step 8: Cool Completely This might be the hardest part! Let the bread cool in the pan for about 10 minutes, then lift it out using the parchment paper overhang. Cool completely on a wire rack before slicing. I know it’s tempting to cut into it right away, but warm banana bread can be gummy and fall apart.
Pro Tips for Perfect Results
Banana ripeness matters: I cannot stress this enough – use bananas that are very ripe, with lots of brown spots or even black skin. They’re sweeter and create better texture.
Don’t overmix: Once you add the flour, mix just until combined. Overmixing develops the gluten and can make your bread tough.
Check your oven: Every oven bakes differently. Start checking at 45 minutes and adjust from there. Mine usually takes exactly 50 minutes.
Storage tip: Once completely cool, I wrap leftover slices individually and freeze them. They thaw beautifully and taste fresh!
Creative Variations I Love
Over the years, I’ve experimented with different ways to customize this chocolate banana bread, and here are my favorite variations:
Double Chocolate Version: Add an extra 1/4 cup of chocolate chips and a tablespoon of cocoa powder for ultra-rich chocolate lovers.
Nutty Chocolate Banana: Fold in 1/2 cup of chopped walnuts or pecans along with the chocolate chips. The nuts add a lovely crunch and complement both the chocolate and banana flavors perfectly.
Espresso Enhancement: Add 1 teaspoon of instant espresso powder to the dry ingredients. It doesn’t make the bread taste like coffee – it actually intensifies the chocolate flavor.
Coconut Twist: Replace the chocolate chips with 1/2 cup of unsweetened coconut flakes for a tropical variation that’s absolutely delicious.
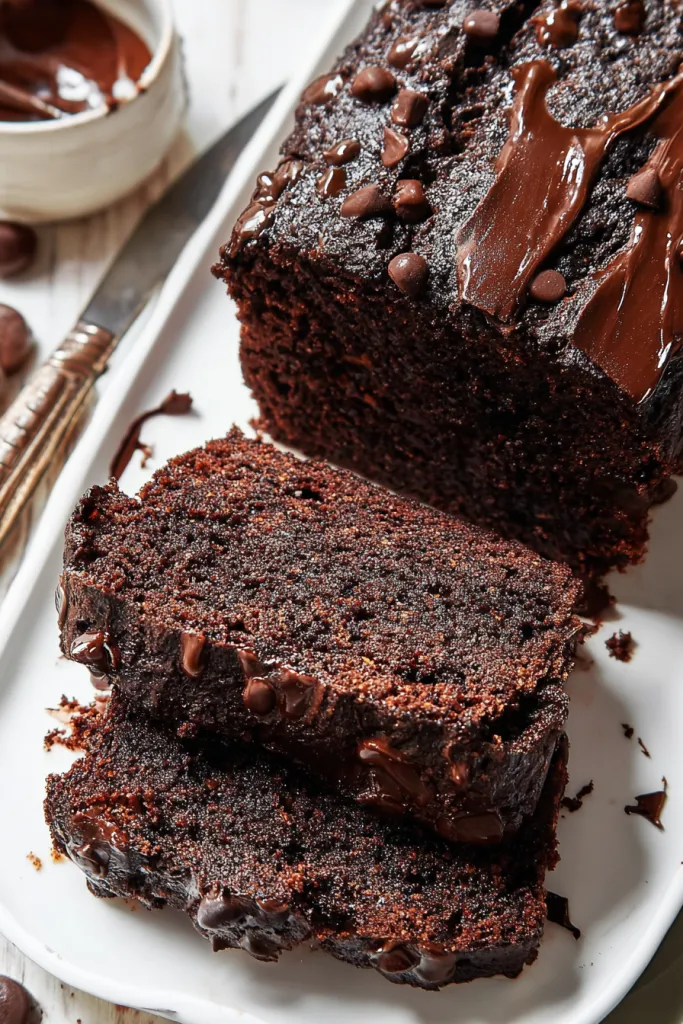
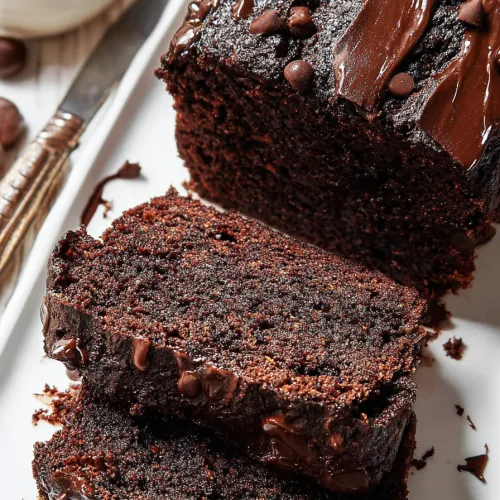
Image Prompt 5: A sliced loaf of chocolate banana bread on a wooden cutting board, showing the moist, dark crumb studded with chocolate chips
Perfect Storage Solutions
I’ve learned a lot about storing this bread to maintain its incredible texture and flavor:
Counter Storage: Keep the completely cooled bread in an airtight container at room temperature for up to 5 days. I usually wrap individual slices in plastic wrap within the container to keep them extra fresh.
Refrigerator Storage: For longer storage, refrigerate wrapped bread for up to one week. Let slices come to room temperature before eating, or toast them lightly.
Freezer Storage: This bread freezes beautifully! Wrap the entire cooled loaf in plastic wrap, then aluminum foil, and freeze for up to 3 months. I also like to slice the loaf first, then wrap individual slices – perfect for grabbing a single serving.
Thawing Tips: Thaw overnight in the refrigerator or at room temperature for a few hours. Individual slices thaw in about 30 minutes at room temperature.
Frequently Asked Questions
Can I make this recipe gluten-free?
Absolutely! I designed this recipe using gluten-free 1:1 baking flour that includes xanthan gum. Just make sure your flour blend includes xanthan gum for the best texture. I’ve had great success with brands like Bob’s Red Mill and King Arthur.
What if I don’t have enough ripe bananas?
If you’re short on bananas, you can replace up to 1/2 cup of mashed banana with unsweetened applesauce, plain Greek yogurt, or sour cream. The texture will be slightly different but still delicious.
Can I make this without eggs?
Yes! For a vegan version, replace the 2 eggs with 2 tablespoons of ground flaxseed meal mixed with 1/3 cup water. Let this mixture sit for 5 minutes to thicken before using.
Why does my bread sink in the middle?
This usually happens from overmixing the batter or opening the oven door too early in the baking process. Make sure to mix just until combined and resist checking on the bread until at least 40 minutes of baking time.
Can I turn this into muffins?
Definitely! This recipe makes about 15 muffins. Fill muffin cups about 3/4 full and bake at 375°F for 20-25 minutes. Start checking at 18 minutes – they’re done when a toothpick comes out with just a few moist crumbs.
How do I know when it’s properly done?
Insert a toothpick in the center of the loaf. It should come out with a few moist crumbs but no wet batter. The top should spring back lightly when touched, and the edges should just start pulling away from the sides of the pan.
Final Thoughts
This chocolate banana bread has become such a staple in my kitchen, and I hope it becomes one in yours too. There’s something so satisfying about transforming those overripe bananas into something this delicious and comforting. Whether you’re enjoying a slice with your morning coffee or serving it as a special dessert, this recipe delivers every single time.
The best part? It gets even better the next day as all the flavors meld together. I love making a loaf on Sunday and having it throughout the week for quick breakfasts or afternoon treats. Give this recipe a try, and I guarantee it’ll become one of your go-to comfort baking recipes too!
Chocolate Banana Bread
Ingredients
- 1 cup + 2 TBSP gluten-free 1:1 baking flour with xanthan gum; or substitute with whole wheat flour
- 2/3 cup unsweetened cocoa powder do not use Dutch process cocoa powder
- 1 teaspoon baking soda
- 1/2 teaspoon fine sea salt
- 1 1/4 cups mashed bananas about 3 medium overripe bananas
- 1/3 cup pure maple syrup
- 1/4 cup granulated sugar optional
- 1/4 cup avocado oil can substitute with light olive oil or coconut oil
- 2 large eggs room temperature
- 1 tablespoon vanilla extract pure vanilla works best
- 1/2 cup non-dairy milk almond, oat, soy, etc.
- 1/2 cup mini chocolate chips plus extra for topping
Instructions
- Preheat the oven to 350°F and line a 9×5-inch loaf pan with parchment paper, leaving overhang for easy removal.
- In a medium bowl, whisk together the gluten-free flour, cocoa powder, baking soda, and salt. Set aside.
- In a large bowl, mash the bananas until smooth and creamy. Add maple syrup, granulated sugar (if using), and oil, mixing until well combined.
- Whisk in the eggs and vanilla extract until smooth.
- Gradually add half of the dry ingredients to the banana mixture, stirring gently with a spatula. Add non-dairy milk, then the rest of the dry ingredients, mixing just until combined.
- Fold in chocolate chips, reserving some for the top.
- Pour batter into the prepared loaf pan, smooth the top, and sprinkle reserved chocolate chips on top. Bake for 45-55 minutes, covering with foil at 30 minutes to prevent excessive browning. Check for doneness with a toothpick – it should come out with a few moist crumbs.
- Cool in the pan for 10 minutes, then lift the bread out using the parchment overhang. Cool completely on a wire rack before slicing.


