

You know that feeling when you wake up to the smell of fresh bread baking?
Yeah. That’s what this is about.
I’ve been making this chocolate chip loaf for years now. And honestly? It never gets old. My kids still rush to the kitchen every single time.
Here’s what makes it special.
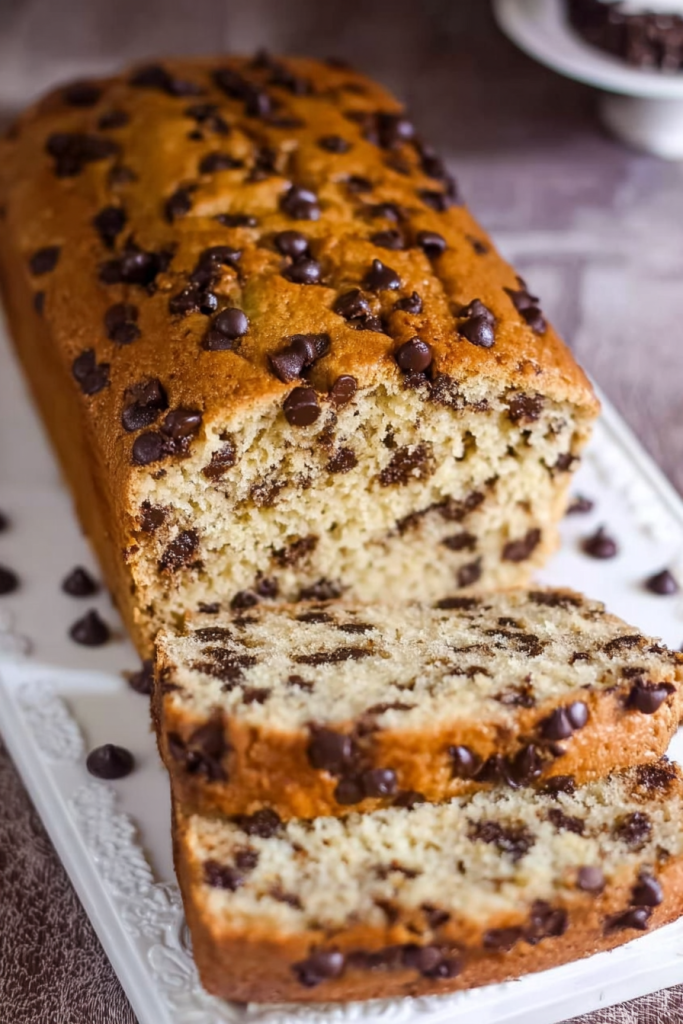
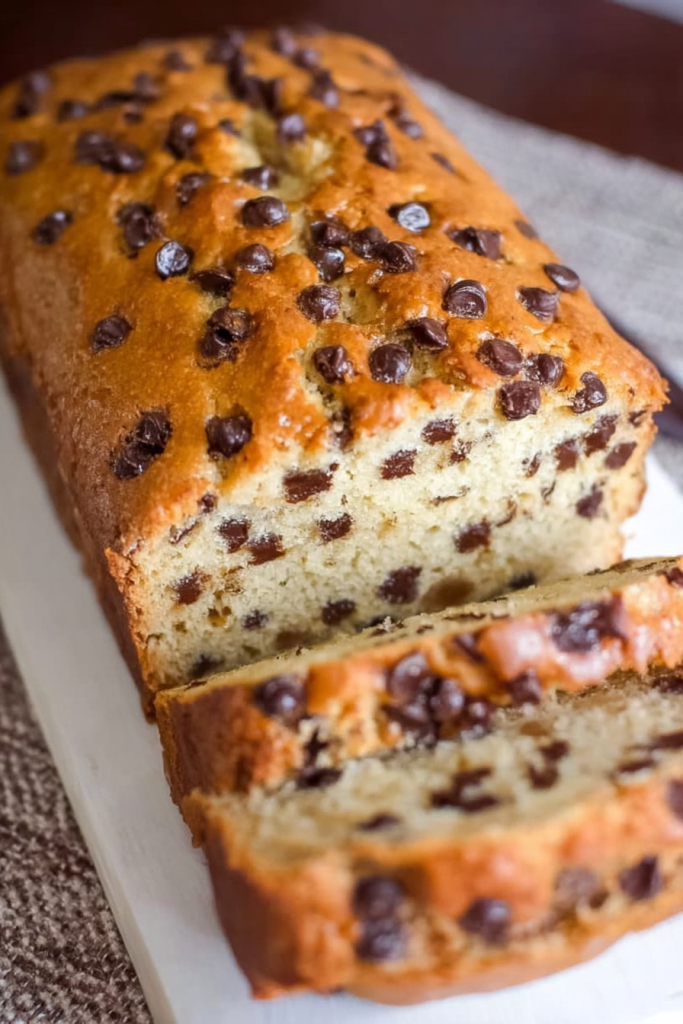
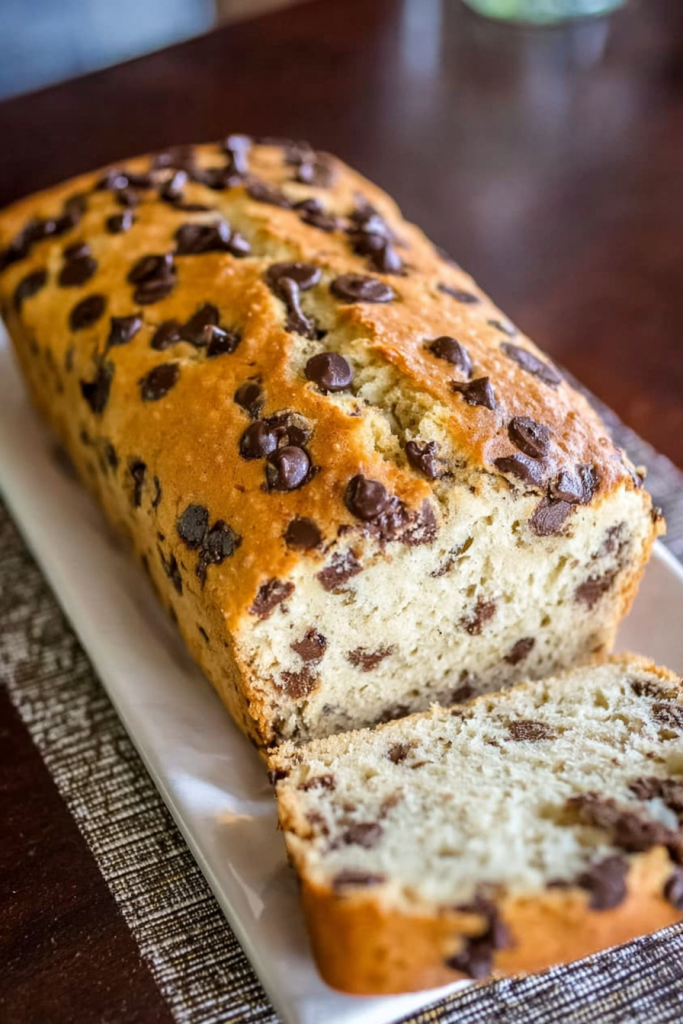
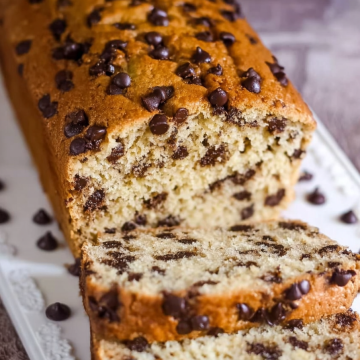
It sits somewhere between cake and bread. Not too sweet, not too plain. The texture? Soft and tender. And those mini chocolate chips? They create these little pockets of melty heaven in every bite.
Think of it as a warm hug. In loaf form.
Recipe Timing:
- Prep Time: 10 minutes
- Cook Time: 45-50 minutes
- Total Time: 55-60 minutes
- Servings: 12 slices
- Difficulty: Easy
Why You’ll Actually Love This
Look, I’m not going to tell you this is life-changing or anything dramatic.
But here’s why it’s become my go-to:
First – it’s basically foolproof. New to baking? No problem. You don’t need fancy equipment or pastry school skills.
Second – check your pantry right now. I bet you already have everything you need. No weird ingredients. No last-minute store runs at 6am.
Third – this thing is versatile.
Warm slice for breakfast? Yes. Pack it in lunchboxes? Absolutely. Afternoon snack with coffee? Perfect.
The possibilities? Endless.
How I Found This Recipe
So here’s the backstory.
A few years ago, I was having the worst mornings. Complete chaos. Kids running around, me trying to get ready for work, everyone hungry and cranky.
I needed something comforting but easy.
Muffins felt too fussy. Toast was boring. And don’t even get me started on trying to make pancakes on a Tuesday morning.
Then I found this loaf recipe.
Game changer? Maybe not. But it changed my mornings.
I could bake it once on Sunday. Enjoy it all week. And here’s the kicker – the buttermilk keeps it incredibly moist even days later.
No dry, crumbly nonsense.
My favorite part? Friends think I bought it from some fancy bakery. They’re always shocked when I tell them it took less than an hour.
One more thing about the mini chocolate chips…
They’re key.
Regular chips? They sink to the bottom like rocks. But minis? They stay suspended throughout the batter. So every single bite has chocolate.
Trust me on this one.

Let’s Talk Ingredients
Okay, let me walk you through what you’ll need.
Each ingredient does something specific. And understanding why you’re using them makes you a better baker.
What You Need
| Ingredient | Quantity | Why It Matters |
|---|---|---|
| All-purpose flour | 2 cups | Spooned and leveled, not packed – creates structure |
| Baking soda | 1/2 tsp | Makes it rise and tender |
| Baking powder | 1/2 tsp | Extra leavening boost |
| Salt | 1/2 tsp | Balances all that sweetness |
| Butter | 6 tablespoons | Must be softened – adds richness |
| Granulated sugar | 2/3 cup | White sugar only |
| Large eggs | 3 | Room temp works better |
| Vanilla extract | 1 tsp | Get the real stuff, not imitation |
| Buttermilk | 1 cup | Full-fat version – this is crucial |
| Mini chocolate chips | 1/2 cup | Minis don’t sink! |
Breaking Down Each Ingredient
The Flour Foundation
All-purpose flour builds the structure here.
But here’s something most people mess up – how you measure it matters.
I always spoon flour into my measuring cup. Never scoop directly from the bag. Why? Because scooping packs it down, and you end up with too much flour.
Too much flour = dense bread.
Nobody wants that.
Leavening Agents (The Rising Stars)
Baking soda and baking powder together?
Yes. Both.
They work as a team to create that light, airy texture. The buttermilk activates the baking soda. It’s basic chemistry. But the kind that tastes delicious.
Fat and Sugar (The Flavor Duo)
Butter vs. oil? Butter wins. Every time.
The flavor is richer. The texture is better. But – and this is important – it needs to be truly softened.
Not melted. Not cold. Softened.
Cold butter won’t cream properly with the sugar. And that creaming step? It’s what makes your loaf tender instead of dense.
Now about the sugar…
It does more than just sweeten. It helps create a tender crumb. It promotes browning. Don’t try to reduce it to be “healthy.” You’ll just end up with bland bread.
Eggs and Vanilla
Three eggs seems like a lot, right?
But they’re doing heavy lifting here. Structure. Moisture. Richness. All from those eggs.
Room temperature eggs mix in more smoothly. Just leave them on the counter for 30 minutes before baking.
Vanilla extract enhances everything.
Don’t skip it. And please, please don’t use imitation vanilla. The real stuff makes a noticeable difference. You’ll taste it.
The Buttermilk Secret
Here’s where I get serious.
Buttermilk is non-negotiable.
I know, I know. You’re thinking “can’t I just use regular milk?”
No. You can’t.
Well, you can. But your bread will suffer. Buttermilk is thicker. More acidic. That acidity reacts with the baking soda to create the tender crumb.
Regular milk? It’s just… milk. It won’t do the same thing.
The chemistry matters here.
Chocolate Chip Selection
Mini chocolate chips are my strong preference.
Here’s why: they distribute evenly without weighing down the batter. Every single bite gets chocolate.
Regular chips? They’re heavier. They sink to the bottom like little chocolate anchors.
If you only have regular chips, okay fine. Use them. Just know that most of your chocolate will end up in the bottom third of the loaf.
The bread will still taste good. It just won’t be as evenly chocolatey.
Before You Start Baking
Setting Up for Success
Preheat your oven to 350°F.
I know this seems obvious. But you’d be surprised how many people skip this and wonder why their bread doesn’t bake evenly.
Also, prep your 9×5 inch loaf pan. I spray mine generously with non-stick spray. Or you can line it with parchment paper. Either way works.
Room Temperature = Better Texture
Take your butter and eggs out ahead of time.
I usually do this while I’m having my morning coffee. By the time I’m ready to bake, they’re perfect.
Room temperature ingredients blend more smoothly. Better blending = better texture.
Your butter should indent easily when you press it. Too cold? It won’t cream right. Too warm? It won’t hold air.
Measuring Matters
For flour: spoon it into your cup and level with a knife.
Never shake the cup. Never tap it. Just spoon and level.
For buttermilk: use a liquid measuring cup and check at eye level.
These tiny details? They make a big difference.
Kitchen Tools (Nothing Fancy)
You don’t need professional equipment.
Here’s what I use:
- Standard mixing bowl
- Electric mixer (hand mixer works great)
- Whisk
- Rubber spatula
- That loaf pan
- Cooling rack
That’s it.
No stand mixer required. No fancy gadgets. Just basic kitchen tools.
The cooling rack is important though. It lets air circulate under the loaf so you don’t get a soggy bottom.
Let’s Make This Thing
The Mixing Process
Step 1: Mix Your Dry Stuff
Grab a medium bowl.
Whisk together:
- Flour
- Baking soda
- Baking powder
- Salt
Whisk for about 30 seconds. This distributes everything evenly and breaks up any flour lumps.
Set it aside. You’ll need it soon.
Step 2: Cream the Butter and Sugar
This is where the magic starts.
In a large bowl, beat butter and sugar together on medium-high speed.
How long? About 3-4 minutes.
I know that feels like forever. But stick with it.
The mixture should become light and fluffy. It’ll lighten in color too. This is incorporating air, which helps your loaf rise.
Don’t rush this step. Scrape down the bowl sides occasionally so everything gets mixed.
Step 3: Add the Eggs
Add eggs one at a time.
Beat well after each one. This prevents curdling and ensures everything incorporates properly.
After all three eggs are in, the mixture might look a bit separated. That’s totally normal. Don’t panic.
Now add the vanilla extract. Beat for another 30 seconds.
Step 4: The Alternating Method
Pay attention here. This is where technique matters.
Add half your flour mixture. Stir gently until barely combined.
Pour in half the buttermilk. Stir again until just incorporated.
You’ll see streaks of flour. That’s perfect. Don’t try to mix them out.
Add the remaining flour mixture. Stir carefully.
Then add the rest of the buttermilk. Mix until everything just comes together.
The Overmixing Trap
Listen carefully.
Once you add flour, you need to mix as little as possible.
Overmixing develops gluten. Gluten makes tough bread. Tough bread is sad bread.
A few small lumps? Totally fine. They’ll bake out.
Stop mixing as soon as you can’t see dry flour anymore.
The batter will be thick and somewhat lumpy. That’s exactly what you want.
Adding the Chocolate
Time for the best part.
Fold in your mini chocolate chips with a rubber spatula. Fold from the bottom up, turning the bowl as you go.
About 8-10 folds should do it.
This distributes chips evenly without deflating all that air you worked so hard to incorporate.
Want a pro move? Reserve a few chips and sprinkle them on top before baking. Looks fancy.
Into the Pan
Spoon your batter into the prepared pan.
Use your spatula to spread it evenly. Pay attention to the corners – they need love too.
The batter should fill the pan about two-thirds full.
Smooth the top gently. Then give the pan a gentle tap on the counter. This releases air bubbles.
Baking Time
Temperature and Timing
Slide the pan into your preheated oven.
Set a timer for 45 minutes. But stay nearby.
Every oven is different. Seriously. I’ve baked in probably 20 different ovens over the years, and they all have personalities.
Start checking at 45 minutes with a toothpick inserted in the center.
What are you looking for?
A few moist crumbs. Not wet batter. Not completely clean. Just a few moist crumbs.
What to Look For
The top should be golden brown with a slight dome in the center.
Small cracks on top? Normal. Actually, they’re kind of attractive.
The edges will pull away slightly from the pan. You might see some chocolate chips bubbling on top.
These are all good signs.
If the top is browning too fast, tent it with foil. This prevents burning while the center finishes.
Cooling (The Hard Part)
Initial Rest
When it’s done, pull it out.
Let it sit in the pan for 10 minutes.
I know. It smells amazing. You want to eat it NOW.
But wait.
The loaf keeps cooking slightly from residual heat. It also firms up, which makes it easier to remove from the pan.
Final Cooling
After 10 minutes, run a knife around the edges.
Flip the pan over onto a cooling rack. The loaf should pop right out.
Now for the torture part: let it cool completely before slicing.
At least 30 minutes. Preferably an hour.
Cutting hot bread = squished, gummy slices. Nobody wants that.
Slicing Like a Pro
Use a sharp serrated knife.
Saw gently. Don’t press down. This prevents squashing.
Wipe the knife between slices for neat edges.
One inch thick slices work best. You should get 10-12 servings.
How to Serve It
Honestly? This loaf is fantastic on its own.
But here are some ideas:
The Classic: Spread with softened butter while still warm. The butter melts into all the nooks. Heaven.
The Toasted: Toast slices lightly. Edges get crispy, center stays soft, chocolate chips get extra melty.
The Coffee Companion: Serve alongside fresh coffee or tea. Perfect for lazy weekend mornings.
The Fancy Version: Add whipped cream or dust with powdered sugar. Simple touches that make it feel special.
Storage, Tips, and Your Questions
How to Store This
Room Temperature
Airtight container. Up to three days.
Keep it away from direct sunlight or it’ll dry out.
I like wrapping individual slices in plastic wrap. Makes grab-and-go breakfasts super easy.
In the Fridge
Refrigerate for longer storage. It’ll keep for up to a week.
Bring slices to room temperature before eating. Or microwave for 15 seconds to make them taste fresh-baked again.
Freezer Storage
This loaf freezes beautifully.
Wrap the whole thing tightly in plastic wrap. Then wrap again in foil.
Label it with the date. Freeze for up to three months.
Thaw overnight in the fridge. Or microwave individual frozen slices when you need a quick breakfast.
Pro Tips From My Kitchen
Temperature Matters
Room temperature ingredients are crucial.
Forgot to soften your butter? Cube it and let it sit for 20 minutes. Or microwave for literally 5 seconds only.
No Buttermilk?
Make your own.
Add one tablespoon of lemon juice or vinegar to regular milk. Let it sit for five minutes.
Boom. Homemade buttermilk.
It won’t be quite as thick, but it works in a pinch.
Preventing Sinking Chips
Mini chips rarely sink. But here’s extra insurance if you’re worried.
Toss them in a tablespoon of flour before adding. The coating helps them stay suspended.
Checking for Doneness
The toothpick test is reliable.
But also trust your senses:
- Does it smell amazing? ✓
- Is it golden brown? ✓
- Does the top spring back when pressed? ✓
If yes to all three, you’re good.
High Altitude Baking
Living in the mountains?
Reduce baking powder and soda by one-quarter. You might need slightly more liquid too.
When Things Go Wrong
Dense, Heavy Texture
This usually means you overmixed.
Remember: stir gently once flour goes in. Mix just until combined.
Also check your leavening agents. Old baking powder loses its oomph. Replace it every six months.
Dry Crumb
Overbaking is usually the culprit.
Many ovens run hot. Get an oven thermometer. They’re like $5 and save so much heartache.
Also, make sure you’re measuring flour correctly. Too much flour = dry bread.
Chocolate Chips Sank
Regular chips are heavier than minis.
Switch to mini chips. Problem solved.
Pale Top
Increase oven temperature by 25 degrees. Or bake five minutes longer.
Some ovens have hot spots. Try rotating the pan halfway through.
Your Questions Answered
Can I use regular milk instead of buttermilk?
Short answer: No.
Long answer: Buttermilk’s acidity is essential for this recipe’s chemistry. Regular milk won’t give you the same texture.
Make the lemon juice substitute if you don’t have buttermilk. It really does work.
Why did my chocolate chips sink?
Regular chips are too heavy.
Mini chocolate chips are lighter and stay suspended better. You can also toss chips in flour before folding them in.
Can I make this without eggs?
Replacing three eggs is tough.
You could try flax eggs (1 tablespoon ground flax plus 3 tablespoons water per egg). Let it sit five minutes before using.
Fair warning: results will be different.
How do I know when it’s perfectly done?
Insert a toothpick at 45 minutes.
Look for a few moist crumbs – not wet batter, not completely clean.
The top should be golden and spring back when touched. Edges pull slightly from the pan.
Can I add nuts or dried fruit?
Absolutely!
Add up to half a cup of chopped walnuts or pecans. Dried fruit works too.
Keep total mix-ins to about one cup maximum. Too much weighs down the batter.
Why is my loaf cracked on top?
Cracks are totally normal.
They happen when the loaf rises in the oven. The top sets before the inside finishes expanding.
It’s actually a sign of good baking. Not a problem.
Can I double this recipe?
Yes, but use two pans.
Doubling in one large pan won’t bake evenly. The center will be raw when the edges are done.
Two standard loaf pans work perfectly.
My Final Thoughts
This chocolate chip loaf has earned its permanent spot in my kitchen rotation.
It’s reliable. Delicious. Endlessly satisfying.
Whether you’re baking for yourself or sharing with family, it just… works.
The beauty? It’s simple.
No complicated techniques. No weird ingredients. Just straightforward baking that produces something really good.
I hope this brings you as much joy as it’s brought me.
There’s something special about pulling a golden loaf from the oven. The smell alone makes it worthwhile.
Happy baking!
May your mornings be sweeter and your kitchen smell amazing.
Easy Chocolate Chip Loaf
Ingredients
- 2 cups all-purpose flour spooned and leveled
- 1/2 tsp baking soda
- 1/2 tsp baking powder
- 1/2 tsp salt
- 6 tablespoons butter softened
- 2/3 cup granulated sugar
- 3 large eggs room temperature
- 1 tsp vanilla extract
- 1 cup buttermilk full-fat
- 1/2 cup mini chocolate chips
Instructions
- Preheat oven to 350°F. Grease a 9×5 inch loaf pan with non-stick spray or line with parchment paper.
- In a medium bowl, whisk together flour, baking soda, baking powder, and salt for about 30 seconds. Set aside.
- In a large bowl, beat softened butter and sugar together on medium-high speed for 3-4 minutes until light and fluffy. Scrape down bowl sides occasionally.
- Add eggs one at a time, beating well after each addition. Add vanilla extract and beat for another 30 seconds.
- Add half the flour mixture and stir gently until barely combined. Pour in half the buttermilk and stir until just incorporated.
- Add remaining flour mixture and stir carefully. Then add the rest of the buttermilk. Mix until everything just comes together with no dry flour visible. Do not overmix – a few small lumps are fine.
- Fold in mini chocolate chips with a rubber spatula using 8-10 gentle folds from bottom to top. Reserve a few chips to sprinkle on top if desired.
- Spoon batter into prepared loaf pan, spreading evenly and paying attention to corners. Smooth the top and tap pan gently on counter to release air bubbles.
- Bake for 45-50 minutes, or until a toothpick inserted in the center comes out with a few moist crumbs (not wet batter). Top should be golden brown and spring back when pressed.
- Let cool in pan for 10 minutes. Run a knife around edges, then flip onto a cooling rack. Cool completely for at least 30 minutes before slicing.
- Slice with a sharp serrated knife using a gentle sawing motion. Cut 1-inch thick slices. Serve plain, toasted, or with butter.


