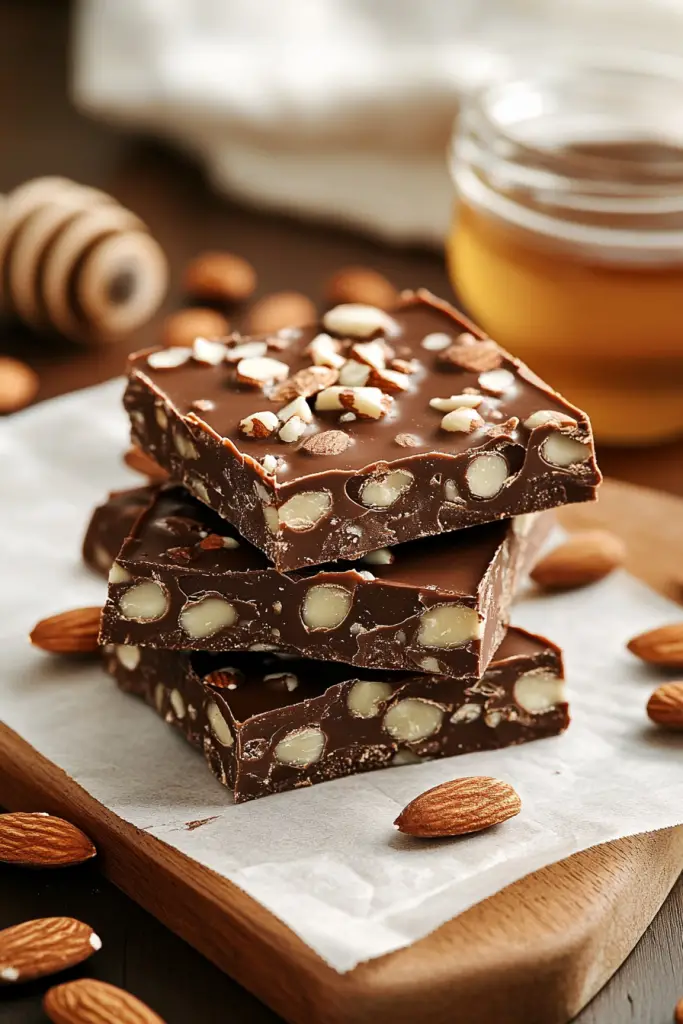
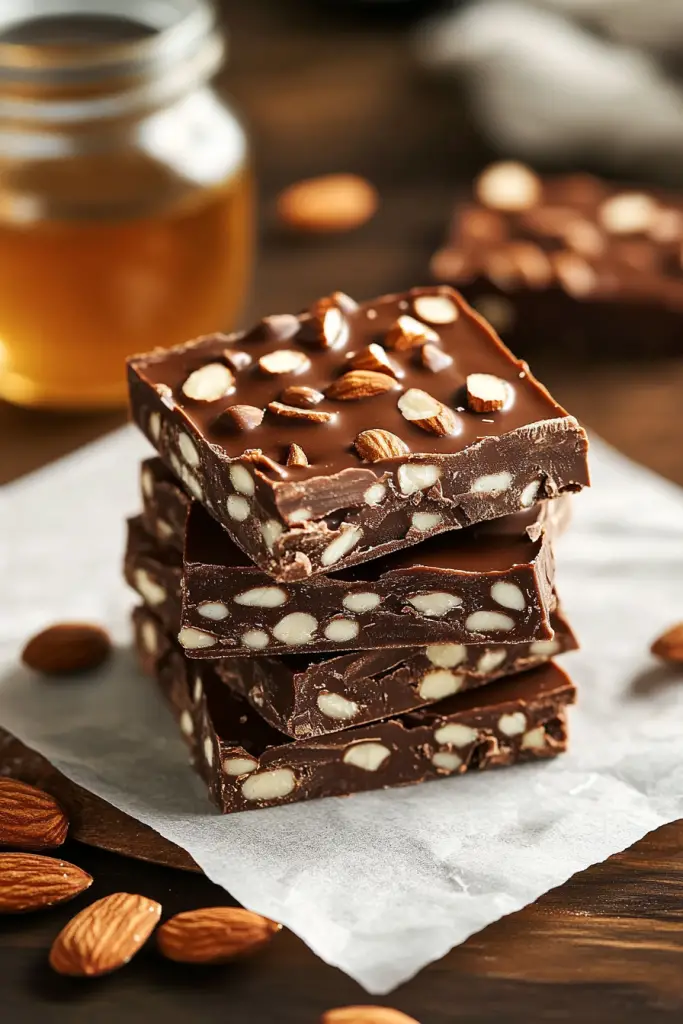
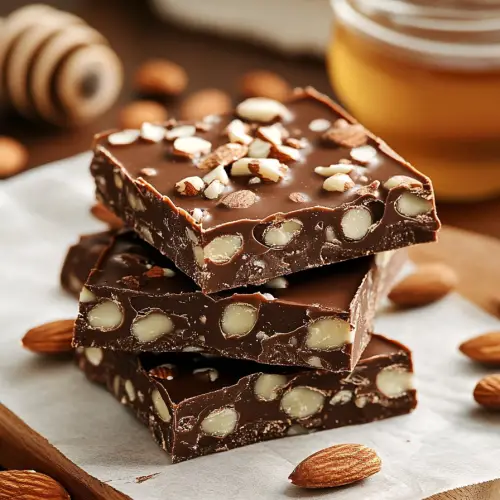
Have you ever craved something sweet, crunchy, and chocolatey that doesn’t require hours in the kitchen? My Chocolate Crunch Bars are exactly what you need. As someone who balances a busy schedule with a persistent sweet tooth, I’ve perfected these no-bake treats that deliver maximum satisfaction with minimal effort. These bars combine the rich decadence of dark chocolate with the satisfying crunch of puffed rice cereal, all held together with the natural sweetness of honey and the nutty depth of almond butter.
I stumbled upon this recipe during a particularly hectic week when I needed a quick dessert for unexpected guests. What started as a pantry-raid experiment has become one of my most requested treats. The beauty of these bars lies in their simplicity—just five ingredients transform into something that tastes deceptively complex and indulgent. Plus, they’re ready in under 30 minutes, though the hardest part is waiting for them to set!
What makes these Chocolate Crunch Bars so special is the balance of textures and flavors. The dark chocolate provides a sophisticated bitterness that’s perfectly complemented by the natural sweetness of honey. The almond butter adds a subtle nuttiness and helps create that perfect chewy-yet-firm texture. And of course, the puffed rice cereal delivers that satisfying crunch that makes these bars utterly addictive.
These bars are wonderfully versatile too. They make a perfect afternoon pick-me-up with coffee, a lunchbox treat, or even a relatively wholesome dessert when you’re craving something sweet. I’ve served them at everything from casual movie nights to elegant dinner parties, and they always disappear quickly!
| Ingredient | Quantity | Notes |
|---|---|---|
| Dark chocolate chips | 1 1/4 cups | Semi-sweet chocolate chips work well too |
| Almond butter | 1/2 cup | Use creamy for best texture |
| Honey | 1/4 cup | Maple syrup works as a vegan alternative |
| Vanilla extract | 1 teaspoon | Pure vanilla extract provides the best flavor |
| Puffed rice cereal | 3 cups | Ensure it’s fresh for maximum crunchiness |
Prep Time: 15 minutes | Chill Time: 1 hour | Total Time: 1 hour 15 minutes Servings: 12 bars | Difficulty: Easy
Step-by-Step Instructions for Chocolate Crunch Bars
Creating these Chocolate Crunch Bars couldn’t be simpler, but there are a few key techniques that elevate them from good to irresistible. The secret lies in how you melt the chocolate and how you combine the ingredients. Let me walk you through my foolproof method.
Step 1: Prepare Your Pan
Line an 8×8 inch baking pan with parchment paper, leaving some overhang on the sides. This makes it incredibly easy to lift the finished bars out for cutting. Pro tip: Give the parchment a light spritz of cooking spray to prevent any sticking.
Step 2: Melt the Chocolate
In a medium-sized heatproof bowl, combine the dark chocolate chips and almond butter. You can melt this mixture using either a double boiler or the microwave. If using a double boiler, set the bowl over a pan of simmering (not boiling) water, making sure the bowl doesn’t touch the water. Stir occasionally until completely smooth. If using a microwave, heat in 30-second intervals at 50% power, stirring between each interval until fully melted. This gentle heating prevents the chocolate from seizing or burning.
Step 3: Add Sweetness and Flavor
Once your chocolate mixture is smooth, remove from heat if using a double boiler. Stir in the honey and vanilla extract until fully incorporated. The mixture should be glossy and fragrant. The vanilla enhances the chocolate flavor while the honey adds just the right amount of sweetness. Pro tip: If your honey is thick, warm it slightly before adding to help it incorporate more easily.
Step 4: Fold in the Cereal
Pour your chocolate mixture over the puffed rice cereal in a large mixing bowl. Using a spatula or wooden spoon, gently fold everything together until all the cereal is evenly coated. Work quickly but carefully—you want to thoroughly coat each piece of cereal without crushing it. The goal is to maintain that signature crunch while ensuring every bite has chocolate goodness.
Step 5: Press Into the Pan
Transfer your chocolate-cereal mixture into the prepared pan. Using the back of a spatula or your hands (slightly dampened to prevent sticking), press the mixture firmly and evenly into the pan. Getting a good, firm press ensures your bars will hold together when cut, but don’t compress them so much that you lose the airy crunch.
Step 6: Chill to Set
Place the pan in the refrigerator and allow the bars to set for at least 1 hour. Patience is key here—proper setting time ensures clean cuts and the perfect texture. If you’re in a real hurry, you can pop the pan in the freezer for about 30 minutes, but the texture is best when refrigerated.
Step 7: Cut and Serve
Once set, use the parchment paper overhang to lift the entire slab out of the pan and onto a cutting board. With a sharp knife, cut into 12 even bars or 16 smaller squares, depending on your preference. For the cleanest cuts, wipe your knife between slices and use a gentle sawing motion.
Serving Suggestions, Variations, and FAQs for Chocolate Crunch Bars
Once your Chocolate Crunch Bars have set and been cut into perfect squares, it’s time to enjoy them! I love serving these as is, but there are many creative ways to elevate them even further. The beauty of this recipe is its versatility—it can be dressed up or down depending on the occasion.
Serving Suggestions
For an everyday treat, simply stack these on a plate and watch them disappear. For more special occasions, try placing each bar in a mini cupcake liner for easy grabbing at parties. They pair wonderfully with coffee, tea, or a cold glass of milk. For an extra-decadent dessert, warm a bar slightly (about 10 seconds in the microwave) and top with a small scoop of vanilla ice cream—the contrast between warm, gooey chocolate and cold ice cream is divine!
Storage Tips
Store your Chocolate Crunch Bars in an airtight container in the refrigerator for up to a week—though honestly, they rarely last that long in my house! You can also freeze them for up to three months. Just separate layers with parchment paper to prevent sticking, and thaw in the refrigerator before serving. Pro tip: These bars maintain their texture best when kept cool, especially during warmer months.
Delicious Variations
While these bars are perfect in their original form, here are some exciting variations to try:
- Coconut Crunch: Add 1/2 cup of toasted shredded coconut to the mixture.
- Berry Bliss: Stir in 1/3 cup of freeze-dried strawberries or raspberries for a fruity twist.
- Mint Chocolate: Add 1/4 teaspoon of peppermint extract along with the vanilla for a refreshing flavor.
- Seed Power: Sprinkle 2 tablespoons of chia or hemp seeds for added nutrition.
Remember, the key to successful variations is maintaining the ratio of wet to dry ingredients. If adding dry ingredients like coconut or seeds, you may need to increase the chocolate and almond butter slightly to ensure everything binds together properly.
When to Serve
These Chocolate Crunch Bars are perfect for:
- Lunchbox treats (they hold up well at room temperature for a few hours)
- After-school snacks
- Weekend coffee dates
- Holiday gift platters
- Potluck dessert tables
- Late-night sweet cravings
- Energy-boosting pre-workout bites
Frequently Asked Questions
Can I use a different nut butter instead of almond butter?
Absolutely! Peanut butter, cashew butter, or sunflower seed butter (for a nut-free option) all work beautifully in this recipe. Each brings its own unique flavor profile, so feel free to experiment based on your preferences or what you have on hand.
My bars seem too soft. What went wrong?
This typically happens if the ratio of wet to dry ingredients is off. Make sure you’re using exactly 3 cups of puffed rice cereal. Also, ensure you’ve given them enough time to chill—at least one full hour in the refrigerator is needed for proper setting.
Can I make these vegan?
Yes! Simply use dairy-free chocolate chips and substitute maple syrup for the honey. The result is equally delicious and completely plant-based.
How can I reduce the sugar content?
Try using 70% or higher dark chocolate chips and reduce the honey to 3 tablespoons. You can also experiment with natural sugar alternatives like monk fruit sweetener, though this may affect the binding properties slightly.
Will these bars hold up at room temperature for a party?
They’ll hold their shape at room temperature for several hours, especially in cooler environments. For summer events or outdoor gatherings, consider keeping them chilled until about 30 minutes before serving.
Chocolate Crunch Bars
Ingredients
- 1 1/4 cups dark chocolate chips
- 1/2 cup almond butter creamy
- 1/4 cup honey or maple syrup for vegan option
- 1 teaspoon vanilla extract
- 3 cups puffed rice cereal
Instructions
- Prepare your pan: Line an 8×8 inch baking pan with parchment paper, leaving some overhang. Lightly spray with cooking spray to prevent sticking.
- Melt the chocolate and almond butter: In a heatproof bowl, combine dark chocolate chips and almond butter. Melt over a double boiler or in the microwave (30-second intervals, stirring each time) until smooth.
- Add sweetness and flavor: Stir in honey and vanilla extract, mixing until fully incorporated and glossy.
- Fold in the cereal: Pour the melted chocolate mixture over the puffed rice cereal in a large bowl. Gently fold until the cereal is evenly coated.
- Press into the pan: Transfer the mixture into the prepared pan and press down firmly using a spatula or damp hands.
- Chill to set: Refrigerate for at least 1 hour to allow the bars to firm up.
- Cut and serve: Lift the slab from the pan using the parchment paper. Cut into 12 bars or 16 smaller squares.