I’ve been making chocolate desserts for years, but nothing quite beats the elegance of this Chocolate Mousse Pie. The first time I served this at a dinner party, everyone assumed I’d spent hours in the kitchen. The truth? This no-bake dessert comes together effortlessly with just a handful of ingredients, making it perfect for both novice bakers and experienced cooks looking for a reliable crowd-pleaser.
What makes this chocolate mousse pie so special is its foolproof method. Instead of dealing with temperamental raw eggs, I use a clever combination of mini marshmallows and chocolate to create a silky-smooth mousse that’s both safe and delicious. The marshmallows melt seamlessly into the chocolate, providing structure and that characteristic mousse texture we all love.
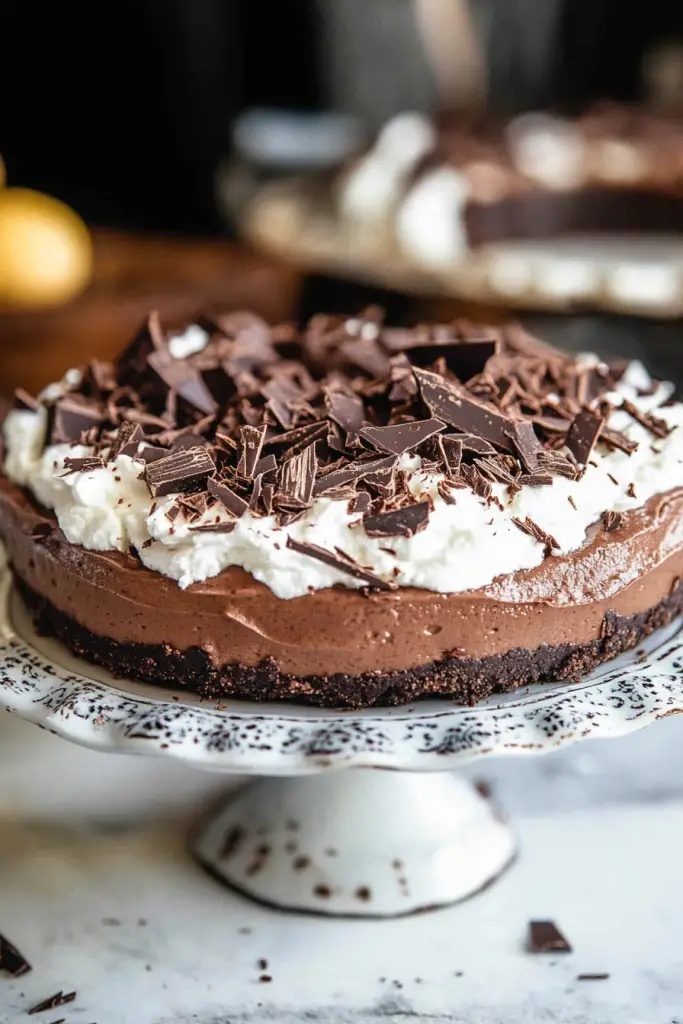
The foundation of this pie starts with a crisp Oreo crust – whether you grab a pre-made one from the store or whip up your own. The contrast between the crunchy cookie base and the velvety chocolate filling creates an irresistible texture combination that’ll have your guests reaching for seconds.

Here’s what you’ll need to create this decadent dessert:
| Ingredient | Quantity | Notes |
|---|---|---|
| Mini marshmallows | 1 ½ cups | Fresh for best melting |
| Semisweet baking chocolate | 8 ounces | Chopped into small pieces |
| Milk | 1/2 cup | Whole milk preferred |
| Cold heavy cream | 2 ½ cups | Divided for mousse and topping |
| Powdered sugar | ¼ cup | For sweetening whipped cream |
| Vanilla extract | 1/2 teaspoon | Pure vanilla recommended |
| Oreo crust | 1 | 9-inch, store-bought or homemade |
Prep Time: 20 minutes | Chill Time: 30 minutes | Total Time: 50 minutes
Servings: 8 | Difficulty: Easy
The beauty of this recipe lies in its simplicity. With just basic equipment – a saucepan, mixing bowls, and a whisk – you’ll create a professional-quality dessert that looks like it came from a high-end bakery.
Step-by-Step Cooking Instructions
Now that we have everything ready, let’s dive into making this incredible chocolate mousse pie. The key to success here is patience – don’t rush the cooling process, as it’s crucial for achieving that perfect mousse texture.
First, I combine the mini marshmallows, chopped chocolate, and milk in a large, heavy-bottomed saucepan. Using low heat is essential here; I’ve learned from experience that cranking up the temperature leads to scorched chocolate and a grainy texture. Stir constantly with a wooden spoon or heat-resistant spatula, watching as the marshmallows slowly melt and blend with the chocolate. This process usually takes about 5-7 minutes until everything is completely smooth and glossy.
Once melted, I remove the pan from heat and let it cool completely. This is where many people get impatient, but trust me – adding hot chocolate to whipped cream will result in a soupy mess. I usually transfer the mixture to a bowl and let it sit for about 15-20 minutes, stirring occasionally to release heat.
While the chocolate cools, I whip the cold heavy cream with powdered sugar and vanilla extract until soft peaks form. The cream should hold its shape but still have a slight wobble – overwhipping will make folding difficult. I then carefully remove 2 cups of this whipped cream and set it aside for the topping.
The magic happens when I fold the remaining whipped cream into the cooled chocolate mixture. Using a gentle folding motion, I incorporate the cream in thirds, preserving as much air as possible. This creates our luxurious mousse filling.
I spread this chocolate mousse evenly over the Oreo crust, then top with the reserved whipped cream, smoothing it into an even layer. The pie needs at least 30 minutes in the refrigerator to set properly, though I often chill it longer for a firmer texture.
Serving Suggestions, Variations & FAQs
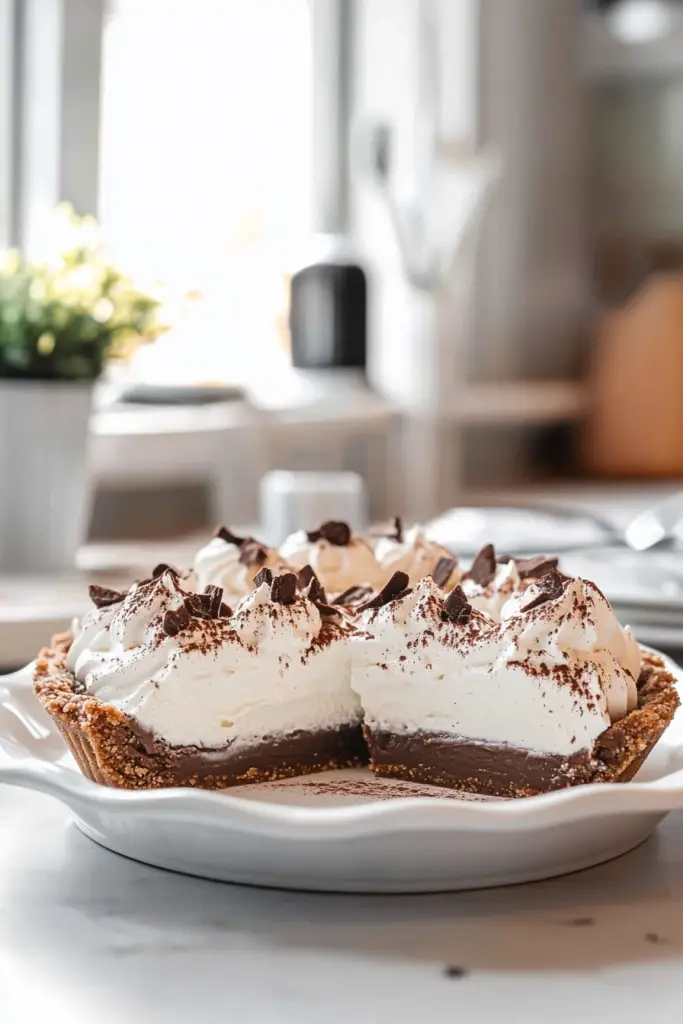
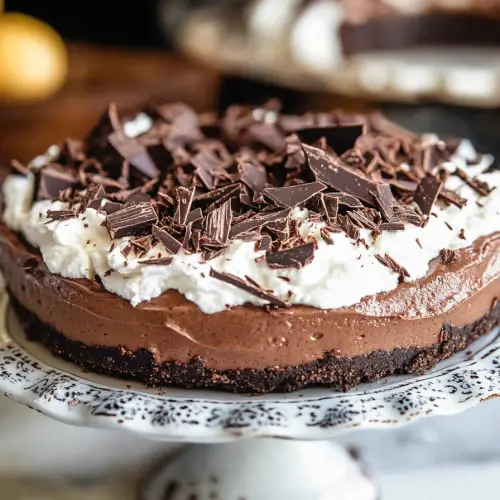
After chilling, this chocolate mousse pie transforms into a show-stopping dessert that never fails to impress. I love to garnish it with chocolate shavings or curls – simply run a vegetable peeler along the edge of a chocolate bar for elegant curls that add both visual appeal and textural contrast. For an extra touch of sophistication, I sometimes dust the top with a light sprinkle of cocoa powder.
The beauty of this recipe lies in its versatility. While I typically stick to semisweet chocolate, milk chocolate creates a sweeter, more kid-friendly version. For chocolate lovers, try adding a tablespoon of instant espresso powder to the melting chocolate for a deeper flavor profile. During the holidays, I’ve stirred in a teaspoon of peppermint extract for a festive twist.
Storage is straightforward – simply cover the pie with plastic wrap or place it in an airtight container. It keeps beautifully in the refrigerator for 3-4 days, though in my house, it rarely lasts that long! The texture actually improves after the first day as the flavors meld together.
Frequently Asked Questions
Can I use a different type of crust? Absolutely! Graham cracker crusts work wonderfully, or try a chocolate cookie crust for double chocolate indulgence.
Is it possible to make this dairy-free? Yes, substitute the milk with almond or coconut milk, and use coconut cream instead of heavy cream. The texture will be slightly different but still delicious.
Can I freeze this pie? While possible, freezing affects the texture of the mousse. If you must freeze it, wrap tightly and consume within one month.
Why did my mousse turn out runny? This usually happens when the chocolate mixture wasn’t cooled completely before folding in the whipped cream, or if the cream was under-whipped.
Can I make individual servings? Certainly! Divide the mousse among ramekins or small glasses for elegant individual desserts.
Chocolate Mousse Pie
Ingredients
- 1 ½ cups mini marshmallows fresh for best melting
- 8 ounces semisweet baking chocolate chopped
- ½ cup whole milk
- 2 ½ cups cold heavy cream divided
- ¼ cup powdered sugar
- ½ teaspoon pure vanilla extract
- 1 9- inch Oreo crust store-bought or homemade
Instructions
- In a heavy-bottomed saucepan over low heat, combine mini marshmallows, chopped chocolate, and milk. Stir constantly until the mixture is smooth and glossy, about 5–7 minutes.
- Remove from heat and transfer to a mixing bowl. Allow to cool completely for 15–20 minutes, stirring occasionally.
- While the chocolate mixture cools, whip cold heavy cream with powdered sugar and vanilla extract until soft peaks form.
- Reserve 2 cups of whipped cream for topping.
- Gently fold the remaining whipped cream into the cooled chocolate mixture in three additions, being careful to preserve volume.
- Spread the mousse evenly into the Oreo crust.
- Top with reserved whipped cream and smooth into an even layer.
- Chill for at least 30 minutes, or until set.