Okay, story time.
The first time someone told me to bake bread with pickles, I thought they were pulling my leg. Pickles? In bread? But here I am today, and this tangy loaf is literally the recipe everyone asks me to make again and again.
Here’s the thing about this bread. It doesn’t need yeast. No fancy techniques. You just mix stuff together, pour it in a pan, and bake. That’s it.
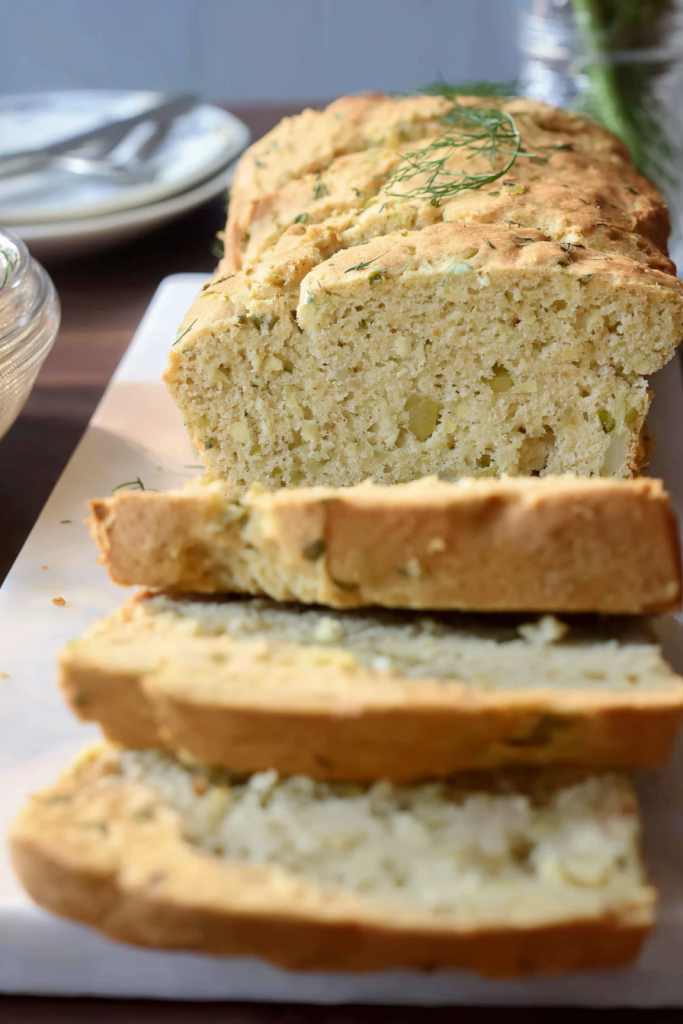
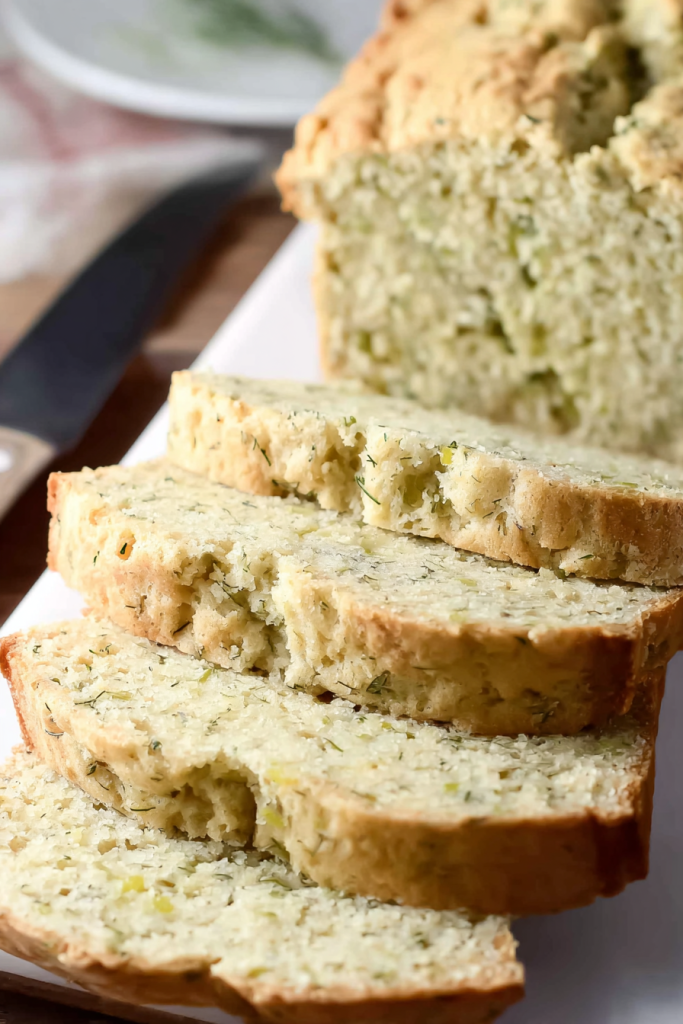
What you get is this gorgeous golden loaf that’s tender on the inside with the most amazing dill pickle flavor. And I’m not talking about some weird gimmick. This bread is legitimately good.
You can eat it with soup. Make sandwiches. Or just slather butter on a warm slice and call it a day.
The magic happens when pickle juice meets fresh dill. They team up to create this layered flavor situation that goes way beyond “oh, it tastes like pickles.” The onion soup mix? That’s the secret weapon for savory depth. And sour cream keeps everything moist and tender.
It’s comfort food. But make it interesting.
Let’s Break Down These Ingredients
I’m going to walk you through every single ingredient because understanding the “why” makes you a better baker.
| Ingredient | Quantity | What It Does |
|---|---|---|
| Sour cream | ¾ cup | Makes it moist and adds tanginess |
| Vegetable oil | ½ cup | Keeps bread soft for days |
| Large eggs | 2 | Holds everything together |
| Dill pickle juice | 2 tbsp | Real pickle flavor throughout |
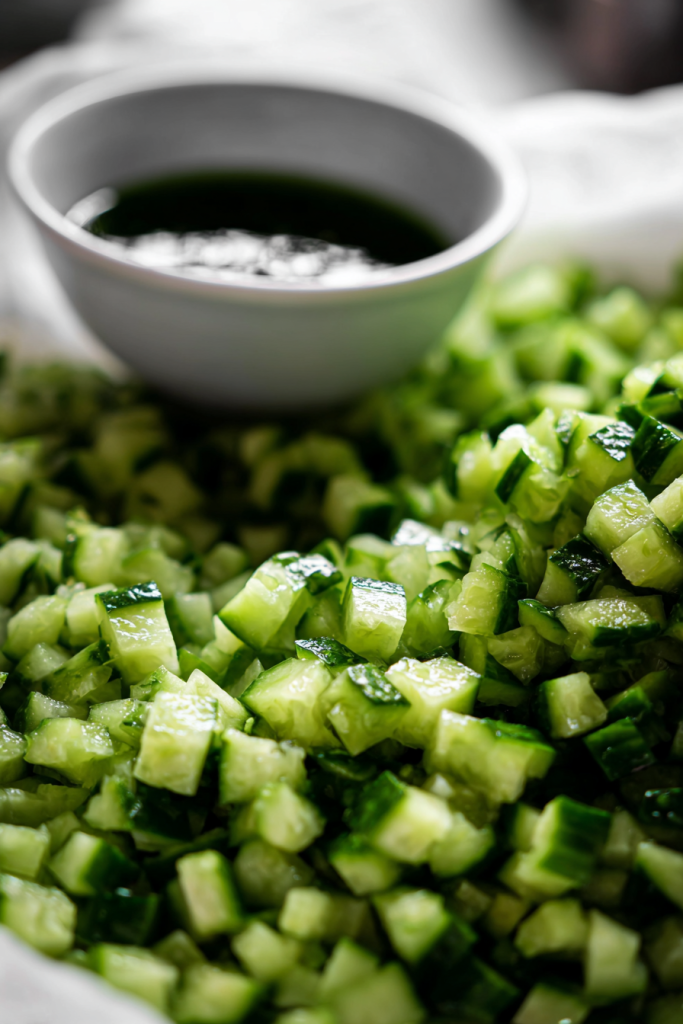
| Finely diced dill pickles | 1/3 cup | Pat these dry first |
| All-purpose flour | 1¾ cups | Use the spoon-and-level method |
| Onion soup mix | 1 packet | The flavor bomb nobody expects |
| Granulated sugar | 2 tbsp | Balances the tang |
| Baking powder | 1½ tsp | Makes it rise |
| Baking soda | ¼ tsp | Works with acids to add lift |
| Fresh dill | ¼ cup chopped | Don’t skip this |
About that sour cream: I always use full-fat. The cheap stuff works just fine, but full-fat gives you that velvety texture. Also? Take it out of the fridge 30 minutes before you start. Room temp ingredients mix way better.
Why oil and not butter? I know, I know. Butter tastes amazing. But here’s the deal. Oil stays liquid at room temperature, which means your bread stays soft for days. With butter, it firms up when cold and your bread gets hard faster.
Canola oil works too if that’s what you’ve got.
The pickle prep step you can’t skip: Before those diced pickles go anywhere near your batter, press them between paper towels. Seriously. Get that excess moisture out.
I didn’t do this my first time. The bread turned out soggy in spots. Learn from my mistakes.
Here’s why onion soup mix is genius: One little packet has dried onions, herbs, and savory seasonings already mixed. You’d spend forever measuring all that stuff separately. Plus it creates this flavor base that makes people go “wait, what’s in this?”
Fresh dill is kind of a big deal here. Look, I’m usually the first person to tell you dried herbs are fine. But fresh dill? It makes a real difference in this recipe.
If you absolutely have to use dried, swap in 1 tablespoon for the ¼ cup fresh. But you’ll lose some of that bright, aromatic quality. And those pretty green flecks throughout the bread.
Chop it fine so it spreads evenly.
Flour measuring matters more than you think. Don’t dip your measuring cup straight into the flour bag. You’ll pack in too much and end up with dense, dry bread.
Instead:
- Fluff the flour with a spoon first
- Spoon it into your measuring cup
- Level it off with a knife
About that sugar: Two tablespoons seems like a lot for savory bread, right? But sugar does three things here. It balances the sharp pickle flavor. Helps the crust brown nicely. And adds this subtle sweetness that makes every bite more interesting.
Let’s Make This Bread
This is where it gets fun. Watching simple ingredients turn into something amazing never gets old.
Step 1: Get Your Setup Ready
First thing? Preheat your oven to 350°F.
This temperature is the sweet spot for quick breads. Hot enough to make things rise. Not so hot that the outside burns before the inside cooks.
Grab your 9×5-inch loaf pan and line it with parchment paper. Let the paper hang over two sides. Those overhangs become handles later for lifting the bread out.
Quick tip I learned the hard way: Lightly grease the pan before adding parchment. Otherwise the paper slides around when you pour in the batter. Annoying.
Step 2: Mix Your Wet Stuff
Get your biggest mixing bowl.
Crack in those two eggs. Add sour cream, vegetable oil, and pickle juice. Whisk it all together until it looks smooth and uniform.
The eggs might fight you at first. Keep whisking. You want everything pale yellow and combined.
That pickle juice? It’s not optional. I know you’ve got diced pickles going in, but the liquid distributes flavor in a way chunks just can’t. The juice gets into every bite.
Once everything’s smooth, fold in your diced pickles. Use a spatula for this, not the whisk. You want to keep those pickle pieces intact.
Step 3: Add the Dry Ingredients (Carefully)
This is where people mess up most often.
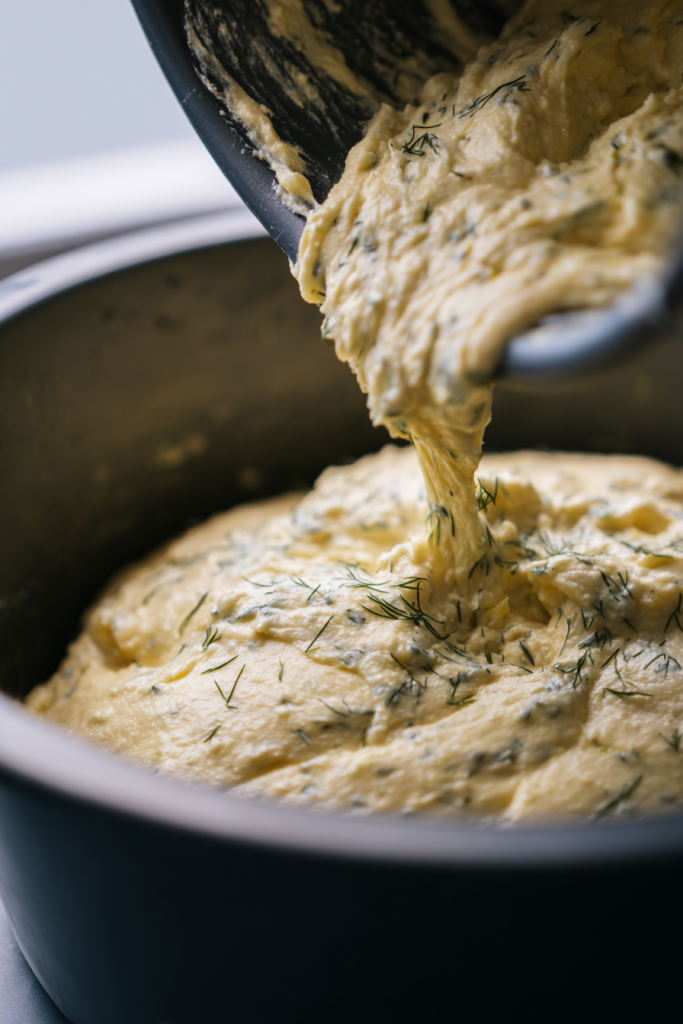
Dump in your flour, onion soup mix, sugar, baking powder, and baking soda all at once. Sprinkle the fresh dill on top.
Now here’s the important part: Stir just until you don’t see dry flour anymore. That’s it. Stop.
Why?
Overmixing develops gluten. Gluten makes your bread tough and chewy instead of tender and crumbly. Mix with gentle folding motions. A few small lumps are totally fine.
The second everything looks combined, put down that spatula.
Your batter should be thick but pourable. Think thick pancake batter. If it’s too stiff, you probably packed your flour measurements. Too loose? Add another tablespoon of flour.
Step 4: Bake Time
Pour the batter into your prepared pan. Spread it evenly with your spatula. It should come up about two-thirds of the way.
Don’t stress if the top looks messy. It’ll even out as it bakes.
Slide the pan onto your center oven rack. Set a timer for 40 minutes.
But don’t wander off.
Around the 30-minute mark, start peeking. The top should be turning golden brown. Edges will pull away from the pan slightly.
Your best friend here? The toothpick test. Stick a toothpick in the center. Clean or with just a few dry crumbs? You’re done. Wet batter? Give it another 5 minutes and check again.
Step 5: The Hardest Part (Waiting)
I know you want to slice into this immediately. Don’t.
Let the bread cool in the pan for 5-10 minutes. This lets the structure set up properly. Cut too early and your slices will fall apart.
After those few minutes, grab those parchment overhangs and lift the whole loaf out. Move it to a cutting board.
Use a serrated knife. Gentle sawing motion. Don’t press down.
Serve that first slice warm with butter. Watch it melt into all the nooks and crannies. The tangy pickle flavor, the savory onion notes, the fresh dill. It all comes together into something really special.
Every bite has different textures. Tender crumb. Slightly crispy crust. Little pockets of pickle.
Quick Tips That’ll Save You
Bring ingredients to room temp: I mentioned this earlier but it’s worth repeating. Room temp eggs and sour cream mix better and create better texture. Take them out 30 minutes before you start.
Patience pays off: Cutting too early releases all the steam that keeps the bread moist. Wait those 5-10 minutes. I promise it’s worth it.
Make it yours: Want more pickle flavor? Bump the diced pickles up to ½ cup. Want it milder? Drop down to ¼ cup. This recipe is forgiving.
Storage hack: This bread stays fresh longer than most homemade loaves because of the oil and sour cream. Once it’s cool, wrap it tight in foil, then put it in a resealable bag.
Storage, Ways to Eat This, and Your Questions Answered
How to Keep This Fresh
Like most quick breads, this tastes best fresh. But proper storage makes it last.
On the counter: Wrap your completely cooled bread in aluminum foil. Then slip it into a resealable plastic bag. Keeps for 2 days this way. The foil stops moisture loss. The bag keeps other food smells away.
In the fridge: Want it to last longer? Refrigerate it wrapped up the same way. Good for a full week. Before eating, let slices come to room temp. Or warm them quick in the microwave (15-20 seconds) or pop them in the toaster.
In the freezer: This bread freezes great for up to 2 months. I slice it before freezing so I can grab individual pieces. Wrap the whole loaf or individual slices in plastic wrap, then foil. Write the date on it. Thaw overnight in the fridge, or toast frozen slices straight from the freezer.
Ways to Serve This Thing
The classic: Spread softened butter on a warm slice. That’s it. The richness complements the tangy pickle flavor perfectly.
Want to get fancy? Make herb butter with extra fresh dill and a pinch of garlic powder.
With soup: This bread was made for soup. Tomato soup. Potato leek. Chicken noodle. All of them work. The savory bread balances creamy soups without fighting them.
As a sandwich: Turkey, Swiss cheese, crisp lettuce. Boom. Instant deli sandwich. The pickle flavor means you don’t even need pickle spears on the side.
With dips: Spinach artichoke dip. Warm cheese dips. Even hummus. The sturdy texture holds up to thick, heavy dips without falling apart.
For breakfast: Toast a slice and top it with scrambled eggs and avocado. I know it sounds weird. But the savory profile actually works really well in the morning, especially if you’re not into sweet breakfast stuff.
Questions People Always Ask Me
Can I use dried dill instead of fresh?
Yes, but the flavor won’t be as bright.
Swap in 1 tablespoon dried dill for the ¼ cup fresh. Dried herbs are more concentrated, so you need less. Add it with your other dry ingredients.
Here’s the thing though. Fresh dill gives you those little green flecks throughout the bread. Looks pretty. Tastes brighter.
If you cook with dried dill regularly, the substitution is fine. But for special occasions or when you really want that wow factor, fresh is worth hunting down.
Why did my bread turn out dense and heavy?
Three main reasons this happens:
First: You overmixed. Mix only until you don’t see dry flour. Any more than that develops gluten, which makes bread tough.
Second: You measured flour wrong. Too much flour makes dense bread. Always spoon flour into your measuring cup and level it.
Third: Your leavening agents are old. Check those expiration dates on your baking powder and baking soda. Old stuff doesn’t work.
If your bread sinks in the center, your oven might be running too cool. Get an oven thermometer to check.
Can I make this without onion soup mix?
Absolutely.
Make your own blend:
- 2 tablespoons dried minced onion
- ½ teaspoon onion powder
- ½ teaspoon garlic powder
- ¼ teaspoon salt
- ¼ teaspoon black pepper
Mix it all together before adding to your batter. Some people prefer this because packaged soup mix has preservatives and loads of sodium. Homemade gives you total control.
How do I know when it’s actually done?
Look for these signs:
The top should be golden brown, not pale. Edges pull away from the pan sides slightly. But your most reliable test? That toothpick in the center. Clean or with just a few dry crumbs means done. Wet batter means keep baking.
The bread should also spring back when you press it gently. If you’ve got an instant-read thermometer, internal temp should hit 200-205°F.
Underbaked bread is gummy in the middle. Overbaked bread is dry and crumbly.
Can I add cheese to this?
Oh absolutely. Cheese makes everything better.
Fold in ½ cup shredded sharp cheddar with the diced pickles. It melts during baking and creates these pockets of richness throughout the loaf.
Want to go full cheese mode? Sprinkle 2 tablespoons on top during the last 10 minutes of baking. Gets all melty and golden.
Swiss, Gruyere, or pepper jack all work great too. Just know that adding cheese increases moisture and richness. You might need to bake an extra 5 minutes. Test with that toothpick to make sure the center’s done.
The cheese-pickle combo basically tastes like grilled cheese sandwich in bread form. It’s ridiculous.
This dill pickle bread completely changed how I think about savory baking. The combination of tangy pickles, aromatic dill, and those savory onion notes creates something you just don’t expect.
Each slice has that essence of dill pickles without being overwhelming. Whether you’re obsessed with pickles or just curious about trying something different, this bread needs to be in your rotation.
The technique is simple enough for beginners. But the flavor is sophisticated enough to impress people who bake all the time.
Make it. Watch it disappear. Then make it again because everyone’s going to ask you for the recipe.
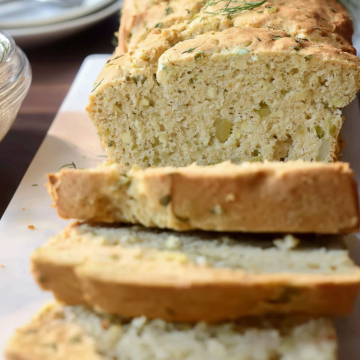
Easy Dill Pickle Bread (No Yeast)
Ingredients
Wet Ingredients
- 3/4 cup sour cream full-fat, room temperature
- 1/2 cup vegetable oil or canola oil
- 2 large eggs room temperature
- 2 tbsp dill pickle juice
- 1/3 cup finely diced dill pickles patted dry with paper towels
Dry Ingredients
- 1 3/4 cups all-purpose flour spooned and leveled
- 1 packet onion soup mix about 1 oz
- 2 tbsp granulated sugar
- 1 1/2 tsp baking powder
- 1/4 tsp baking soda
- 1/4 cup fresh dill finely chopped
Instructions
- Preheat your oven to 350°F (175°C). Line a 9×5-inch loaf pan with parchment paper, letting it hang over two sides. Lightly grease the pan before adding parchment to prevent sliding.
- In a large mixing bowl, whisk together the eggs, sour cream, vegetable oil, and pickle juice until smooth and uniform. The mixture should be pale yellow and well combined.
- Pat the diced pickles dry with paper towels to remove excess moisture. Fold the dried pickles into the wet mixture using a spatula.
- Add the flour, onion soup mix, sugar, baking powder, and baking soda all at once. Sprinkle the chopped fresh dill on top.
- Gently fold the dry ingredients into the wet ingredients just until no dry flour is visible. Do not overmix—a few small lumps are fine. Stop as soon as everything is combined to keep the bread tender.
- Pour the batter into the prepared loaf pan and spread it evenly with a spatula. The batter should come up about two-thirds of the way.
- Bake on the center oven rack for 40-45 minutes, or until the top is golden brown and a toothpick inserted in the center comes out clean or with just a few dry crumbs. Edges should pull away slightly from the pan.
- Let the bread cool in the pan for 5-10 minutes to allow the structure to set. Then use the parchment overhangs to lift the loaf out and transfer to a cutting board.
- Slice with a serrated knife using a gentle sawing motion. Serve warm with butter or let cool completely before storing.