

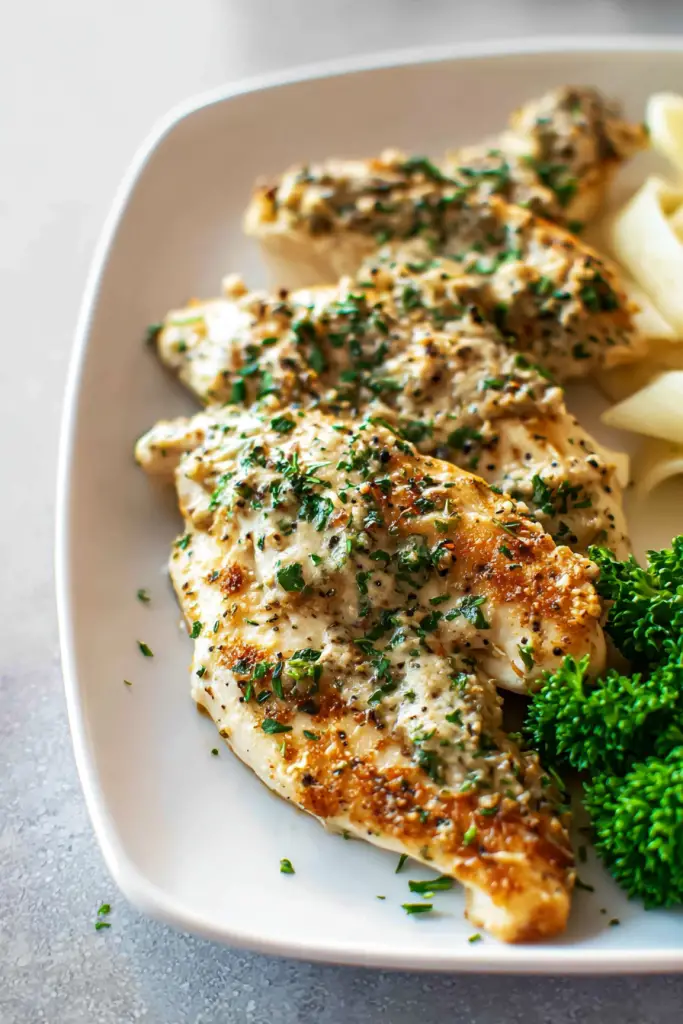
Listen, I’m obsessed with this garlic and Parmesan chicken.
Like, seriously obsessed.
It’s on my dinner rotation at least twice a week now. Why? Because it tastes like something I’d order at a fancy Italian restaurant, but I can whip it up on a Tuesday night when I’m exhausted from work.
The whole thing takes 25 minutes from start to finish.
And here’s the kicker – only one pan gets dirty.
My husband nearly cried tears of joy when he realized there weren’t five pots and pans piled in the sink. The creamy, garlicky sauce coating that perfectly golden chicken? Yeah, everyone at my table goes quiet when they take that first bite.
Why This Recipe Actually Works
Let me break it down for you:
It’s stupid fast. Under 30 minutes, and I’m using ingredients I already have sitting in my pantry and fridge. No weird specialty items.
The sauce is ridiculously good. That creamy Parmesan situation clings to every piece of chicken. Each bite feels like a warm hug.
You can pair it with anything. Pasta? Yes. Rice? Absolutely. Roasted veggies? Perfect. I’ve served this thing dozens of ways, and nobody has ever complained.
Want to know my secret?
I slice each chicken breast horizontally to make thinner cutlets. Game changer. They cook evenly in half the time, and you avoid that awful dry chicken nightmare we’ve all suffered through.
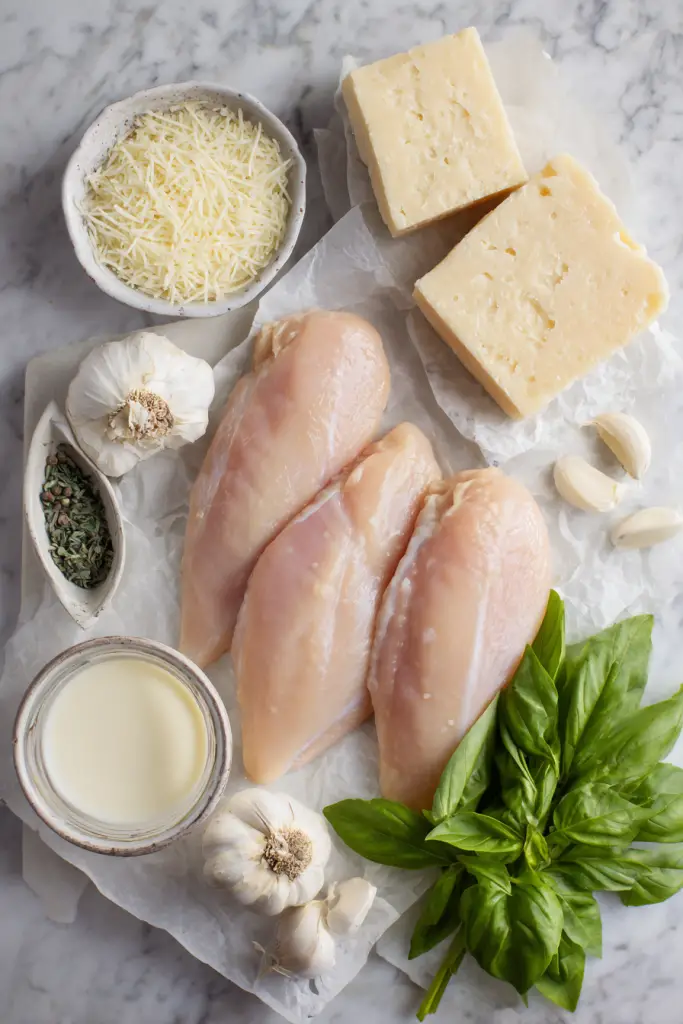
What You’ll Actually Need
Let me walk you through the lineup:
Boneless, skinless chicken breast: I grab about 1 pound – that’s usually 2 big breasts. Slicing them thin is crucial here.
Don’t skip this step.
You can swap in chicken thighs if you’re a dark meat person. I won’t judge.
Flour: This does double duty. First, it gives the chicken that gorgeous golden crust. Second, it thickens up the sauce beautifully. Just use regular all-purpose flour.
Italian seasoning: This herb blend is basically magic in a jar. No Italian seasoning? Mix equal parts dried oregano, basil, and thyme. Problem solved.
Garlic powder: Boosts that garlic flavor in the coating. Works perfectly with the fresh garlic we’ll add to the sauce later.
Butter: Creates the rich base for our sauce. Also helps the garlic cook without burning, which is key.
Fresh garlic: Six cloves sounds like a lot, right?
Trust me on this.
The flavor mellows out as it cooks and turns sweet and amazing. I always mince mine super fine so it spreads evenly through the sauce.
Chicken broth: Adds that savory depth. I go for low-sodium because I like controlling my salt levels. Vegetable broth works if that’s what you’ve got.
Heavy cream: This is what makes the sauce dreamy and luxurious. You could use half and half, but fair warning – your sauce will be thinner.
Shredded Parmesan cheese: Freshly grated is a thousand times better than the pre-shredded stuff. But look, I’ve used the pre-shredded kind when I’m lazy or rushed. It works.
Kosher salt and fresh cracked pepper: Can’t skip these. I season at different stages while cooking to build up those flavors.
Fresh parsley: Just for garnish. Adds a nice pop of green and freshness.
Recipe Timing & Servings
| Metric | Time/Amount |
|---|---|
| Prep Time | 10 minutes |
| Cook Time | 15 minutes |
| Total Time | 25 minutes |
| Servings | 4 |
| Difficulty | Easy |
Cooking Instructions
Ingredient Measurements Table
| Ingredient | Quantity | Notes |
|---|---|---|
| Olive oil | 1 tablespoon | For searing chicken |
| Boneless, skinless chicken breast | 1 lb (2 breasts) | Slice in half lengthwise |
| Flour (for chicken) | 2 tablespoons | All-purpose flour |
| Italian seasoning (for chicken) | 2 teaspoons | Or homemade herb blend |
| Garlic powder | 1 teaspoon | Adds depth to coating |
| Kosher salt | To taste | For seasoning chicken |
| Fresh cracked pepper | To taste | For seasoning chicken |
| Butter | 2 tablespoons | For sauce base |
| Garlic cloves | 6 cloves | Finely minced |
| Italian seasoning (for sauce) | 2 teaspoons | Additional for sauce |
| Flour (for sauce) | 2 tablespoons | Thickens the sauce |
| Chicken broth | 1 cup | Low-sodium preferred |
| Heavy cream | 1 cup | Creates creamy texture |
| Shredded Parmesan cheese | 1 cup | Freshly grated is best |
| Kosher salt | To taste | For seasoning sauce |
| Fresh cracked pepper | To taste | For seasoning sauce |
| Fresh parsley | For garnish | Chopped, optional |
Let’s Make This Thing
Step 1: Set up your dredging station
Grab a shallow dish. Toss in the flour, Italian seasoning, garlic powder, salt, and pepper. Whisk it all together.
Done.
Step 2: Slice that chicken
Put each chicken breast on your cutting board. Carefully slice it in half horizontally – like you’re opening a book.
Now you’ve got two thinner cutlets from each breast. They’ll cook way faster and stay juicy.
Step 3: Coat the chicken
Take each cutlet and press it into your flour mixture. Make sure both sides get covered. Shake off the excess – you don’t want clumps.
Step 4: Get your pan hot
Put a large sauté pan over medium heat. Add the olive oil. Let it heat up for about a minute until it shimmers.
This step matters.
If the oil isn’t hot enough, your chicken will steam instead of sear. Nobody wants steamed chicken.
Step 5: Sear time
Carefully lay those coated chicken cutlets in the hot pan. Don’t move them around – just let them cook for 4 to 6 minutes.
They’ll develop this beautiful golden crust.
Flip them over. Cook another 4 to 6 minutes. You’re looking for an internal temp of 165°F.
Step 6: Rest the chicken
Transfer the cooked chicken to a clean plate. Tent it loosely with foil to keep it warm.
Now comes the fun part.
Step 7: Start your sauce
Turn the heat down to medium-low. Add the butter to that same pan.
Don’t you dare wipe out the pan! Those browned bits are pure flavor gold.
Step 8: Cook the garlic
Once the butter melts, toss in your minced garlic and Italian seasoning. Add a pinch of salt and pepper.
Stir constantly for about 1 minute. Your kitchen will smell amazing right now.
Watch it carefully – burnt garlic is bitter and sad.
Step 9: Make the roux
Sprinkle those 2 tablespoons of flour over the garlic butter. Keep stirring for another minute.
This cooks out the raw flour taste and sets up your sauce base.
Step 10: Add the broth
Pour in the chicken broth while whisking like your life depends on it. Scrape up all those delicious browned bits from the bottom.
This is called deglazing, and it’s where serious flavor happens.
Step 11: Cream time
Pour in the heavy cream while stirring. Bring everything to a gentle simmer.
Watch it carefully so it doesn’t boil over and make a mess.
Step 12: Cheese, please
Here’s where it gets good.
Add the Parmesan cheese gradually. I do it in handfuls, stirring after each addition. Let each bit melt before adding more.
This prevents clumping and gives you that silky smooth sauce.
Step 13: Get the right consistency
Let the sauce simmer for 2 to 3 minutes until it thickens up. Too thick? Add a splash of broth. Too thin? Let it simmer longer.
Step 14: Bring it all together
Nestle that cooked chicken back into the pan with the sauce. Spoon some sauce over each piece.
Let everything simmer together for 1 to 2 minutes. The flavors need to mingle and get to know each other.
Step 15: Final seasoning
Taste the sauce. Does it need more salt? More pepper? Adjust it now.
Sprinkle that fresh chopped parsley over the top.
Step 16: Serve it up
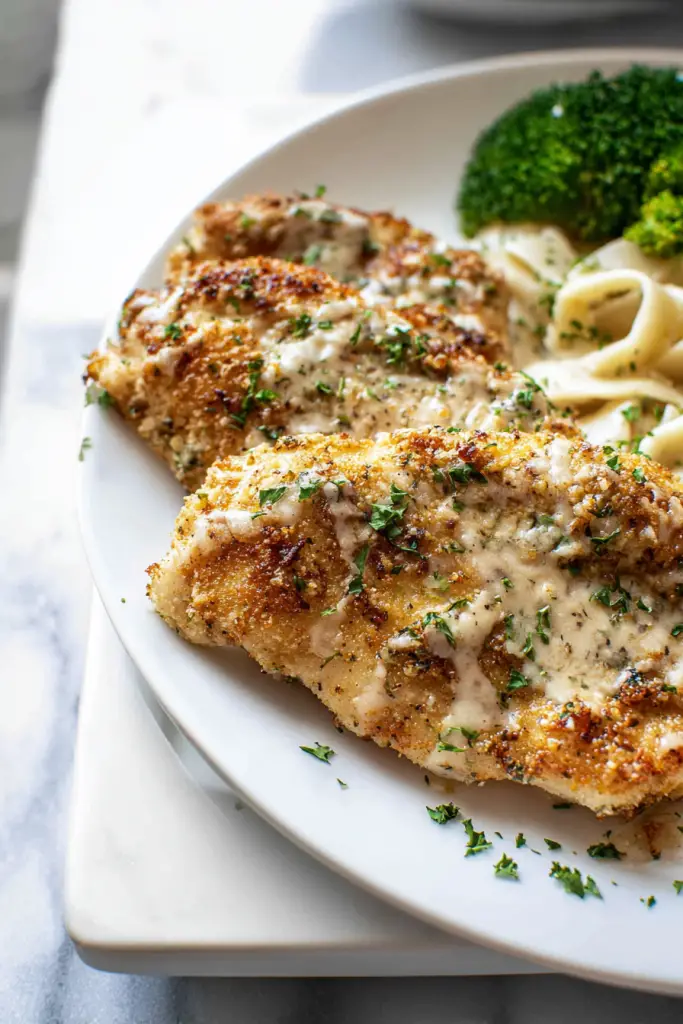
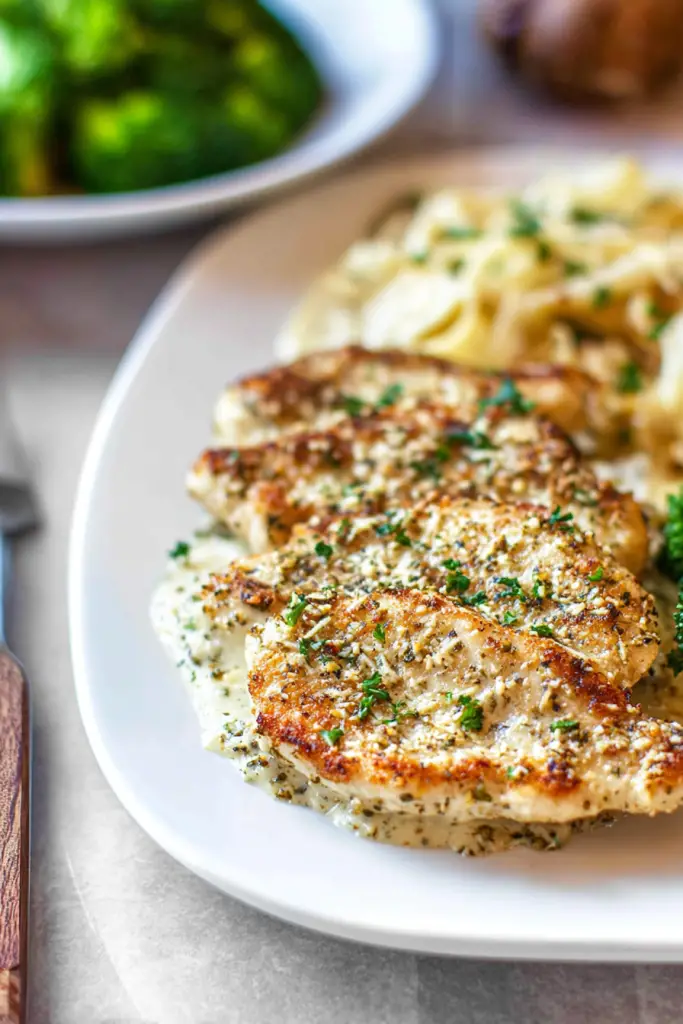
Plate the chicken with plenty of that gorgeous sauce.
This dish is best eaten immediately while everything’s hot and that sauce is silky perfection.
My Hard-Earned Tips
Pound it out if needed: Got super thick chicken breasts? Give them a gentle pounding before slicing. Everything cooks more evenly.
Room temp matters: I try to let my chicken sit out for 10 minutes before cooking. Cold chicken straight from the fridge cooks unevenly.
Don’t crowd the pan: If your pan isn’t big enough, cook the chicken in batches. Crowding = steaming. Steaming = no golden crust.
Fresh Parmesan is non-negotiable: Okay, it’s slightly negotiable. But pre-shredded cheese has anti-caking stuff that makes the sauce grainy. Freshly grated melts like a dream.
Keep the heat low for sauce: Medium-low is your friend here. High heat makes dairy break and separate. You’ll end up with a grainy mess.
Scrape that pan: Those browned bits are flavor bombs. Get them all up when you add the broth.
Veggie boost: Sometimes I throw in sautéed mushrooms or baby spinach during the final simmer. Makes it feel less guilty and more substantial.
Storage, Serving & FAQs
What to Serve With This
I’ve paired this garlic Parmesan chicken with basically everything. Here are my go-to combos:
Pasta is perfect: I love this over fettuccine, linguine, or penne. The sauce hugs every strand of pasta.
Pro tip? Save some pasta water to thin the sauce if you need to.
Rice soaks it up: Fluffy white rice, garlic rice, even cauliflower rice – they all work beautifully. I often make extra sauce just to drizzle over my rice because I have no self-control.
Roasted veggies add balance: Roasted broccoli, asparagus, or green beans cut through the richness. That slight char on the veggies? Chef’s kiss.
Mashed potatoes = comfort heaven: Creamy mashed potatoes with this sauce is basically a warm blanket in food form. Sometimes I add extra Parmesan to my mashed potatoes to tie it all together.
Fresh salad cuts the richness: A crisp green salad with light vinaigrette helps balance out all that cream. I’m partial to arugula with lemon dressing.
Make It Ahead (Yes, Really)
I meal prep this all the time. Here’s my system:
You can make it 2 days ahead. Just let everything cool completely before storing.
Storage trick: Transfer the chicken and sauce to an airtight container. Make sure the chicken is totally covered in sauce – this keeps it from drying out.
When you’re ready to eat: Reheat everything gently in a pan over medium-low heat. Add a splash of cream or broth to loosen it up. The sauce thickens in the fridge.
Don’t forget to taste: After reheating, always adjust your salt and pepper. Flavors mellow during storage.
Leftover Life
Fridge storage: Pop leftovers in an airtight container. They’ll keep for up to 4 days. Let everything cool to room temp first.
Keep them together: Store the chicken and sauce together. The sauce is like a protective blanket that prevents the chicken from drying out.
Portion it out: Sometimes I divide everything into individual containers. Makes grabbing lunch or dinner super easy during the week.
Freezer Instructions
Can you freeze it? Absolutely.
Cooked chicken and sauce can go in an airtight, freezer-safe container for up to 2 months.
Leave headspace: The sauce will expand when it freezes. Leave some room at the top of your container. Label it with the date so you don’t forget when you made it.
Thaw it properly: Always thaw in the fridge overnight. Safe, even thawing without ruining the texture.
After thawing: Reheat gently on the stovetop. Add extra cream or broth because the sauce might separate a bit during freezing.
How to Reheat Without Ruining It
Stovetop is best: I always reheat on the stove. Place everything in a pan over medium-low heat. Stir occasionally and add liquid as needed.
Microwave in a pinch: If you’re rushed, microwave at 50% power. Stop and stir every 30 seconds. This helps heat it evenly.
Never use high heat: High heat makes cream sauce break and separate. Low and slow wins every time with dairy-based sauces.
Freshen it up: Add a small splash of cream, broth, or even milk when reheating. Brings the sauce back to its original creamy glory.
Your Questions Answered
Can I use chicken thighs instead?
Yes! I’ve done this tons of times.
Boneless, skinless chicken thighs stay even juicier than breasts. Just adjust the cooking time a bit since thighs are usually thicker.
Make sure they hit 165°F internal temp.
What if I don’t have heavy cream?
You’ve got options.
Half and half works, but your sauce will be thinner and less rich. I’ve also mixed milk with a tablespoon of cream cheese to fake it.
Greek yogurt stirred in at the end (off heat) can work too. Fair warning – it makes the flavor tangier.
Can I make this dairy-free?
It’s tricky since the sauce is basically all dairy. But I’ve experimented.
Coconut cream and nutritional yeast can work. The flavor changes a lot though. Use coconut oil instead of butter and add extra garlic for flavor depth.
Why is my sauce grainy?
Two main culprits here:
- Heat too high when you added the dairy
- Pre-shredded cheese with anti-caking agents
Keep your heat at medium-low after adding cream. Always use freshly grated Parmesan. Add the cheese gradually and let each handful melt completely before adding more.
Can I add vegetables?
Absolutely!
I throw in sautéed mushrooms, spinach, or sun-dried tomatoes all the time. Add mushrooms when you cook the garlic. Stir in spinach or tomatoes at the very end so they just wilt.
Roasted red peppers are another favorite addition.
My sauce is too thick. Help?
Easy fix.
Whisk in chicken broth or heavy cream, one tablespoon at a time, until you hit your desired consistency. I keep extra broth warm on the side just for this.
Remember – sauce thickens as it sits.
Can I double this recipe?
Definitely! I double it all the time for meal prep or when we have friends over.
You might need to cook the chicken in batches to avoid overcrowding. Use a larger pan or two separate pans for the sauce to make sure everything cooks evenly.
My Final Two Cents
This garlic and Parmesan chicken has earned its spot in my weekly rotation.
It delivers restaurant-level flavor with minimal effort and time. That creamy, garlicky sauce? Completely addictive.
I love how flexible this recipe is. Weeknight family dinner? Check. Casual dinner party with friends? Check. It always gets rave reviews.
The combination of tender chicken and that rich Parmesan sauce never lets me down.
Here’s what I really love though – you can make it your own. Adjust the garlic level. Add your favorite veggies. Serve it with whatever sides you’ve got on hand.
It’s forgiving and flexible while still tasting like you spent hours in the kitchen.
Give this garlic and Parmesan chicken a try. It’s one of those recipes that looks impressive and tastes expensive but comes together in less than 30 minutes.
That’s my kind of recipe.

Garlic Parmesan Chicken
Ingredients
- For the Chicken:
- 1 tablespoon olive oil
- 1 lb boneless skinless chicken breast (2 breasts, sliced in half lengthwise)
- 2 tablespoons all-purpose flour
- 2 teaspoons Italian seasoning
- 1 teaspoon garlic powder
- Kosher salt to taste
- Fresh cracked pepper to taste
- For the Sauce:
- 2 tablespoons butter
- 6 cloves garlic finely minced
- 2 teaspoons Italian seasoning
- 2 tablespoons all-purpose flour
- 1 cup chicken broth low-sodium preferred
- 1 cup heavy cream
- 1 cup shredded Parmesan cheese freshly grated is best
- Kosher salt to taste
- Fresh cracked pepper to taste
- Fresh parsley chopped, for garnish
Instructions
- Prepare the Chicken:
- In a shallow dish, whisk together 2 tablespoons flour, 2 teaspoons Italian seasoning, garlic powder, salt, and pepper.
- Slice each chicken breast in half horizontally to create thinner cutlets (4 cutlets total).
- Press each cutlet into the flour mixture, coating both sides. Shake off excess flour.
- Cook the Chicken:
- Heat olive oil in a large sauté pan over medium heat until shimmering (about 1 minute).
- Add the coated chicken cutlets to the hot pan. Cook for 4-6 minutes without moving them until golden brown.
- Flip the chicken and cook for another 4-6 minutes until the internal temperature reaches 165°F.
- Transfer the cooked chicken to a clean plate and tent loosely with foil to keep warm.
- Make the Sauce:
- Reduce heat to medium-low. Add butter to the same pan (don’t wipe it out).
- Once butter melts, add minced garlic, 2 teaspoons Italian seasoning, salt, and pepper. Stir constantly for 1 minute until fragrant. Watch carefully to prevent burning.
- Sprinkle 2 tablespoons flour over the garlic butter. Stir constantly for 1 minute to cook out the raw flour taste.
- Pour in chicken broth while whisking vigorously. Scrape up all the browned bits from the bottom of the pan.
- Add heavy cream while stirring. Bring to a gentle simmer.
- Add Parmesan cheese gradually in handfuls, stirring after each addition until melted and smooth.
- Let the sauce simmer for 2-3 minutes until thickened to desired consistency. Add a splash of broth if too thick; simmer longer if too thin.
- Finish the Dish:
- Return the cooked chicken to the pan, nestling it into the sauce. Spoon sauce over each piece.
- Let everything simmer together for 1-2 minutes to meld the flavors.
- Taste and adjust salt and pepper as needed. Garnish with fresh chopped parsley.
- Serve immediately while hot with your choice of pasta, rice, or roasted vegetables.
Notes
Let chicken sit at room temperature for 10 minutes before cooking for even cooking
Don’t crowd the pan – cook in batches if necessary to achieve a golden crust
Use freshly grated Parmesan cheese for the smoothest sauce (pre-shredded contains anti-caking agents that can make sauce grainy)
Keep heat at medium-low when making the sauce to prevent cream from breaking
Scrape up all browned bits when deglazing – they add tremendous flavor Variations: Substitute chicken thighs for breasts (adjust cooking time as needed)
Add sautéed mushrooms when cooking the garlic
Stir in baby spinach or sun-dried tomatoes at the end
Use half and half instead of heavy cream for a lighter sauce (will be thinner) Storage: Refrigerate leftovers in an airtight container for up to 4 days
Freeze for up to 2 months in a freezer-safe container
Reheat gently on stovetop over medium-low heat, adding a splash of cream or broth to restore consistency Serving Suggestions:
Pair with fettuccine, linguine, rice, mashed potatoes, roasted broccoli, asparagus, or a fresh arugula saladClaude can make mistakes. Please double-check responses.


