

The Only Homemade Pizza Dough Recipe You’ll Ever Need transforms pizza night into something extraordinary. This recipe has become my absolute favorite for creating restaurant-quality pizza at home. Whether I’m feeding my family on a busy weeknight or entertaining friends, this dough never disappoints. The beauty lies in its simplicity and reliability.
Making pizza dough from scratch might sound intimidating, but I promise it’s easier than you think. There’s something magical about watching simple ingredients transform into a pillowy, golden-crusted masterpiece. The aroma alone fills your kitchen with warmth and anticipation. I’ve tested countless variations over the years, and this recipe consistently delivers perfect results.
What I love most is the versatility this dough offers. You can create thin, crispy crusts or thick, chewy ones. The choice is entirely yours. Plus, knowing exactly what goes into your dough means no preservatives or mystery ingredients. Just pure, delicious, homemade goodness that your family will absolutely adore.
Why This Recipe Works
The science behind this homemade pizza dough is what makes it truly foolproof. Understanding these key elements will help you master the technique every single time.
First, let’s talk about yeast activation. When you combine active dry yeast with warm water and honey, something incredible happens. The yeast awakens and begins feeding on the sugars. You’ll see bubbles and foam forming within minutes. This tells you the yeast is alive and ready to work its magic. The temperature of your water is critical here. Too hot, and you’ll kill the yeast. Too cold, and it won’t activate properly.
Bread flour is another crucial component that sets this recipe apart. Unlike all-purpose flour, bread flour contains more protein. This higher protein content develops stronger gluten strands when kneaded. The result? A dough with better structure and that satisfying chewiness we crave in pizza crust. The elasticity also makes the dough easier to stretch without tearing.
The olive oil serves multiple purposes in this recipe. It adds richness and flavor to the dough. It also helps create a tender crumb structure. Additionally, the oil prevents the dough from drying out during the rising process. These elements work together to create the perfect foundation for any style of pizza.
Why You’ll Love This Recipe
This homemade pizza dough recipe has earned its place as my kitchen staple for several compelling reasons. Let me share why it’ll become your favorite too.
The ingredient list is refreshingly simple. You probably have everything you need already sitting in your pantry. No specialty items or hard-to-find ingredients required. This makes spontaneous pizza nights totally achievable. I can’t count how many times I’ve decided to make pizza on a whim.
The versatility of this dough is truly remarkable. I’ve used it for classic Margherita pizzas with fresh mozzarella and basil. I’ve also created thick, hearty deep-dish pies loaded with toppings. The same dough works beautifully for both. You can even use it for calzones, stromboli, or flatbreads. The possibilities are genuinely endless.
Time efficiency is another major advantage. The active work time is minimal. You’re looking at maybe 15 minutes of hands-on effort. The dough does most of the work itself while rising. You can prepare it in the morning and have fresh pizza ready for dinner. Or make it the night before for even better flavor development.
The cost savings compared to store-bought dough or takeout pizza are significant. This recipe makes enough for two large pizzas for just a few dollars. That’s multiple meals for less than the price of one delivery pizza. Your wallet and your taste buds will thank you.
Recipe Timing:
Prep Time: 10 minutes | Cook Time: 15 minutes | Total Time: 2 hours 25 minutes (including rise time)
Servings: 2 large pizzas | Difficulty: Easy
Ingredients & Instructions
Ingredients Table
| Ingredient | Quantity | Notes |
|---|---|---|
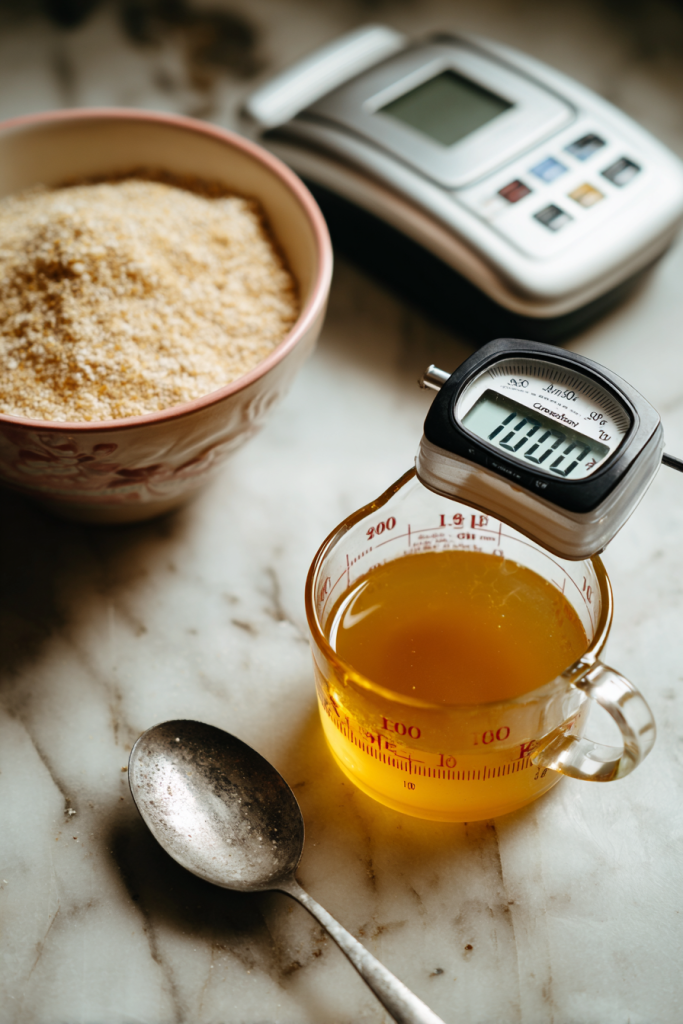
| Warm water | 1 cup | Must be 107-110°F for proper yeast activation |
| Active dry yeast | 2 1/4 teaspoons | One standard packet; ensure it’s not expired |
| Honey or sugar | 1 tablespoon | Either works; honey adds subtle flavor |
| Salt | 1 teaspoon | Essential for flavor and gluten development |
| Olive oil | 2 tablespoons | Extra virgin preferred for best taste |
| Bread flour | 3 cups | May need up to 1/2 cup more depending on humidity |
How to Make Homemade Pizza Dough
Step 1: Activation of Yeast Mixture
Begin by preparing your yeast mixture in a large mixing bowl. Combine the warm water with the yeast and honey, stirring gently to dissolve. The water temperature is absolutely critical here. Use a thermometer to ensure it’s between 107-110°F. Water that’s too hot will kill the yeast instantly. Water that’s too cool won’t activate it properly.
Set the mixture aside for 5-10 minutes. You’re waiting for visual confirmation that the yeast is alive and active. Look for bubbling and foaming on the surface. The mixture should develop a slightly frothy appearance. If nothing happens after 10 minutes, your yeast may be dead. Start over with fresh yeast rather than proceeding with inactive yeast.
Step 2: Mixing the Dough Ingredients
Once your yeast mixture is bubbly and active, it’s time to build your dough. If using a stand mixer, attach the dough hook. Set the mixer to low speed. Add the salt and olive oil to the yeast mixture first. This allows them to incorporate evenly.
Now begin adding the flour gradually. Start with half of the flour, letting it mix thoroughly. Then add the remaining flour slowly, about 1/2 cup at a time. Watch the consistency carefully as you add flour. The dough should pull away from the sides of the bowl. It will feel slightly tacky when touched but shouldn’t stick to your fingers.
The exact amount of flour needed can vary based on several factors. Humidity levels affect how much moisture the flour absorbs. The brand of flour you use also makes a difference. Don’t worry if you need that extra half cup. Just add flour gradually until you achieve the right consistency.
Step 3: Kneading the Dough to Perfection
Proper kneading is what transforms your mixture into actual pizza dough. Increase your mixer speed to low-medium. Let the dough hook knead the dough for 6 full minutes. I know it’s tempting to stop early, but resist that urge. This kneading time is crucial for gluten development.
If you’re kneading by hand, turn the dough onto a lightly floured surface. Push the dough away from you with the heel of your hand. Fold it back over itself and give it a quarter turn. Repeat this motion for 8-10 minutes. The dough should become smooth and elastic. It will spring back when you poke it gently.
You’ll notice the dough’s texture changing as you knead. It starts out rough and slightly shaggy. Gradually, it becomes smoother and more cohesive. The surface takes on a silky appearance. This transformation tells you the gluten strands are forming properly.
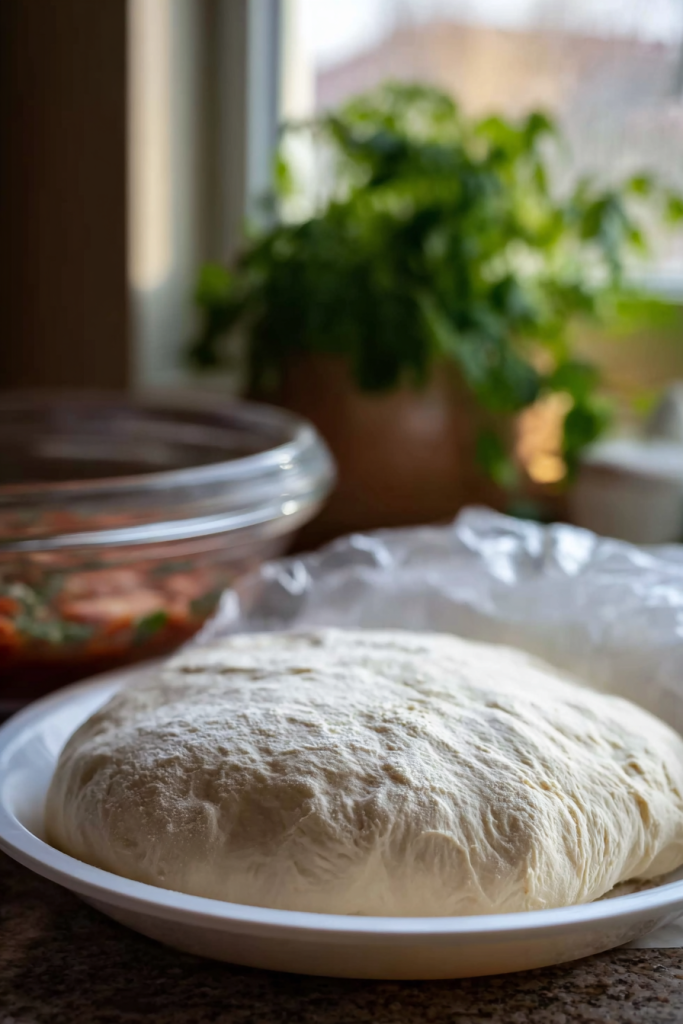
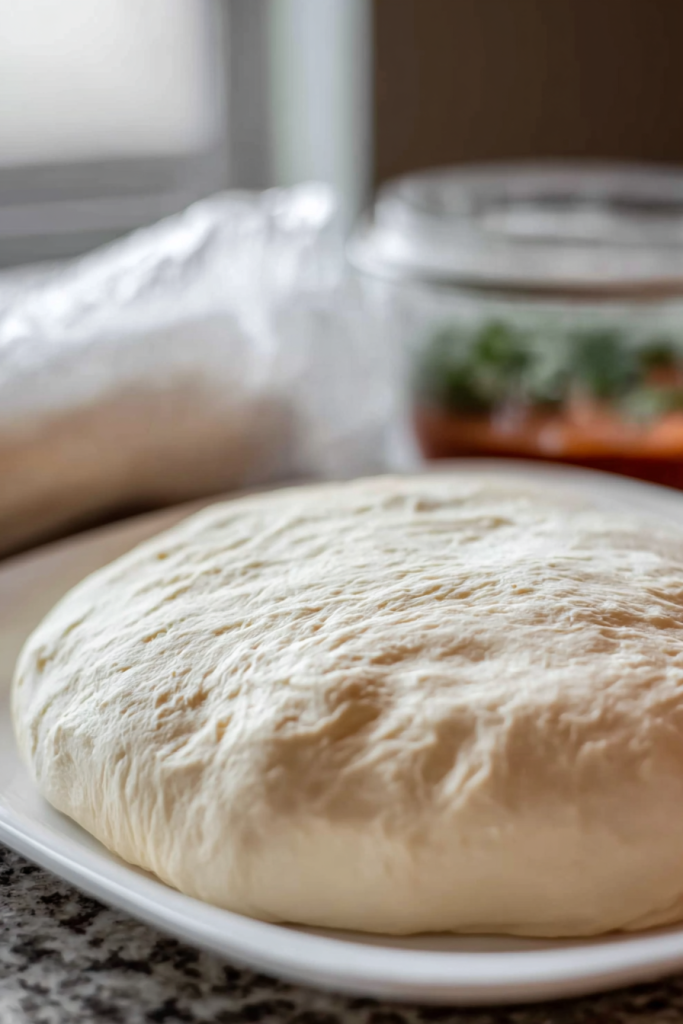
Step 4: Letting the Dough Rise
Your dough needs a warm, draft-free environment to rise properly. Lightly grease your mixing bowl with olive oil. Coat the dough ball with oil as well. This prevents a dry skin from forming on the surface. Place the dough in the bowl and turn it to coat all sides.
Cover the bowl tightly with plastic wrap. Some people prefer a damp kitchen towel. Either method works as long as it prevents air exposure. Set the bowl in a warm spot away from drafts. Room temperature works fine in most cases.
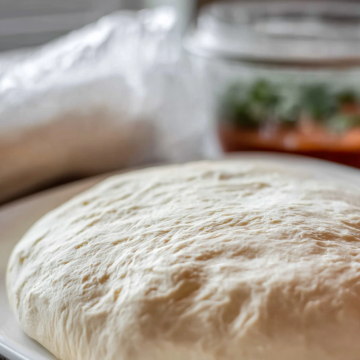
The dough needs 1-2 hours to double in size. In cooler weather, this might take longer. A helpful trick is to turn on your oven light. Place the covered bowl inside the oven with just the light on. The gentle warmth creates the perfect rising environment. Don’t turn the oven on, though. Just the light provides enough warmth.
You’ll know the dough is ready when it has visibly doubled. Press two fingers gently into the dough. If the indentations remain, the dough has risen sufficiently. If it springs back immediately, give it more time.
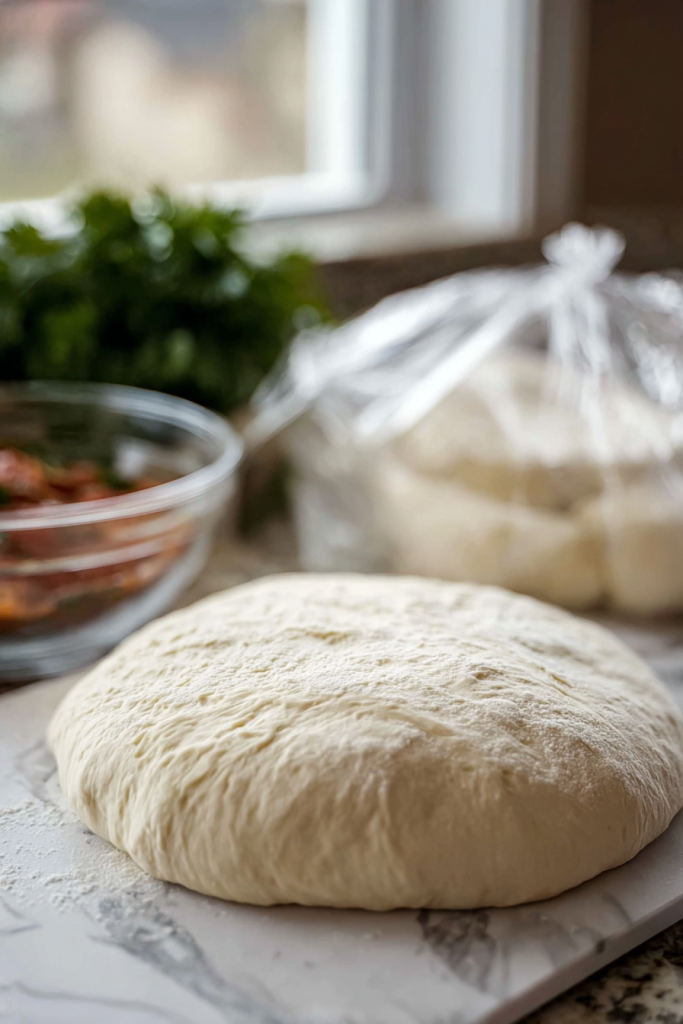
Step 5: Shaping and Using Your Pizza Dough
Once risen, your dough is ready for action. Punch down the center gently to release the built-up gases. Turn it out onto a lightly floured work surface. At this point, you can divide it into two equal portions for two pizzas.
Let the divided dough rest for 10 minutes before shaping. This relaxation period makes stretching much easier. The gluten strands relax, allowing the dough to stretch without snapping back. When ready, use your hands or a rolling pin to shape the dough. Start from the center and work your way outward. Create your desired thickness and shape.
For a traditional hand-tossed look, stretch the dough by hand. Hold it up and let gravity help. Rotate it as you work, gently stretching the edges. For a more rustic approach, simply press it out on your work surface. Either method produces delicious results.
Tips for Success
Getting perfect pizza dough every time requires attention to a few key details. Let me share the tips I’ve learned through trial and error.
Measure your flour correctly using the spoon and level method. Don’t scoop directly from the bag. This can pack in too much flour. Spoon the flour into your measuring cup instead. Level it off with a knife edge. This prevents adding excess flour that makes the dough dry.
Water temperature cannot be overlooked. Invest in a simple kitchen thermometer. Check the temperature before adding yeast. This small step prevents so many problems. Remember, yeast is a living organism. Treat it with care.
Avoid the temptation to over-knead. While kneading is essential, too much can make the dough tough. Stick to the recommended times. The dough should feel smooth and elastic, not rubbery or resistant. Trust the process and the timing.
If your kitchen is very dry, you might need less flour. In humid conditions, you might need more. Pay attention to the dough’s texture rather than strictly following measurements. The dough should feel slightly tacky but manageable.
Variations, Storage & FAQs
Variations to Try
Once you’ve mastered the basic recipe, experimenting with variations keeps things interesting. Here are my favorite ways to customize this dough.
Whole Wheat Pizza Dough: Replace half of the bread flour with whole wheat flour. This adds a nutty flavor and extra fiber. The dough will be slightly denser. You may need to add a tablespoon or two more water. The whole wheat flour absorbs more liquid than bread flour.
Herb-Infused Dough: Mix in 2 teaspoons of Italian seasoning during the mixing stage. You can also add 1 teaspoon of garlic powder for extra flavor. These additions create an aromatic crust that needs minimal toppings. The herbs complement tomato-based sauces beautifully.
Gluten-Free Option: Use a cup-for-cup gluten-free flour blend. You’ll need to adjust the liquid slightly. Gluten-free doughs often require more moisture. Add an extra tablespoon of water if the dough seems too dry. The texture will differ slightly from traditional dough.
Sourdough Pizza Crust: Replace the yeast with 1 cup of active sourdough starter. Reduce the water to 1/2 cup. This creates a tangy, complex flavor. The fermentation time will be longer, typically 6-8 hours or overnight.
Serving Suggestions
The beauty of homemade pizza dough is the endless topping possibilities. Let me share some of my favorite combinations.
For a classic Margherita, keep it simple. Spread quality tomato sauce on your stretched dough. Add fresh mozzarella slices and torn basil leaves. Drizzle with olive oil and sprinkle with sea salt. This traditional combination never disappoints.
Try a white pizza for something different. Skip the tomato sauce entirely. Instead, spread ricotta cheese mixed with garlic. Add mozzarella and fresh spinach. Top with crumbled sausage for a hearty meal. The creamy base is incredibly satisfying.
BBQ chicken pizza is perfect for those who like bold flavors. Use BBQ sauce as your base instead of tomato sauce. Add cooked chicken, red onions, and cilantro. Top with a blend of mozzarella and cheddar cheese. The smoky-sweet combination is addictive.
For a complete meal, serve your pizza with complementary sides. A crisp Caesar salad balances the richness of pizza. Garlic knots made from extra dough are always a hit. A simple antipasto platter also pairs wonderfully with homemade pizza.
Storage Tips
Proper storage extends the life of your pizza dough and maintains its quality. Here’s how to store it correctly.
For short-term storage, refrigerate unused dough in an airtight container. It will keep for up to three days. The dough continues to ferment slowly in the refrigerator. This actually develops more complex flavors over time. Bring it to room temperature before using.
For longer storage, freezing is your best option. Divide the dough into portions first. Wrap each portion tightly in plastic wrap. Place the wrapped dough in a freezer bag. Remove as much air as possible before sealing. Frozen dough keeps well for up to three months.
To use frozen dough, transfer it to the refrigerator the night before. Let it thaw slowly overnight. Bring it to room temperature before shaping. Never thaw dough in the microwave. This can kill the yeast and create an uneven texture.
If you notice your refrigerated dough developing a grayish color, don’t panic. This is oxidation and is completely normal. Simply punch down the dough. The color will even out as you work with it.
Pairing Ideas
Elevate your pizza night with thoughtful beverage and side pairings. The right combinations enhance the entire dining experience.
Wine pairs beautifully with pizza. For tomato-based pizzas, try a medium-bodied red like Chianti. The acidity complements the tomato sauce perfectly. For white pizzas or vegetable pizzas, a crisp Pinot Grigio works wonderfully. The light, refreshing wine balances rich cheese.
Beer is another classic pizza pairing. A hoppy IPA cuts through fatty, cheesy toppings. For meat-heavy pizzas, try a brown ale or amber lager. The malty sweetness complements savory flavors. Light wheat beers pair well with vegetable pizzas.
For non-alcoholic options, Italian sodas are festive and fun. Make them with flavored syrups and sparkling water. A splash of cream creates an Italian cream soda. These colorful drinks appeal to both kids and adults.
Salads provide a fresh contrast to pizza’s richness. A simple Caprese salad with tomatoes, mozzarella, and basil is classic. Arugula salad with lemon vinaigrette offers a peppery counterpoint. Even a basic mixed green salad with balsamic dressing works well.
Frequently Asked Questions
Can I make this dough ahead of time?
Absolutely! In fact, making dough ahead often improves its flavor. Prepare the dough through the first rise. Punch it down and refrigerate in an airtight container. It will keep for up to three days. The slow fermentation develops deeper, more complex flavors. Bring the dough to room temperature before shaping. This typically takes about 30 minutes to an hour.
Why didn’t my yeast activate?
Several factors can prevent yeast activation. Most commonly, the water temperature was incorrect. Water above 120°F kills yeast instantly. Water below 100°F won’t activate it properly. Old or expired yeast is another common culprit. Always check the expiration date before using. Store yeast in the refrigerator to extend its shelf life.
Can I substitute all-purpose flour for bread flour?
Yes, but your results will differ slightly. All-purpose flour contains less protein than bread flour. This means less gluten development and a less chewy texture. The dough may also be slightly less elastic. If using all-purpose flour, reduce the amount by about 2 tablespoons. This prevents the dough from becoming too dry.
How do I know when the dough has risen enough?
The dough should double in size during the first rise. Use the poke test to check readiness. Press two fingers gently into the dough. If the indentations remain, the dough is ready. If it springs back quickly, it needs more time. Rising times vary based on room temperature. Warmer environments speed up the process.
Can I use instant yeast instead of active dry yeast?
Yes, instant yeast works perfectly in this recipe. You can mix instant yeast directly with the dry ingredients. Skip the activation step entirely. Use the same amount as called for with active dry yeast. The rising time may be slightly shorter with instant yeast. Keep an eye on the dough and use the poke test to check readiness.
Conclusion
This homemade pizza dough recipe has transformed countless pizza nights in my kitchen. The combination of simple ingredients and straightforward techniques makes it accessible to everyone. Whether you’re a beginner or experienced baker, this dough delivers consistent, delicious results every single time.
The versatility means you’ll never get bored with pizza night. Try different toppings and styles. Experiment with the variations. Make it your own. The most important thing is to enjoy the process and the incredible homemade pizza that results.
Once you experience the difference homemade dough makes, you’ll never want to go back to store-bought. The taste, texture, and satisfaction of creating something from scratch is truly unmatched. So gather your ingredients and give this recipe a try. Your family and friends will be absolutely amazed by your pizza-making skills!
The Only Homemade Pizza Dough Recipe You’ll Ever Need
Ingredients
- 1 cup warm water 107-110°F
- 2 1/4 teaspoons active dry yeast 1 standard packet
- 1 tablespoon honey or sugar
- 1 teaspoon salt
- 2 tablespoons olive oil extra virgin preferred
- 3 cups bread flour plus up to 1/2 cup more as needed
Instructions
- Activate the Yeast:
- In a large mixing bowl, combine warm water (107-110°F), yeast, and honey. Stir gently to dissolve.
- Let the mixture sit for 5-10 minutes until it becomes bubbly and foamy on top. This confirms the yeast is active.
- Mix the Dough:
- Add salt and olive oil to the activated yeast mixture.
- Using a stand mixer with dough hook (or wooden spoon), mix on low speed.
- Gradually add flour, starting with half the amount. Mix until incorporated.
- Continue adding remaining flour slowly, about 1/2 cup at a time, until dough pulls away from the sides of the bowl and feels slightly tacky but not sticky.
- Knead the Dough:
- Increase mixer speed to low-medium and knead for 6 minutes. (If kneading by hand, turn dough onto floured surface and knead for 8-10 minutes.)
- Dough should become smooth, elastic, and spring back when poked gently.
- First Rise:
- Lightly grease the mixing bowl and dough ball with olive oil.
- Cover bowl tightly with plastic wrap or damp kitchen towel.
- Let rise in a warm, draft-free spot for 1-2 hours until doubled in size. (Tip: Place covered bowl in oven with just the light on for ideal rising temperature.)
- Shape and Use:
- Once doubled, punch down the dough gently to release gases.
- Turn dough onto lightly floured surface and divide into 2 equal portions.
- Let rest for 10 minutes before shaping.
- Roll or stretch each portion to desired thickness for pizza.
- Top with your favorite sauce and toppings, then bake according to your pizza recipe instructions.
Notes
Freezer: Wrap portions tightly in plastic wrap, then place in freezer bag. Freeze up to 3 months. Thaw overnight in refrigerator. Tips for Success: Water temperature is critical—use a thermometer to ensure 107-110°F. Too hot kills yeast; too cold won’t activate it.
Measure flour using spoon-and-level method to avoid adding too much.
Humidity affects flour absorption. Add extra flour gradually if dough is too sticky.
Don’t over-knead—stick to recommended times for best texture. Variations: Whole Wheat: Replace half the bread flour with whole wheat flour. Add 1-2 tablespoons extra water.
Herb-Infused: Mix in 2 teaspoons Italian seasoning and 1 teaspoon garlic powder with the flour.
Gluten-Free: Use cup-for-cup gluten-free flour blend and add extra tablespoon of water as needed. Make-Ahead:
Prepare dough through first rise, punch down, and refrigerate. Cold fermentation for 24-72 hours develops deeper flavor. Bring to room temperature 30-60 minutes before shaping.
Uses Beyond Pizza:
This versatile dough also works perfectly for calzones, stromboli, flatbreads, breadsticks, and garlic knots.


