

Okay, let’s talk about sweet potatoes for a second.
When you coat them in a glossy maple glaze? Pure magic. The natural sweetness just sings when you pair it with real maple syrup and warm spices. It’s the kind of dish that makes people go quiet at the dinner table. You know, that good kind of quiet.
I’ve been making these for years now. Every single holiday gathering. Every potluck. Every time someone says “bring your famous sweet potatoes.”
Here’s what I love most about this recipe.
You can make it ahead. Like, the day before. Then just reheat it when you’re already juggling seventeen other dishes. The sweet potatoes get this amazing caramelized exterior while staying tender and creamy inside. Sweet and savory in every single bite.
The best part? It’s stupid simple.
No fancy ingredients. No complicated techniques that make you want to throw your spatula across the kitchen. Just:
- Fresh sweet potatoes
- Real maple syrup (we’ll talk about this)
- Butter
- A few spices
That’s it.
The oven does all the heavy lifting. You just prep everything, slide it in, and go deal with your other dishes. The sweet potatoes roast slowly, soaking up all those wonderful flavors. Meanwhile, the glaze reduces down into this thick, syrupy coating that clings to every piece.
I learned something important over the years…
Never. Skip. The resting time.
Those final ten minutes after baking? That’s when the magic finalizes. The glaze transforms from kinda thin to perfectly syrupy. It coats the potatoes like a dream.
Now, I make these for Thanksgiving and Christmas, obviously. But here’s my secret—they’re good enough for a random Tuesday night. Seriously. They pair beautifully with roasted meats, grilled chicken, or even a vegetarian spread.
And the smell? Oh man, the smell.
Maple, cinnamon, and caramelizing sweet potatoes mixing together in your oven. Your family will start wandering into the kitchen asking “what’s that amazing smell?” before dinner is even close to ready.
What You’ll Need
| Ingredient | Quantity | Notes |
|---|---|---|
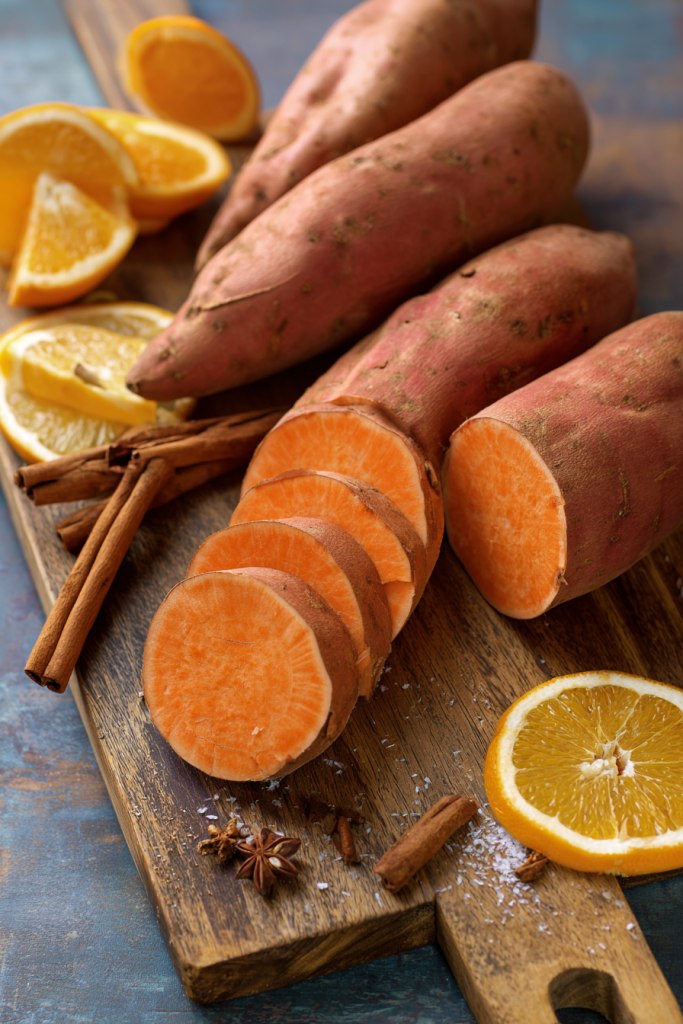
| Sweet potatoes | 4 pounds | Long, thin ones are easier to slice uniformly |
| Pure maple syrup | ⅓ cup | Never use pancake syrup—I’m serious |
| Unsalted butter | 4 tablespoons | Melted |
| Light brown sugar | ½ cup | Pack it down when measuring |
| Ground cinnamon | 1 teaspoon | Fresh if you’ve got it |
| Ground nutmeg | ¼ teaspoon | A little really does go a long way |
| Orange zest | 1 tablespoon | Fresh from the orange, not the jar |
| Vanilla extract | 1 teaspoon | Pure only—no imitation stuff |
| Salt | ½ teaspoon | Trust me, it balances everything |

Let’s Make This Thing
Alright, grab your apron. I’m walking you through this step by step.
Step 1: Get Your Sweet Potatoes Ready
First things first—preheat your oven to 375°F. This temperature is perfect. Not too hot (burns the glaze), not too cool (takes forever).
Peel your sweet potatoes with a sharp vegetable peeler. I like working with firm, fresh ones because they’re easier to handle. Give them a good rinse under cold water. Get all that dirt off.
Now for the slicing part.
Cut them into rounds about half an inch thick. Try to keep them the same size. This matters because you want them all to finish cooking at the same time. Got some thick potatoes? Cut those rounds in half to make little half-moons.
Grab a large baking dish—I use a 9×13-inch pan. Place all your sliced sweet potatoes in there. Arrange them in a somewhat even layer. They can overlap a bit. No stress.
Step 2: Make That Gorgeous Glaze
This is where things get good.
Melt your butter in a medium saucepan over low heat. Don’t rush it. You don’t want brown butter here—just melted.
Once it’s liquid, take the pan off the heat. Add everything else:
- Maple syrup
- Brown sugar
- Cinnamon
- Nutmeg
- Orange zest
- Vanilla
- Salt
Whisk it all together until it’s completely smooth. No lumps.
The mixture looks pretty liquid right now, right? Don’t panic. It’s supposed to be that way. It’ll thicken up beautifully in the oven. If it’s too thick to pour, just warm it gently for 30 seconds.
Now pour this gorgeous glaze all over your sliced sweet potatoes. Use a spoon or just dive in with your hands. Toss everything gently so every piece gets coated. They should be glistening with that maple mixture.
Step 3: The First Bake (Covered)
Cover your baking dish tightly with aluminum foil. This traps the steam and helps everything cook evenly. Plus, it keeps the glaze from burning.
Slide it into your oven. Set a timer for 25 minutes.
What’s happening in there? The potatoes are starting to soften. They’re absorbing all those amazing flavors. The butter and maple are working their way in.
After 25 minutes, carefully peel back the foil. Watch out—that steam is HOT. Pull it away from your face. Give the potatoes a gentle stir with a spoon.
Step 4: The Uncovered Bake (Where Magic Happens)
Put the dish back in the oven. No foil this time.
Now the real transformation starts. The glaze that’s exposed to the heat? It begins reducing and caramelizing. Getting thicker. Getting richer.
Bake for 20 minutes. Then stir again. This keeps everything cooking evenly and prevents sticking. You’ll see the glaze getting thicker and more concentrated. It’s beautiful.
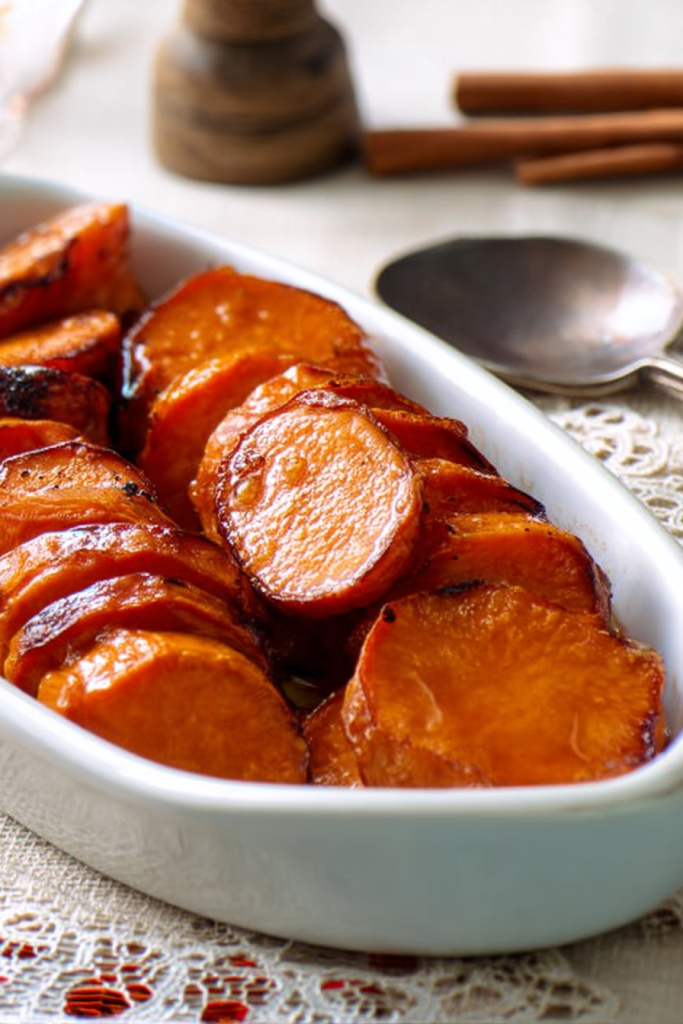
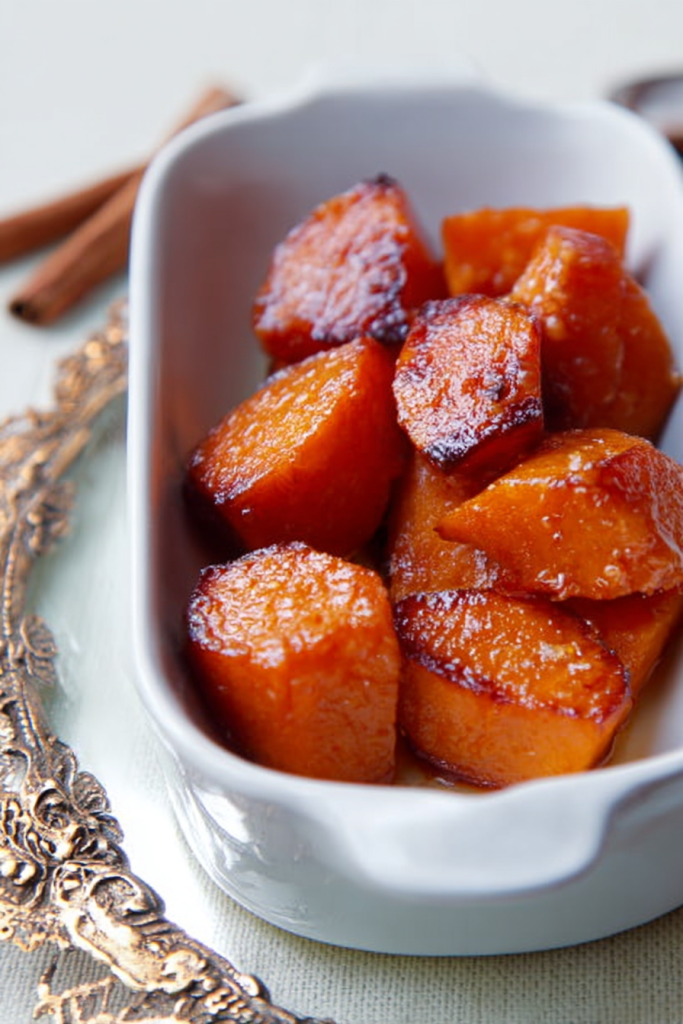
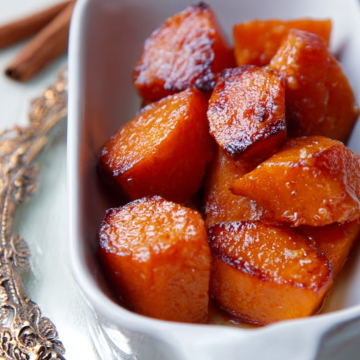
Keep baking for another 25 to 30 minutes. Check your sweet potatoes with a fork. They should be tender but not falling apart. The glaze should coat them in a glossy, thick layer.
Step 5: The Waiting Game (Don’t Skip This)
Pull that dish out of the oven. I know you want to dig in right now. I get it.
But wait.
Let those sweet potatoes rest for a full ten minutes. Set a timer if you need to.
What’s happening during this rest? The glaze keeps thickening as it cools. It goes from slightly runny to that perfect syrupy consistency. The sweet potatoes are also finishing up their cooking with the residual heat.
This rest period is the difference between good and incredible.
My Pro Tips (Learned the Hard Way)
Choose similar-sized sweet potatoes. They’ll all cook at the same rate. Skinnier ones are actually easier to work with for uniform rounds.
Real maple syrup only. I cannot stress this enough. The imitation stuff or pancake syrup? They don’t have that complex, deep flavor. It’s like comparing real vanilla to artificial. There’s just no contest.
Making these ahead? Slightly undercook them. When you reheat, they’ll finish cooking and keep a better texture. Store them covered in the fridge for up to three days.
Want more flavor? Add a pinch of ground ginger or allspice to the glaze. Some folks swear by adding a splash of fresh orange juice along with the zest. Try it.
Look for caramelized edges. Those slightly crispy bits? That’s where the flavor lives. They add this wonderful texture contrast against the tender interior.
How to Serve These Bad Boys
These sweet potatoes play well with others.
I serve them with roasted turkey, baked ham, or grilled pork chops all the time. They also work beautifully next to herb-roasted chicken.
Planning a full holiday spread? Pair these with:
- Green bean casserole
- Homemade dinner rolls
- Cranberry sauce (adds color and that tart contrast)
The sweet and savory combination just works.
Going vegetarian? These sweet potatoes can be the star of the show. Serve them alongside quinoa salad, roasted Brussels sprouts, and a hearty grain dish. The maple glaze adds all that satisfying richness you want.
Now here’s something cool about leftovers…
Chop them up and add them to morning oatmeal. Sounds weird, but trust me. They’re also fantastic in grain bowls. Or next to scrambled eggs for a sweet-savory breakfast situation.
Presentation tips?
Garnish with fresh thyme leaves. The green against the orange potatoes looks incredible. Or do a light dusting of cinnamon on top.
Want to get fancy? Transfer everything to a serving platter instead of serving from the baking dish. Drizzle any leftover glaze from the pan over the top. That glossy coating catches the light and looks restaurant-quality.
Your Questions Answered
Can I make these ahead of time?
Yes! Make the whole recipe, let it cool completely, then cover and refrigerate. They’ll keep for three days. When you’re ready, reheat them covered at 325°F for about 20 minutes. The texture stays pretty darn good. Though I’ll be honest—fresh from the oven is always best.
I don’t have maple syrup. What now?
Honey works in a pinch. The flavor profile will be different but still delicious. Use the same amount. Just know you’re getting a different kind of sweetness. Whatever you do, don’t use pancake syrup. That stuff has artificial flavors that’ll throw everything off.
My glaze is too thin. Help!
Relax. This is totally normal during the baking process. The glaze thickens a lot during that uncovered baking time. Still thin after the full cooking time? Remove the potatoes to a plate. Pour the glaze into a saucepan and simmer it on the stovetop until it reduces and thickens. Then pour it back over.
Can I add marshmallows?
Sure can! Toss mini marshmallows on top during the last five minutes of baking. They’ll toast up and get golden. Fair warning though—this makes it a sweeter dish overall. Different vibe than what we’re going for here, but equally delicious.
Why did my sweet potatoes turn to mush?
Two common reasons:
- Overcooked them
- Cut them too small
Make sure you’re cutting half-inch slices. Check them at the one-hour mark with a fork. They should be tender but still hold their shape when you stir them around.
Can I change up the spices?
Absolutely! The recipe is pretty forgiving. Try:
- Ground ginger
- Allspice
- Cardamom
- A pinch of cloves
- Fresh rosemary for an herbal twist
Just start with small amounts. You can always add more, but you can’t take it away.
These maple candied sweet potatoes have become one of those recipes people specifically request. Like, “you’re bringing those sweet potatoes, right?” kind of requests.
The combo of tender sweet potatoes and rich maple glaze just hits different. Every time I make them, someone asks for seconds. Then they ask for the recipe.
And here’s the beautiful thing…
The recipe is forgiving. Want it less sweet? Cut back on the brown sugar a bit. Want more spice? Add extra cinnamon. The basic technique stays the same no matter what little adjustments you make.
I really hope you try these. There’s something so satisfying about pulling that pan from the oven. The caramelized edges. The glossy glaze. The smell filling your entire house.
Your kitchen will smell incredible. Your table will look amazing. And your family will be fighting over the last spoonful.
Make these for your next special meal. Or just make them on a Wednesday because you feel like it.
Either way, I’m pretty confident they’ll become a staple at your table too.
Happy cooking!
Maple Candied Sweet Potatoes
Ingredients
- 4 pounds sweet potatoes long, thin ones are easier to slice uniformly
- 1/3 cup pure maple syrup never use pancake syrup
- 4 tablespoons unsalted butter melted
- 1/2 cup light brown sugar packed
- 1 teaspoon ground cinnamon fresh if you’ve got it
- 1/4 teaspoon ground nutmeg
- 1 tablespoon orange zest fresh from the orange, not the jar
- 1 teaspoon vanilla extract pure only
- 1/2 teaspoon salt
Instructions
- Preheat your oven to 375°F (190°C).
- Peel the sweet potatoes with a sharp vegetable peeler and rinse under cold water. Cut them into rounds about half an inch thick, keeping them as uniform as possible. If you have thick potatoes, cut the rounds in half to make half-moons.
- Place all sliced sweet potatoes in a 9×13-inch baking dish in a somewhat even layer. They can overlap slightly.
- Melt the butter in a medium saucepan over low heat. Once melted, remove from heat and add the maple syrup, brown sugar, cinnamon, nutmeg, orange zest, vanilla extract, and salt. Whisk until completely smooth.
- Pour the glaze over the sweet potatoes and toss gently until every piece is coated.
- Cover the baking dish tightly with aluminum foil and bake for 25 minutes.
- Carefully remove the foil (watch out for hot steam) and give the potatoes a gentle stir.
- Return the dish to the oven uncovered and bake for 20 minutes. Stir again.
- Continue baking uncovered for another 25 to 30 minutes, until the sweet potatoes are tender when pierced with a fork and the glaze is thick and glossy.
- Remove from the oven and let rest for 10 minutes before serving. The glaze will thicken further as it cools.


