

I’ve been perfecting this peanut butter filled chocolate cookies recipe for years. These cookies combine two irresistible flavors in one decadent treat. The rich chocolate cookie exterior wraps around a creamy peanut butter center that stays perfectly soft.
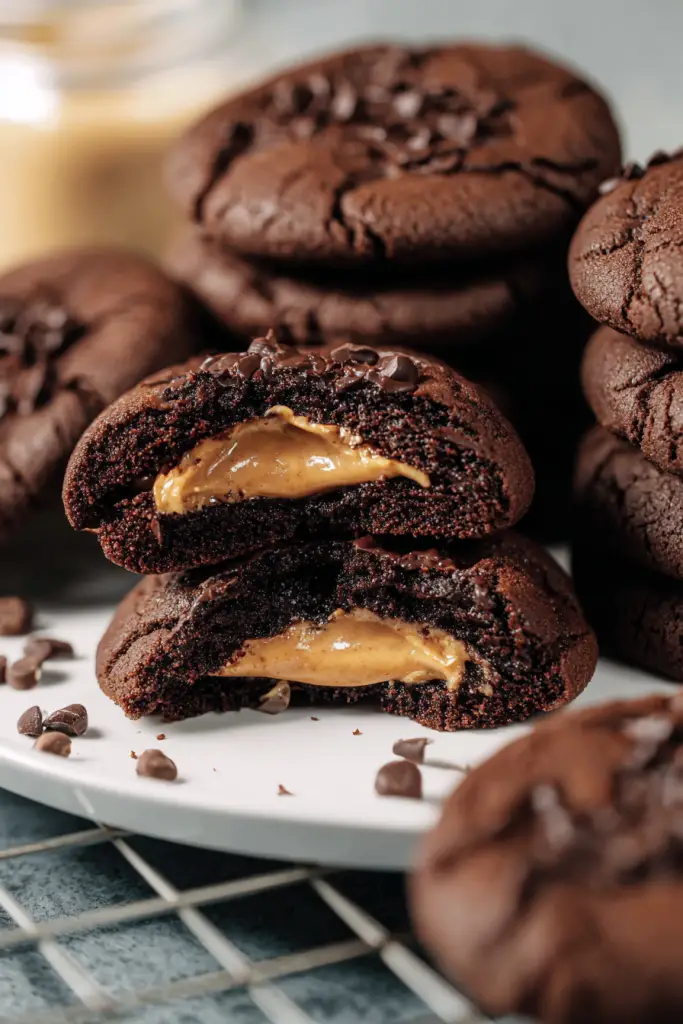
When I first made these cookies, I was amazed by how the peanut butter filling stays gooey. The contrast between the fudgy chocolate cookie and the smooth peanut butter center creates the perfect texture combination. These cookies remind me of my favorite peanut butter cups but in cookie form.
The secret to these cookies lies in the balance of ingredients. I use dark cocoa powder for an intense chocolate flavor that pairs beautifully with the sweet peanut butter filling. Room temperature butter ensures the dough comes together smoothly without overmixing.
Why You’ll Love This Recipe
These peanut butter filled chocolate cookies offer the perfect indulgence for any occasion. The combination of rich chocolate and creamy peanut butter satisfies even the strongest sweet tooth. I love how easy these cookies are to make despite their impressive appearance.
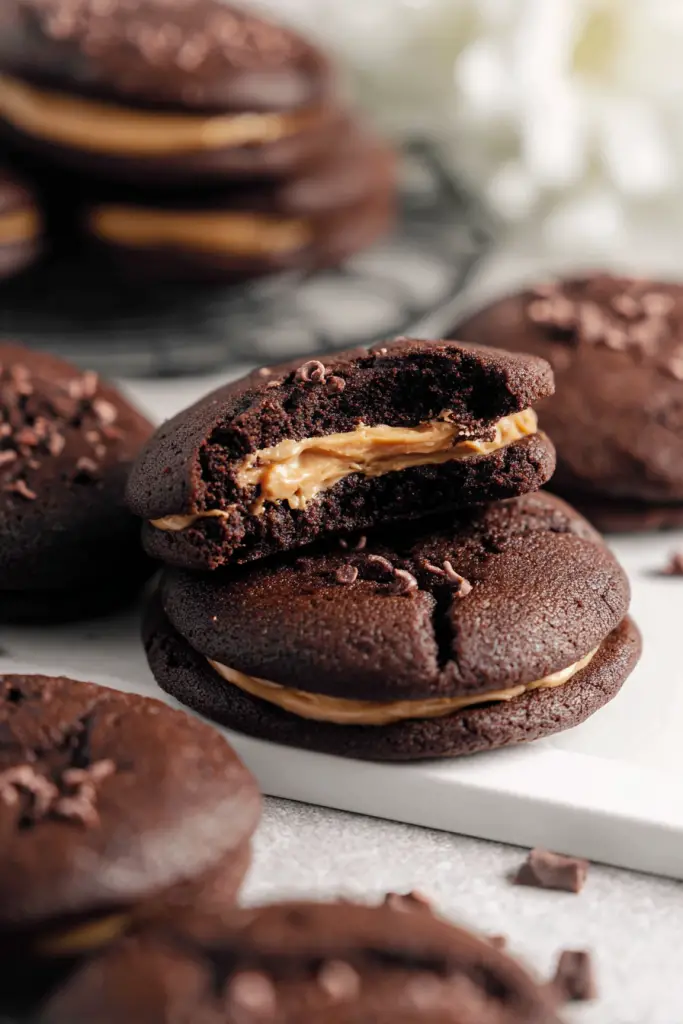
The texture combination keeps me coming back for more. The chocolate cookies remain chewy and fudgy while the peanut butter center stays soft and creamy. These cookies store well too, making them perfect for meal prep or gift-giving.
Prep Time: 10 minutes | Cook Time: 15 minutes | Total Time: 25 minutes
Servings: 24 cookies | Difficulty: Easy
Ingredients Table
| Ingredient | Quantity | Notes |
|---|---|---|
| Creamy peanut butter | 1/2 cup | Natural, drippy consistency preferred |
| Powdered sugar | 3/4 cup | For peanut butter filling |
| All-purpose flour | 1 1/2 cups | Measured correctly by spooning |
| Cocoa powder | 1/2 cup | Dark cocoa powder recommended |
| Baking soda | 1/2 tsp | Fresh for best results |
| Salt | 1/4 tsp | Balances sweetness |
| Butter | 3/4 cup | Room temperature |
| Brown sugar | 1/2 cup | Packed measurement |
| Granulated sugar | 1/2 cup | Regular white sugar |
| Egg | 1 large | Room temperature |
| Vanilla extract | 1 tsp | Pure vanilla preferred |
| Chocolate chips | 1/4 cup | For topping |
Ingredient Notes
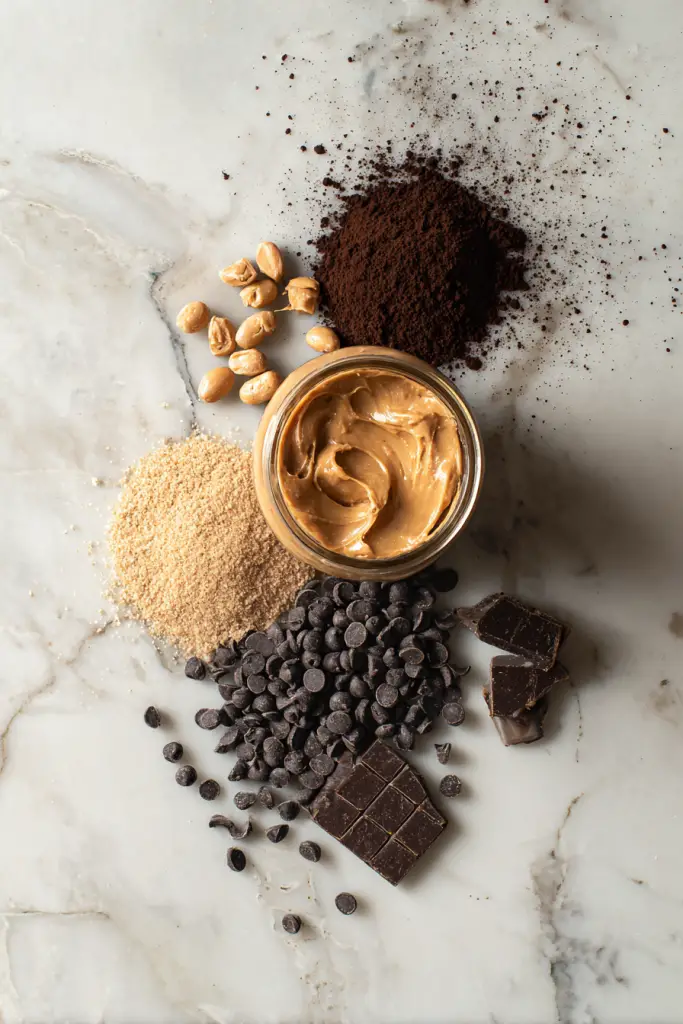
Creamy Peanut Butter: I always use natural peanut butter with just peanuts as the ingredient. The oils in natural peanut butter create the perfect creamy texture for the filling. Avoid no-stir varieties as they won’t provide the same consistency.
Dark Cocoa Powder: This ingredient makes all the difference in flavor depth. Dutch-processed cocoa powder works beautifully and creates that rich chocolate taste I crave. Regular cocoa powder works too but won’t be quite as intense.
Room Temperature Butter: This step is crucial for proper mixing. I take my butter out about an hour before baking. Properly softened butter creams better with the sugars and creates the ideal cookie texture.
Instructions & Techniques
Step-by-Step Instructions
Step 1: Prepare the Peanut Butter Filling I start by mixing the creamy peanut butter and powdered sugar in a small bowl. This combination creates a sweet, moldable filling that won’t leak during baking. I use a fork to combine them until the mixture holds together well.
Next, I roll the peanut butter mixture into small balls, about 1 teaspoon each. These balls should be roughly the size of a marble. I place them on a parchment-lined plate and set aside while preparing the cookie dough.
Step 2: Make the Chocolate Cookie Dough In a large bowl, I whisk together the flour, cocoa powder, baking soda, and salt. This dry mixture ensures even distribution of the leavening agents. I always sift the cocoa powder if it looks lumpy.
Using my stand mixer with the paddle attachment, I cream the room temperature butter with both sugars. This process takes about 3-4 minutes until the mixture becomes light and fluffy. Proper creaming creates the perfect cookie texture.
Step 3: Combine Ingredients I add the egg and vanilla extract to the creamed butter mixture. These ingredients bind everything together and add richness. I mix until just combined, avoiding overmixing which can make cookies tough.
Gradually, I incorporate the dry ingredients into the wet mixture. I mix on low speed until the dough just comes together. The finished dough should be soft but not sticky.
Step 4: Assemble the Cookies This step requires a gentle touch. I take about 2 tablespoons of chocolate dough and flatten it in my palm. I place a peanut butter ball in the center and carefully wrap the dough around it. Rolling gently between my palms creates a smooth ball.
I repeat this process with all the dough and filling. The key is ensuring the chocolate dough completely covers the peanut butter center. Any exposed filling might leak during baking.
Step 5: Chill and Bake I place the assembled cookies on a parchment-lined baking sheet and refrigerate for 30 minutes. This chilling step prevents excessive spreading and helps maintain the cookie shape.
My oven preheats to 350°F while the cookies chill. I bake them for 12-14 minutes until the edges are just set. The centers should still look slightly soft as they continue cooking from residual heat.
Pro Tips for Perfect Cookies
Temperature Control: Room temperature ingredients mix more evenly. I always check that my butter gives slightly to pressure but doesn’t feel warm or melted.
Measuring Accuracy: I use a kitchen scale for the most accurate measurements. Flour can vary significantly when measured by cups, affecting the final texture.
Chilling Time: Don’t skip the refrigeration step. These 30 minutes ensure the cookies maintain their shape and don’t spread too much during baking.
Baking Signs: The cookies are done when the edges look set but the centers still appear slightly underbaked. They firm up as they cool on the baking sheet.
Equipment Recommendations
I use a stand mixer with a paddle attachment for the best results. A hand mixer works too but requires more time for proper creaming. My digital kitchen scale ensures consistent measurements every time.
A good cookie scoop helps create uniform portions. I prefer using parchment paper over cooking spray for easy removal. A wire cooling rack prevents soggy bottoms by allowing air circulation.
Storage, Variations & FAQs
Storage Instructions
Room Temperature Storage: These cookies stay fresh for up to one week when stored properly. I use an airtight container with parchment paper between layers if stacking. The container should be kept in a cool, dry place away from direct sunlight.
Refrigerator Storage: For longer freshness, especially in warm weather, I store these cookies in the refrigerator. They last up to two weeks this way. I always let them come to room temperature before serving for the best texture.
Freezing Options
Freezing Baked Cookies: I freeze completely cooled cookies on a baking sheet first. Once individually frozen, I transfer them to freezer-safe bags or containers. They keep for up to three months and thaw beautifully at room temperature.
Freezing Cookie Dough: Assembled cookie dough balls freeze wonderfully. I freeze them on a baking sheet, then transfer to containers. When ready to bake, I add 2-3 extra minutes to the baking time without thawing.
Recipe Variations
Gluten-Free Version: I substitute the all-purpose flour with a 1:1 gluten-free baking flour. Bob’s Red Mill works excellently and maintains the proper texture.
Vegan Adaptation: Plant-based butter works well in this recipe. I use a high-quality brand for the best flavor and texture results.
Nut-Free Option: For those with peanut allergies, I substitute the peanut butter with sunflower seed butter or almond butter. The texture remains creamy and delicious.
Flavor Variations: I sometimes add a pinch of sea salt to the peanut butter filling for a salted caramel effect. Mini chocolate chips mixed into the filling create extra texture.
Troubleshooting Common Issues
Sticky Dough: If the dough feels too sticky, I chill it for 15-20 minutes. Warm kitchen temperatures can make handling difficult.
Spreading Cookies: Insufficient chilling time often causes excessive spreading. I always ensure the full 30-minute chill time.
Dry Cookies: Overbaking is the most common cause. I remove cookies when centers still look slightly soft.
Frequently Asked Questions
Can I use crunchy peanut butter instead of creamy? I don’t recommend crunchy peanut butter for the filling as it doesn’t hold together as well. The smooth texture of creamy peanut butter creates the perfect consistency for rolling into balls and stays cohesive during baking.
Why do my cookies spread too much during baking? Cookie spreading usually happens when the dough is too warm or hasn’t been chilled long enough. I always refrigerate the assembled cookies for at least 30 minutes before baking. Using room temperature ingredients initially, then chilling the formed cookies, gives the best results.
How do I know when the cookies are done baking? The cookies are perfectly done when the edges look set but the centers still appear slightly soft and underbaked. They continue cooking from residual heat after removing from the oven. Overbaking makes them dry and crumbly.
Can I make these cookies smaller or larger? Absolutely! For smaller cookies, I use about 1 tablespoon of dough with a smaller peanut butter ball. For larger cookies, I increase both proportionally. Adjust baking time accordingly – smaller cookies need 10-12 minutes, larger ones might need 15-17 minutes.
What’s the best way to store leftover peanut butter filling? Leftover peanut butter filling keeps well in the refrigerator for up to one week. I store it in a small airtight container and let it come to room temperature before using. It’s perfect for making more cookies or spreading on toast.
Final Thoughts
These peanut butter filled chocolate cookies have become my go-to recipe for special occasions and everyday treats. The combination of rich chocolate and creamy peanut butter never fails to impress. The recipe is forgiving enough for beginners yet produces professional-looking results.
I love how these cookies bring people together. Whether I’m making them for a bake sale, holiday gathering, or just because, they always disappear quickly. The surprise peanut butter center makes each bite exciting and satisfying.
The best part about this recipe is its versatility. I can prepare the dough ahead of time, freeze portions for later, or customize the flavors to suit different preferences. These cookies truly offer something special for every chocolate and peanut butter lover.

Peanut Butter Filled Chocolate Cookies
Ingredients
- – 1/2 cup creamy peanut butter natural, drippy consistency preferred
- – 3/4 cup powdered sugar
- – 1 1/2 cups all-purpose flour measured correctly by spooning
- – 1/2 cup cocoa powder dark cocoa powder recommended
- – 1/2 tsp baking soda fresh for best results
- – 1/4 tsp salt
- – 3/4 cup butter room temperature
- – 1/2 cup brown sugar packed
- – 1/2 cup granulated sugar
- – 1 large egg room temperature
- – 1 tsp vanilla extract pure vanilla preferred
- – 1/4 cup chocolate chips for topping
Instructions
- **Prepare the Peanut Butter Filling:** Mix creamy peanut butter and powdered sugar in a small bowl using a fork until well combined. Roll mixture into small balls (about 1 teaspoon each, marble-sized). Place on parchment-lined plate and set aside.
- **Make the Chocolate Cookie Dough:** In a large bowl, whisk together flour, cocoa powder, baking soda, and salt. Sift cocoa powder if lumpy. Using a stand mixer with paddle attachment, cream room temperature butter with both sugars for 3-4 minutes until light and fluffy.
- **Combine Ingredients:** Add egg and vanilla extract to creamed butter mixture, mixing until just combined. Gradually incorporate dry ingredients on low speed until dough just comes together. Dough should be soft but not sticky.
- **Assemble the Cookies:** Take about 2 tablespoons of chocolate dough and flatten in palm. Place a peanut butter ball in center and carefully wrap dough around it. Roll gently between palms to create smooth ball. Ensure chocolate dough completely covers peanut butter center.
- **Chill and Bake:** Place assembled cookies on parchment-lined baking sheet and refrigerate for 30 minutes. Preheat oven to 350°F. Bake for 12-14 minutes until edges are set but centers still look slightly soft. Cool on baking sheet.
Notes
– Room temperature butter is crucial for proper mixing
– Don’t skip the 30-minute chilling step to prevent spreading
– Cookies are done when edges are set but centers appear slightly underbaked
– Store in airtight container for up to one week at room temperature
– Can be frozen for up to 3 months (baked cookies or assembled dough)
– For gluten-free version, substitute with 1:1 gluten-free baking flour


