

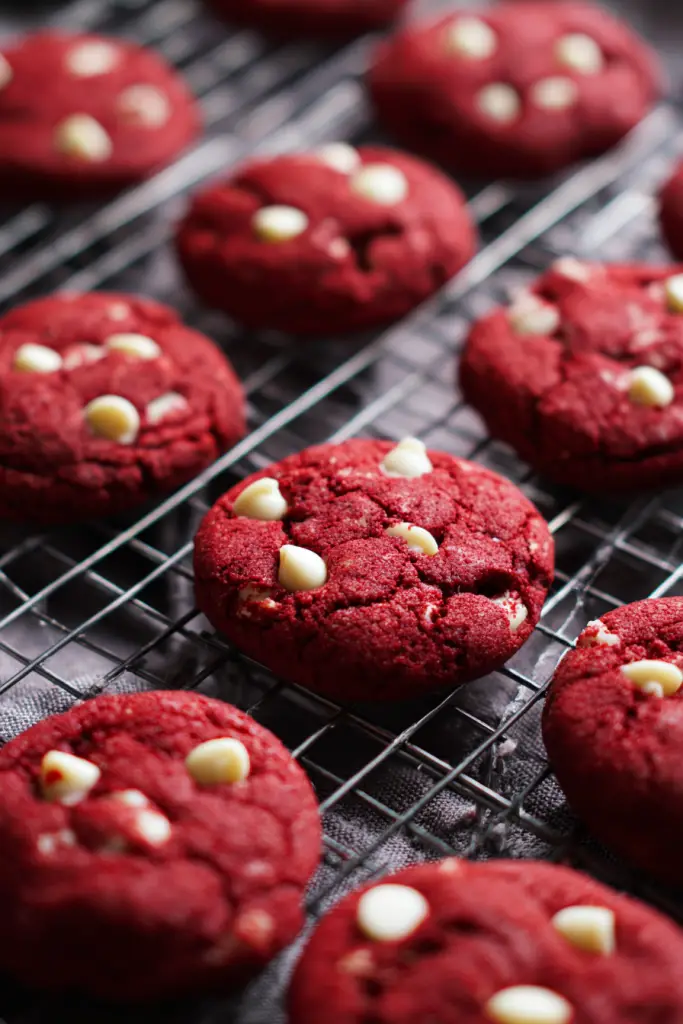
These Red Velvet Cookies are incredibly soft, chewy, and packed with white chocolate chips. They’re a quick dessert that comes together in just 25 minutes—no chilling required!
I absolutely love making these red velvet cookies. They deliver all the flavors I adore about red velvet cake in a convenient cookie form. The best part? They’re ready in under 30 minutes from start to finish. Sometimes I crave that signature red velvet taste but don’t want to commit to making an entire cake. These cookies are my perfect solution!

Why These Are The Best Red Velvet Cookies
Let me share what makes these cookies truly special and different from other recipes.
Perfectly soft and chewy texture. The texture is absolutely incredible. You get crispy edges with a wonderfully soft, chewy center. The secret is pulling them from the oven at just the right moment—don’t overbake them!
Loaded with white chocolate chips. White chocolate and red velvet are a match made in heaven. I fold generous amounts of white chocolate chips into the dough. They add sweetness and create delightful pockets of creamy chocolate throughout each cookie.
No buttermilk needed. Most red velvet recipes require buttermilk, which can be frustrating. I rarely keep buttermilk on hand, and making a store run just for one ingredient isn’t ideal. This recipe skips the buttermilk entirely while keeping that authentic red velvet flavor intact.
Quick and easy preparation. These cookies don’t require any chilling time. You can mix the dough and pop them in the oven right away. They’re perfect for last-minute dessert cravings or when unexpected guests arrive.
Recipe Ingredients
I make these cookies using cocoa powder, white chocolate chips, and simple pantry staples. You probably have most ingredients already!
All-purpose flour – Always use the spoon-and-level method when measuring flour. Simply scoop flour into your measuring cup, then level it off with a knife. Over-measuring flour results in dry, crumbly cookies instead of soft ones.
Cocoa powder – This provides the subtle chocolate flavor that’s characteristic of red velvet. Regular unsweetened cocoa powder works perfectly here.
Baking soda and baking powder – This combination ensures the cookies rise properly. They also contribute to that perfect chewy texture we’re aiming for.
Salt – Just a small amount enhances all the other flavors in the cookies.
Unsalted butter – I prefer unsalted butter so I can control the salt level. If you only have salted butter, reduce or skip the additional salt in the recipe.
Brown sugar and granulated sugar – Using both types of sugar creates the ideal texture. Brown sugar adds moisture and chewiness, while white sugar contributes to the crispy edges.
Egg yolks – Only the yolks are used in this recipe. They make the cookies extra rich and tender. Save the whites for another recipe!
Vanilla extract – Pure vanilla extract adds warmth and depth to the flavor profile.
Red gel food coloring – Gel coloring is more concentrated than liquid versions. Start with the smaller amount listed and add more for a deeper red color. The intensity is completely up to your preference!
White chocolate chips – These sweet, creamy chips complement red velvet beautifully. You can substitute dark chocolate chips or add chopped pecans or walnuts for variation.
Recipe Timing & Yield
| Metric | Time/Amount |
|---|---|
| Prep Time | 10 minutes |
| Cook Time | 15 minutes |
| Total Time | 25 minutes |
| Servings | 24 cookies |
| Difficulty | Easy |
Instructions & Tips
Ingredients Table
| Ingredient | Quantity | Notes |
|---|---|---|
| All-purpose flour | 1 ¾ cups | Spoon-and-level method |
| Cocoa powder | 2 Tablespoons | Unsweetened |
| Baking soda | ½ teaspoon | Fresh for best results |
| Baking powder | ¼ teaspoon | Check expiration date |
| Salt | ¼ teaspoon | Omit if using salted butter |
| Unsalted butter | ½ cup (1 stick) | Softened to room temperature |
| Brown sugar | ½ cup | Packed tightly |
| Granulated sugar | ½ cup | White sugar |
| Egg yolks | 2 | Room temperature preferred |
| Vanilla extract | 1 teaspoon | Pure extract recommended |
| Red gel food coloring | 1 ½ – 2 teaspoons | Adjust for desired color |
| White chocolate chips | 1 cup | Can substitute dark chocolate |
How To Make Red Velvet Cookies
Here’s my step-by-step process for creating these delicious cookies. They come together so quickly and easily!
Step 1: Prep your workspace. Preheat your oven to 350°F. Line two baking sheets with parchment paper or silicone baking mats. This prevents sticking and ensures even browning on the bottom of the cookies.
Step 2: Mix the dry ingredients. In a medium bowl, sift together the flour, cocoa powder, baking soda, baking powder, and salt. Sifting isn’t just extra work—it aerates the ingredients and breaks up any clumps. This creates lighter, more tender cookies.
Step 3: Cream the butter and sugars. In a large bowl, use an electric mixer to cream the softened butter with both sugars. Beat them together for about 2-3 minutes until the mixture becomes light, fluffy, and pale in color. This process incorporates air into the dough.
Step 4: Add the wet ingredients. Add the egg yolks one at a time, beating well after each addition. This ensures they’re fully incorporated. Then mix in the vanilla extract and red gel food coloring. The dough should turn a beautiful red color.
Step 5: Combine wet and dry ingredients. Gradually add the dry ingredient mixture to the wet ingredients. Mix on low speed just until the flour disappears. Don’t overmix at this stage—it can make the cookies tough and dense.
Step 6: Fold in the chocolate chips. Use a spatula or wooden spoon to gently fold the white chocolate chips into the dough. Distribute them evenly throughout.
Step 7: Portion the dough. Use a cookie scoop or spoon to portion balls of dough onto your prepared baking sheets. I use a medium cookie scoop for consistent sizing. Leave about two inches of space between each cookie—they’ll spread during baking.
Step 8: Bake the cookies. Bake for 10-12 minutes. The edges should look set, but the centers might still appear slightly soft. This is exactly what you want! They’ll firm up as they cool.
Step 9: Cool properly. Let the cookies cool on the baking sheet for 5 minutes. This cooling time is crucial—it lets them set without breaking. Then carefully transfer them to a wire rack to cool completely.

Tips For The Best Cookies
I’ve perfected these cookies through lots of testing. Here are my top tips for guaranteed success every single time.
Always sift your dry ingredients. I know it seems like an extra step, but sifting makes a real difference. It adds air to the dough and prevents lumps of cocoa powder or flour. This creates a lighter, more tender cookie.
Don’t overmix the dough. When you’re combining the wet and dry ingredients, mix just until you can’t see any more flour. Overmixing develops the gluten in the flour, which leads to tough, dense cookies. Stop as soon as everything is combined.
Use properly softened butter. Your butter should be soft enough to leave an indentation when pressed, but not melted or greasy. Room temperature butter creams properly with sugar, creating that light and fluffy base. Leave butter out for about 30-60 minutes before starting.
Chill the dough if necessary. If your kitchen is warm and the dough feels too soft or sticky, refrigerate it for 15-20 minutes. This helps the cookies maintain their shape during baking instead of spreading too thin.
Watch the baking time carefully. The difference between perfect and overbaked cookies is just a minute or two. Remove the cookies when the edges are set but the centers still look slightly underdone. They continue cooking on the hot pan after you remove them from the oven.
Let them cool on the pan. Those first 5 minutes of cooling on the baking sheet are essential. The cookies are too soft to move immediately after baking. They need that time to firm up slightly.
Try natural coloring alternatives. If you prefer avoiding artificial food coloring, try beet juice or beet powder instead. The color won’t be as vibrant, but you’ll still get a lovely reddish hue. Use about 1-2 tablespoons of beet juice or 1 teaspoon of beet powder.
Add cream cheese frosting. While these cookies are delicious on their own, a cream cheese frosting swirl on top takes them over the top. It’s a nod to traditional red velvet cake!
Storage & FAQs
Proper Storage Methods
Storing these cookies correctly keeps them fresh and maintains that perfect soft, chewy texture.
Room temperature storage. Place completely cooled cookies in an airtight container. Layer them with parchment paper if stacking. They’ll stay fresh at room temperature for up to one week. Make sure the container seals tightly to prevent them from drying out.
Freezing for later. These cookies freeze beautifully! Let them cool completely first. Arrange cookies in a single layer in a freezer-safe container or bag. Separate additional layers with parchment paper to prevent sticking. Freeze for up to 3 months. When you’re ready to enjoy them, let them thaw at room temperature for about 30 minutes. They’ll taste freshly baked!
Freezing unbaked dough. You can also freeze the cookie dough itself. Scoop dough balls onto a baking sheet and freeze until solid. Transfer frozen dough balls to a freezer bag. When you want fresh cookies, bake them straight from frozen, adding 1-2 minutes to the baking time.
Frequently Asked Questions
Can I use liquid food coloring instead of gel?
Yes, you can substitute liquid food coloring, but you’ll need more of it. Gel coloring is much more concentrated than liquid. Start with about 1 tablespoon of liquid coloring and add more until you achieve your desired shade. Keep in mind that adding too much liquid can slightly affect the dough consistency.
Why do my cookies spread too much during baking?
Several factors cause excessive spreading. Your butter might have been too soft or melted. The dough may have been too warm when you put it in the oven. Try chilling the dough for 15-20 minutes before baking. Also, make sure your baking powder and baking soda are fresh—old leavening agents don’t work properly.
Can I substitute the egg yolks with whole eggs?
Egg yolks create a richer, more tender cookie, but you can use 1 whole egg instead if needed. The texture will be slightly different—a bit more cake-like and less chewy. The cookies will still taste delicious!
How do I know when the cookies are done baking?
Look for set edges while the centers still appear slightly soft and underbaked. The cookies continue cooking on the hot pan after removal from the oven. If you wait until the centers look completely done, you’ll end up with overbaked, dry cookies. Trust the process and pull them when they look slightly underdone!
Can I make these cookies without food coloring?
Absolutely! The cookies will taste exactly the same without the red color. They’ll just look like chocolate chip cookies. For a natural alternative, use beet juice or beet powder. While the color won’t be as vibrant, you’ll get a pleasant pinkish-red hue without artificial coloring.
Final Thoughts
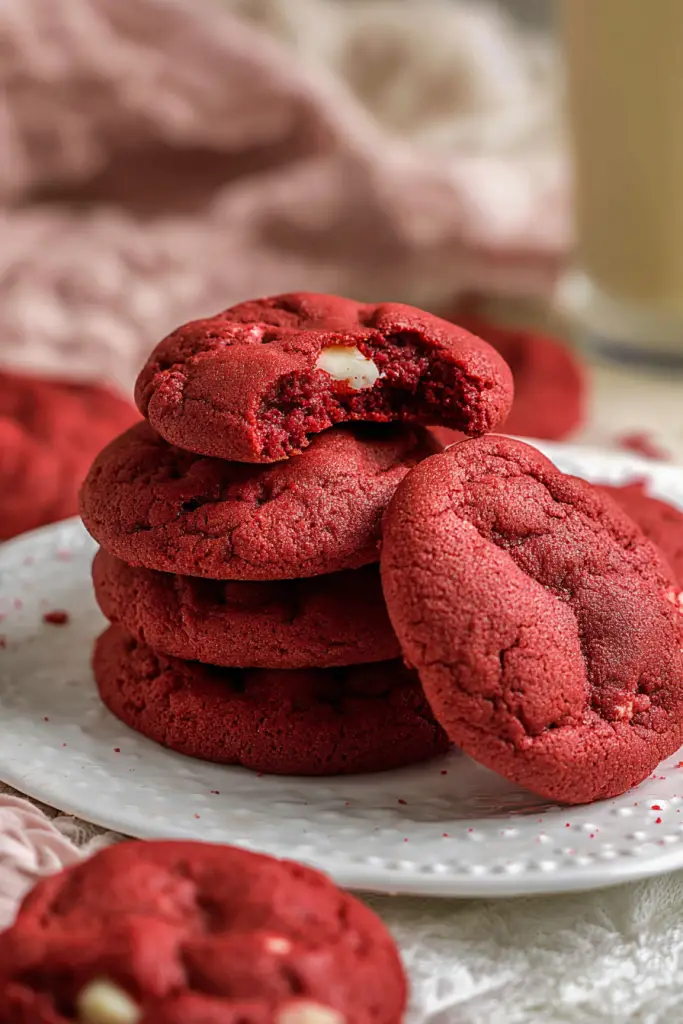
These Red Velvet Cookies have become one of my go-to recipes when I need something quick, impressive, and absolutely delicious. The combination of soft, chewy texture with sweet white chocolate chips creates an irresistible treat. They’re perfect for holidays, celebrations, or just because you’re craving something special.
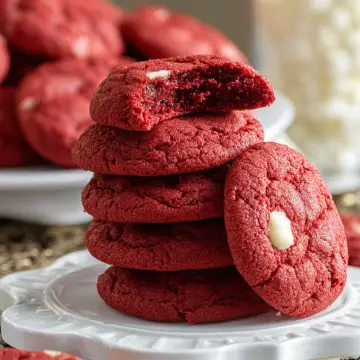
The best part is how simple they are to make. No chilling time, no complicated techniques—just mix, scoop, and bake. In less than 30 minutes, you’ll have warm, beautiful cookies ready to enjoy. They taste amazing fresh from the oven, but they also stay wonderfully soft for days when stored properly.
I love sharing these cookies with friends and family. They always get rave reviews! The vibrant red color makes them feel festive and special, while the familiar red velvet flavor brings comfort and nostalgia. Whether you make them for Valentine’s Day, Christmas, or a random Tuesday afternoon, they’re sure to bring smiles.
Give this recipe a try and let me know what you think. I’m confident these will become your new favorite cookies too!
Red Velvet Cookies
Ingredients
- 1 ¾ cups all-purpose flour
- 2 tablespoons unsweetened cocoa powder
- ½ teaspoon baking soda
- ¼ teaspoon baking powder
- ¼ teaspoon salt
- ½ cup 1 stick unsalted butter, softened to room temperature
- ½ cup brown sugar packed
- ½ cup granulated sugar
- 2 egg yolks room temperature
- 1 teaspoon vanilla extract
- 1 ½ – 2 teaspoons red gel food coloring
- 1 cup white chocolate chips
Instructions
- Preheat your oven to 350°F. Line two baking sheets with parchment paper or silicone baking mats.
- In a medium bowl, sift together the flour, cocoa powder, baking soda, baking powder, and salt. Set aside.
- In a large bowl, use an electric mixer to cream the softened butter with brown sugar and granulated sugar for 2-3 minutes until light, fluffy, and pale in color.
- Add the egg yolks one at a time, beating well after each addition. Mix in the vanilla extract and red gel food coloring until the dough turns a beautiful red color.
- Gradually add the dry ingredient mixture to the wet ingredients. Mix on low speed just until the flour disappears. Do not overmix.
- Use a spatula or wooden spoon to gently fold the white chocolate chips into the dough until evenly distributed.
- Use a cookie scoop or spoon to portion balls of dough onto your prepared baking sheets, leaving about 2 inches of space between each cookie.
- Bake for 10-12 minutes. The edges should look set, but the centers should still appear slightly soft.
- Let the cookies cool on the baking sheet for 5 minutes, then carefully transfer them to a wire rack to cool completely.
Notes
Freezing cookies: Freeze baked cookies for up to 3 months. Thaw at room temperature for 30 minutes before serving.
Freezing dough: Freeze unbaked dough balls for up to 3 months. Bake directly from frozen, adding 1-2 extra minutes to baking time.
Food coloring: Gel coloring is more concentrated than liquid. If using liquid food coloring, start with 1 tablespoon and add more as needed.
Natural coloring: Substitute with 1-2 tablespoons beet juice or 1 teaspoon beet powder for a natural alternative.
Butter temperature: Butter should be soft enough to leave an indentation when pressed, but not melted.
Egg substitution: Can use 1 whole egg instead of 2 egg yolks, though texture will be slightly more cake-like.
Prevent spreading: If dough feels too soft, chill for 15-20 minutes before baking.Claude can make mistakes. Please double-check responses.


