

There’s something magical about Red Velvet Crinkle Cookies during the holiday season. I’ve been making these festive treats for years now. They never fail to impress my family and friends.
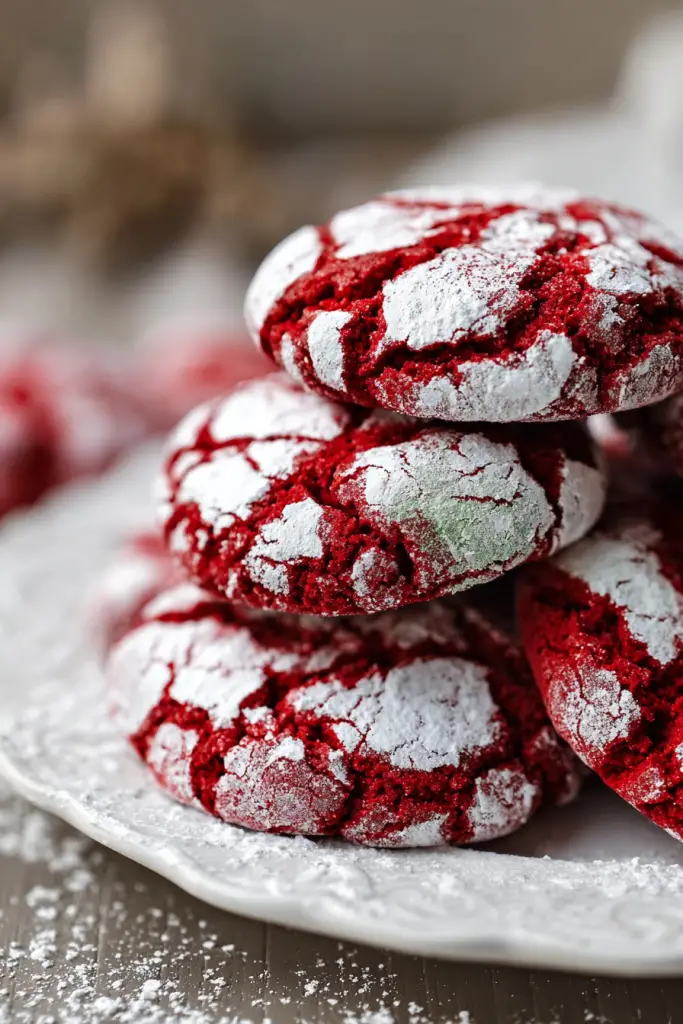
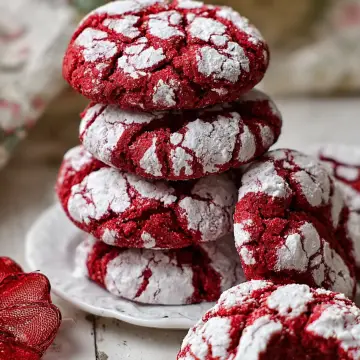
These cookies combine the best of both worlds. You get that classic red velvet flavor with a stunning crackled appearance. The powdered sugar coating creates beautiful white fissures as the cookies bake.
I remember the first time I made crinkle cookies. I was amazed by how the simple rolling technique created such an elegant look. The cookies spread and crack in the oven, revealing that gorgeous red color underneath.
What Makes Crinkle Cookies Special
Crinkle cookies are unique in the cookie world. They start as dough balls rolled in powdered sugar. During baking, they spread and create those signature cracks. The result is a cookie that looks as good as it tastes.
The texture is incredibly soft and chewy. That’s what keeps people coming back for more. Unlike crispy cookies, these have a cake-like interior that melts in your mouth.
Red velvet adds another layer of appeal. The subtle cocoa flavor pairs perfectly with the sweet vanilla notes. That vibrant red color makes these cookies perfect for Christmas celebrations.
Why You’ll Love This Recipe
I’ve tested this recipe countless times over the years. It’s incredibly reliable and produces consistent results. Even beginner bakers can achieve professional-looking cookies.
The ingredient list is straightforward. You probably have most items in your pantry already. No fancy equipment or special techniques are required here.
These cookies are versatile for any occasion. They work beautifully for holiday cookie exchanges. I’ve also made them for Valentine’s Day and birthday parties.
The make-ahead factor is another huge plus. You can prepare the dough in advance. Just chill it until you’re ready to bake.
Recipe Timing & Details
Prep Time: 10 minutes
Cook Time: 15 minutes
Chill Time: 60 minutes
Total Time: 1 hour 25 minutes
Servings: 24 cookies
Difficulty: Easy
Ingredients & Instructions
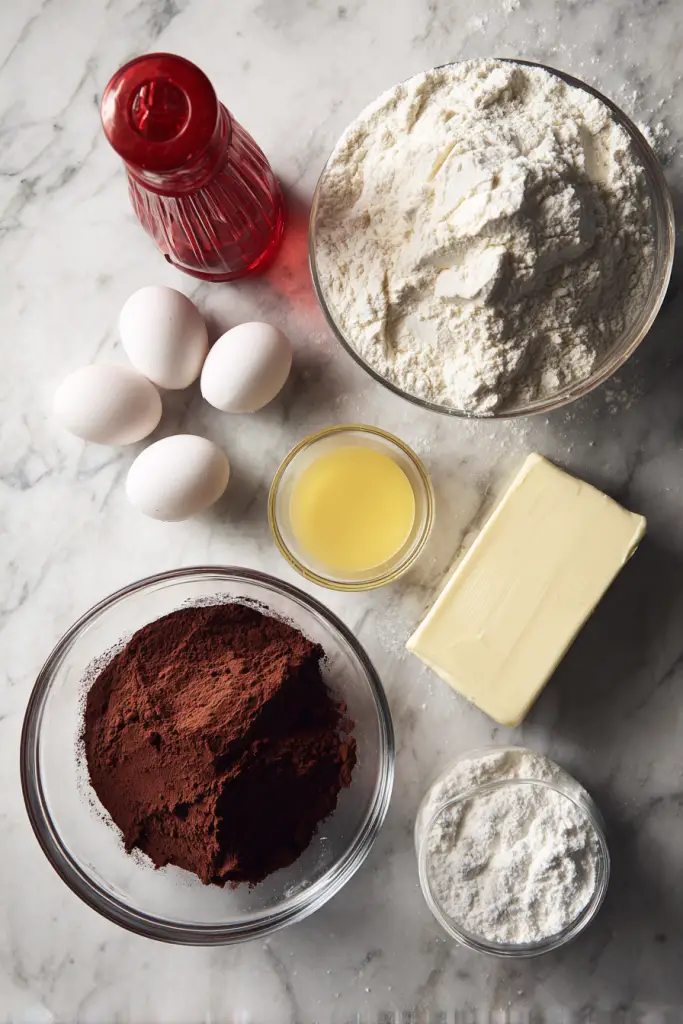
Ingredients You Will Need
Let me walk you through each ingredient and why it matters. Understanding your ingredients leads to better baking results.
| Ingredient | Quantity | Notes |
|---|---|---|
| All-purpose flour | 3 cups | Provides structure; spoon and level for accuracy |
| Unsweetened cocoa powder | 1/4 cup | Creates subtle chocolate flavor; Dutch-process works too |
| Baking powder | 2 tsp | Helps cookies rise and spread properly |
| Baking soda | 1/4 tsp | Works with acidity for better texture |
| Salt | 3/4 tsp | Enhances flavors; don’t skip this |
| Unsalted butter | 3/4 cup | Should be softened to room temperature |
| Granulated sugar | 1 1/3 cups | Adds sweetness and helps with texture |
| Large eggs | 3 | Brings moisture and binds ingredients |
| Milk | 1 Tbsp | Any milk works; adds moisture |
| Vanilla extract | 1 1/2 tsp | Pure vanilla recommended for best flavor |
| Red food coloring | 5 tsp | Liquid or gel works; adjust for desired color |
| Powdered sugar | 1 cup | For rolling; creates the crinkle effect |
Flour: I always measure my flour by spooning it into the cup. Scooping directly can pack too much flour. This leads to dry, dense cookies.
Cocoa Powder: The unsweetened variety is essential here. It provides that subtle chocolate undertone. You can use regular or Dutch-process cocoa.
Butter: Room temperature butter is crucial for proper creaming. It should be soft enough to leave an indent. Cold butter won’t incorporate well with the sugar.
Food Coloring: I prefer liquid red food coloring for this recipe. Gel coloring works too but is more concentrated. Start with less and add more as needed.
How To Make Red Velvet Crinkle Cookies
Let me guide you through each step of this simple process. Take your time and enjoy the baking experience.
Step 1: Prepare Dry Ingredients
Grab a medium bowl and whisk together your dry ingredients. Combine the flour, cocoa powder, baking powder, baking soda, and salt. Make sure everything is evenly distributed. Set this bowl aside for now.
Step 2: Cream Butter and Sugar
In a large bowl or stand mixer, add your softened butter. Pour in the granulated sugar on top. Beat these together on medium-high speed for about three minutes. The mixture should look light and fluffy.
This creaming process is important. It incorporates air into your cookies. That air creates a better texture when baking.
Step 3: Add Eggs and Wet Ingredients
Reduce your mixer speed to medium. Add the eggs one at a time to the butter mixture. Make sure each egg is fully incorporated before adding the next.
Pour in the milk and vanilla extract. Add your red food coloring now too. Mix everything until the color is evenly distributed throughout.
Pro tip: The dough will look very red at this stage. Don’t worry if it seems too bright. The color mellows slightly during baking.
Step 4: Combine Wet and Dry Mixtures
Turn your mixer to low speed now. Gradually add the dry ingredient mixture to the wet ingredients. Add it in three or four additions.
Mix just until no flour streaks remain visible. Don’t overmix the dough at this point. Overmixing can lead to tough cookies.
Step 5: Chill the Dough
Cover your bowl with plastic wrap or a lid. Place it in the refrigerator for at least one hour. This chilling step is not optional.
Cold dough is easier to handle and shape. It also prevents the cookies from spreading too much. I sometimes chill mine overnight for convenience.
Step 6: Shape and Coat
Preheat your oven to 350°F while the dough chills. Line two baking sheets with parchment paper.
Remove the chilled dough from the fridge. Scoop out portions using a cookie scoop or tablespoon. Roll each portion into a smooth ball.
Place the powdered sugar in a shallow bowl. Roll each dough ball generously in the sugar. Make sure they’re completely coated.
Pro tip: Press the dough ball gently into the sugar. This helps it stick better and creates better cracks.
Step 7: Bake to Perfection
Arrange the coated balls on your prepared baking sheets. Space them about two inches apart. They will spread during baking.
Bake for 13 to 15 minutes total. The cookies are done when the edges look set. The centers might still look slightly soft.
Let the cookies cool on the baking sheet for five minutes. This cooling time is important. Moving them too soon can cause breaking.
Transfer to a wire rack to cool completely. The cookies will firm up as they cool.
Tips, Storage & FAQs
Expert Tips for Success
I’ve learned several tricks over the years. These tips will help you make perfect crinkle cookies every time.
Don’t Skip the Chilling: Warm dough spreads too much in the oven. It also becomes sticky and difficult to handle. Plan ahead and give yourself enough chill time.
Generous Sugar Coating: Really pack on that powdered sugar coating. A thick layer creates the best cracking effect. Don’t be shy with the sugar.
Watch the Baking Time: These cookies can go from perfect to overdone quickly. Start checking at 12 minutes. The centers should still look slightly underbaked.
Uniform Size: Use a cookie scoop for consistent sizing. This ensures all cookies bake evenly. I use a two-tablespoon scoop for mine.
Storing Your Cookies
Proper storage keeps your cookies fresh and delicious longer. Here’s what works best for me.
Room Temperature: Store cookies in an airtight container at room temperature. They stay fresh for three to four days. Layer them between parchment paper if stacking.
Refrigeration: You can refrigerate these cookies if you prefer. They’ll last up to one week in the fridge. Let them come to room temperature before serving.
Freezing: These cookies freeze beautifully for up to three months. Freeze them in a single layer first. Then transfer to a freezer bag once solid.
Dough Storage: You can also freeze the unbaked dough balls. Roll them in sugar before freezing. Bake directly from frozen, adding one or two minutes.
Variations to Try
Once you master the basic recipe, try these fun variations. They add new flavors while keeping that signature look.
White Chocolate Chips: Fold in half a cup of white chocolate chips. They complement the red velvet flavor beautifully. Add them right before chilling the dough.
Cream Cheese Frosting Center: Make a cream cheese filling for stuffed cookies. Roll the dough around a frozen ball of frosting. These taste like red velvet cake.
Peppermint Twist: Add half a teaspoon of peppermint extract to the dough. Use crushed candy canes mixed with powdered sugar for coating. Perfect for Christmas parties.
Mini Cookies: Make smaller dough balls for bite-sized treats. Reduce baking time to 10 to 12 minutes. These are great for cookie platters.
Troubleshooting Common Issues
Even experienced bakers encounter problems sometimes. Here’s how to fix common crinkle cookie issues.
Cookies Spread Too Much: Your dough was probably too warm. Make sure it’s properly chilled before baking. Also check that your butter wasn’t melted.
No Cracks Forming: You might need more powdered sugar coating. The sugar layer needs to be thick enough. Try rolling the balls twice in sugar.
Dry or Crumbly Texture: This usually means too much flour was added. Remember to spoon and level your flour. Don’t pack it into the measuring cup.
Color Too Pale: Add more food coloring to your dough. The color fades slightly during baking. Start with the recommended amount and adjust.
Frequently Asked Questions
Can I use gel food coloring instead of liquid?
Yes, gel food coloring works perfectly fine. It’s actually more concentrated than liquid coloring. Start with one to two teaspoons and add more as needed. Mix thoroughly to avoid streaks in your dough.
Why do my cookies need to chill for an hour?
Chilling firms up the butter in the dough. This prevents excessive spreading during baking. Cold dough also handles much better when rolling. You can even chill overnight for convenience.
Can I make these cookies without red food coloring?
Absolutely, you can omit the food coloring entirely. You’ll have chocolate crinkle cookies instead of red velvet. They’ll still taste delicious with that subtle cocoa flavor. The crackle effect will still work beautifully.
How do I know when the cookies are done?
Look for set edges and slightly soft centers. The cookies continue cooking on the hot pan. They should look barely underdone when you remove them. A toothpick inserted will have a few moist crumbs.
Can I substitute the all-purpose flour with another type?
All-purpose flour works best for this recipe’s texture. Cake flour makes them too delicate and crumbly. Bread flour creates a chewier, denser cookie. I recommend sticking with all-purpose for best results.
Final Thoughts
Red Velvet Crinkle Cookies have become a staple in my baking rotation. They’re beautiful, delicious, and surprisingly easy to make. The wow factor is impressive for such a simple recipe.
These cookies bring joy to every occasion. I love seeing people’s faces when they see them. The combination of flavor and appearance is unbeatable.
Don’t be intimidated by the crackle effect. The technique is actually quite simple once you try it. Follow the steps and you’ll have gorgeous cookies.
I hope you enjoy making and eating these as much as I do. They’re perfect for sharing with loved ones. Happy baking, and may your cookies crackle beautifully!
Red Velvet Crinkle Cookies
Ingredients
- 3 cups all-purpose flour
- 1/4 cup unsweetened cocoa powder
- 2 tsp baking powder
- 1/4 tsp baking soda
- 3/4 tsp salt
- 3/4 cup unsalted butter softened to room temperature
- 1 1/3 cups granulated sugar
- 3 large eggs
- 1 Tbsp milk
- 1 1/2 tsp vanilla extract
- 5 tsp red food coloring liquid or gel
- 1 cup powdered sugar for rolling
Instructions
- Prepare Dry Ingredients
- In a medium bowl, whisk together the flour, cocoa powder, baking powder, baking soda, and salt until evenly distributed. Set aside.
- Cream Butter and Sugar
- In a large bowl or stand mixer, beat the softened butter and granulated sugar on medium-high speed for about 3 minutes until light and fluffy.
- Add Eggs and Wet Ingredients
- Reduce mixer speed to medium. Add eggs one at a time, mixing well after each addition. Add milk, vanilla extract, and red food coloring. Mix until color is evenly distributed.
- Combine Wet and Dry Mixtures
- Turn mixer to low speed. Gradually add the dry ingredient mixture in 3-4 additions. Mix just until no flour streaks remain. Do not overmix.
- Chill the Dough
- Cover bowl with plastic wrap and refrigerate for at least 1 hour (or overnight for convenience).
- Shape and Coat
- Preheat oven to 350°F. Line two baking sheets with parchment paper. Scoop chilled dough and roll into balls. Place powdered sugar in a shallow bowl and roll each ball generously until completely coated.
- Bake
- Arrange coated balls on prepared baking sheets, spacing them 2 inches apart. Bake for 13-15 minutes until edges are set but centers still look slightly soft.
- Cool
- Let cookies cool on baking sheet for 5 minutes, then transfer to a wire rack to cool completely.
Notes
Sugar Coating: Apply a generous, thick layer of powdered sugar for the best cracking effect.
Baking Time: Start checking at 12 minutes. Centers should look slightly underbaked as they continue cooking on the hot pan.
Food Coloring: Gel food coloring is more concentrated. Start with 1-2 tsp if using gel instead of liquid.
Storage: Store in an airtight container at room temperature for 3-4 days, refrigerate for up to 1 week, or freeze for up to 3 months.
Make-Ahead: Dough can be prepared in advance and chilled until ready to bake. Unbaked dough balls can also be frozen and baked directly from frozen (add 1-2 minutes to baking time).Claude can make mistakes. Please double-check responses.


