

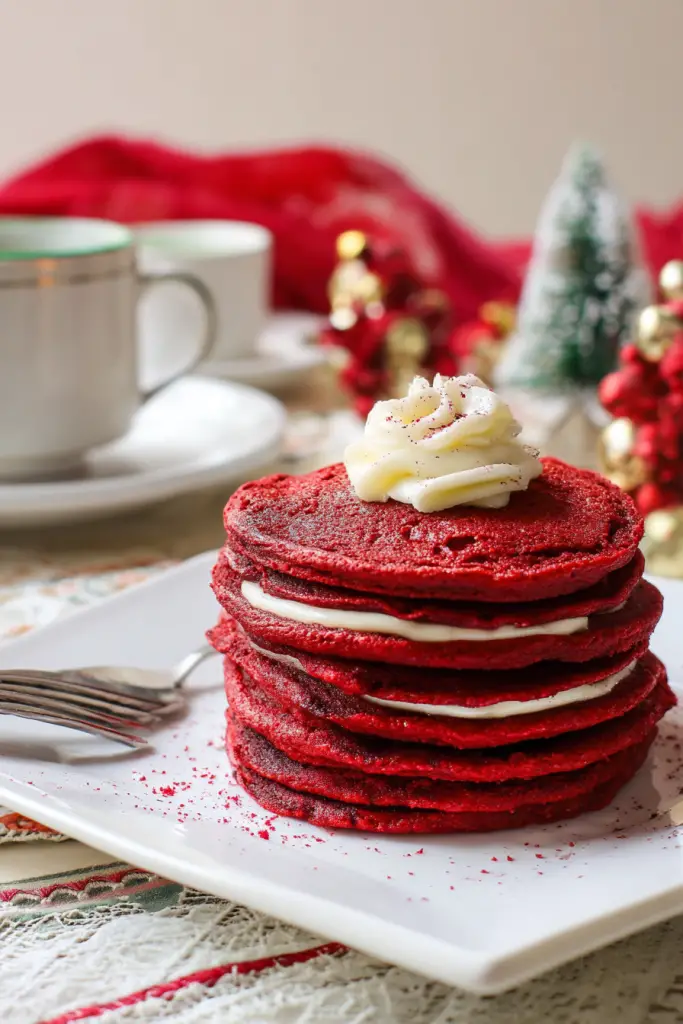
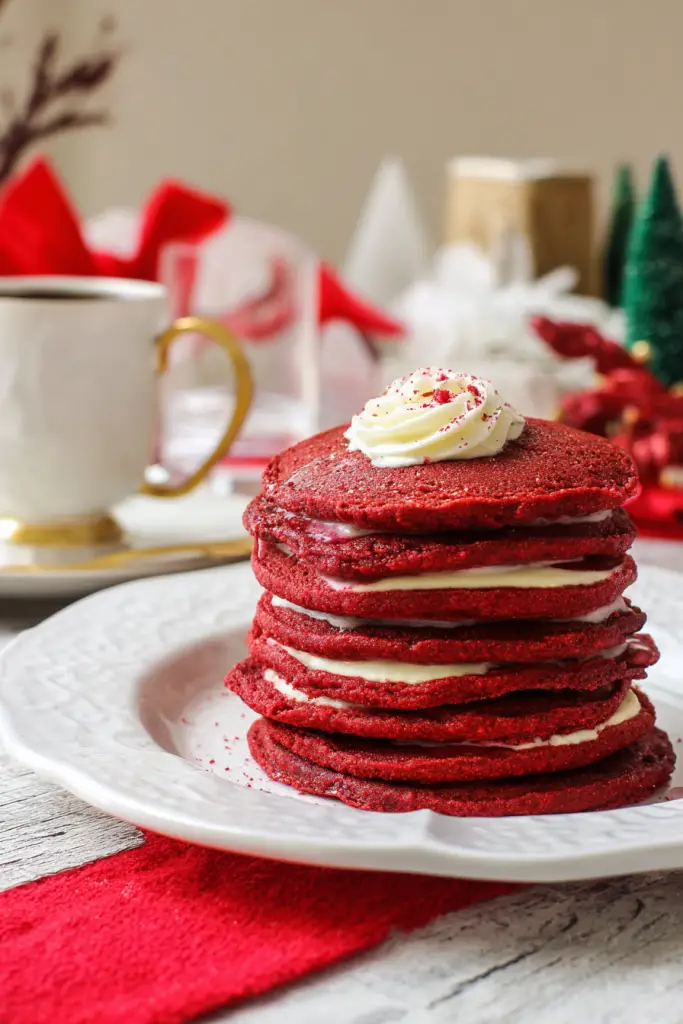
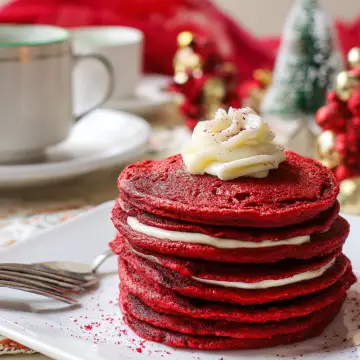
These Red Velvet Pancakes are absolutely delightful. I’ve made them countless times for my family, and they never disappoint. The fluffy texture combined with that signature cocoa flavor makes every bite special. What really sets these apart is the gorgeous red color and the cream cheese swirl on top.
I first made these pancakes on a Valentine’s Day morning. My family fell in love instantly. Now, they’re our go-to breakfast for special occasions. Whether it’s Christmas morning or a birthday brunch, these pancakes always steal the show. The best part? They’re surprisingly simple to make.

Why You’ll Love This Recipe
I appreciate how versatile these pancakes are. You can dress them up with fancy toppings or keep things simple. The cocoa powder gives them a subtle chocolate flavor that’s not overwhelming. My kids think they’re getting dessert for breakfast, which makes mornings much easier.
The cream cheese swirl takes these from good to absolutely incredible. It adds a tangy richness that balances the sweetness perfectly. Trust me, once you try these, regular pancakes will seem boring. Every time I serve them, guests ask for the recipe.
Ingredients You’ll Need
This recipe uses straightforward ingredients you probably have in your pantry. I love that I don’t need specialty items. Everything comes together quickly, making these perfect for busy mornings. The combination creates that classic red velvet flavor we all adore.
For the Pancakes:
- Flour: All-purpose flour works perfectly here. It creates the right texture.
- Sugar: Granulated sugar adds just enough sweetness to the batter.
- Salt: This enhances all the flavors beautifully.
- Baking Powder: This helps the pancakes rise and get fluffy.
- Eggs: Large eggs bind everything together nicely.
- Milk: Whole milk gives the best results, though any milk works.
- Vegetable Oil: This keeps the pancakes moist and tender.
- Cocoa Powder: Unsweetened cocoa powder provides that red velvet flavor.
- Red Food Coloring: This creates the iconic vibrant red color.
- Butter: Used for greasing the griddle.
For the Cream Cheese Swirl:
- Cream Cheese: Make sure it’s softened to room temperature.
- Powdered Sugar: This sweetens the swirl perfectly.
- Vanilla Extract: Pure vanilla gives the best flavor.
- Milk: Just a splash to thin the mixture.
Ingredient Details Table
| Ingredient | Quantity | Notes |
|---|---|---|
| Flour | 2 1/2 cups | All-purpose flour recommended |
| Granulated Sugar | 3 tablespoons | For pancake batter |
| Salt | 3/4 teaspoons | Enhances flavor |
| Baking Powder | 2 tablespoons | Ensures fluffy pancakes |
| Eggs | 2 large | Room temperature preferred |
| Milk | 2 1/4 cups + 1 tbsp | Divided use |
| Vegetable Oil | 3/4 cup | Or coconut oil |
| Cocoa Powder | 1/2 cup | Unsweetened |
| Red Food Coloring | As needed | Gel or liquid works |
| Butter | 2 tablespoons | For cooking |
| Cream Cheese | 4 ounces | Softened |
| Powdered Sugar | 1 cup | For swirl |
| Vanilla Extract | 1/2 teaspoon | Pure preferred |
Prep Time: 10 minutes | Cook Time: 15 minutes | Total Time: 25 minutes
Servings: 4 | Difficulty: Easy
Cooking Instructions & Tips
How to Make Red Velvet Pancakes
Making these pancakes is easier than you might think. I’ve streamlined the process over many attempts. Now, I can whip up a batch in under 30 minutes. The key is having everything measured and ready before you start.
Step 1: Prepare the Wet Ingredients
I start by cracking the eggs into a large mixing bowl. Whisk them thoroughly until completely broken up. This takes about 30 seconds. Then, I add the granulated sugar and whisk vigorously. The mixture should become light and slightly fluffy. This step is important for texture.
Next, pour in the milk and vegetable oil. Whisk everything together until well combined. The mixture should look smooth and uniform. Don’t worry if it seems thin at this point. That’s exactly what you want.
Step 2: Add the Dry Ingredients
Now, add the flour and baking powder to your wet ingredients. I prefer to mix gently here. Use a wooden spoon or whisk in a folding motion. The batter will be lumpy, and that’s perfectly fine. Overmixing creates tough pancakes, so resist the urge to smooth everything out.
Step 3: Create the Red Velvet Base
This is where the magic happens. Stir in the cocoa powder gradually. Make sure it’s evenly distributed throughout the batter. Then, add your red food coloring. I usually start with about 1-2 tablespoons of liquid coloring. Add more if you want a deeper red. Mix until the color is consistent throughout.
Let the batter rest for 5 minutes. This allows the flour to hydrate properly. The baking powder also starts working during this time. Your pancakes will be much fluffier because of this simple step.
Step 4: Make the Cream Cheese Swirl
While the batter rests, prepare your cream cheese mixture. Combine softened cream cheese, powdered sugar, vanilla, and 1 tablespoon of milk in a small bowl. Beat until smooth and creamy. The mixture should be thick but pourable. If it’s too thick, add a tiny bit more milk.
Transfer the mixture to a piping bag. No piping bag? Use a zip-top bag instead. Just snip off a small corner. Set this aside until you’re ready to use it.
Step 5: Cook the Pancakes
Heat your griddle to medium heat. This temperature is crucial for even cooking. Add the butter and let it melt completely. When the butter starts to sizzle, you’re ready to cook. If it browns immediately, your heat is too high.
Pour about 1/2 cup of batter onto the griddle for each pancake. I can usually fit 3-4 pancakes at once. Leave space between them for flipping. The batter will spread slightly as it cooks.
Step 6: Add the Swirl
Once you pour the batter, work quickly. Squeeze the cream cheese mixture onto each pancake in a swirling motion. Start from the center and spiral outward. The swirl will sink slightly into the batter. This creates beautiful marbled patterns when you flip.
Step 7: Flip and Finish
Watch for signs that the pancakes are ready to flip. The edges will start to look set and slightly brown. Small bubbles will form on the surface and pop. This usually takes about 2-3 minutes.
Flip the pancakes carefully with a wide spatula. Cook for another 1-2 minutes on the second side. The swirl side should be facing up now. The pancakes are done when they spring back when lightly pressed.
Pro Tips for Perfect Pancakes
I’ve learned several tricks that make these pancakes even better. First, don’t overmix the batter. Lumps are your friend here. They disappear during cooking and result in tender pancakes.
Second, maintain consistent heat on your griddle. Too hot, and the outside burns before the inside cooks. Too cool, and you get tough, dense pancakes. Medium heat is the sweet spot.
Third, make sure your cream cheese is truly softened. Cold cream cheese won’t mix smoothly. Leave it out for at least 30 minutes before starting. This makes a huge difference in the swirl’s texture.
Equipment You’ll Need
Having the right tools makes cooking these pancakes much easier. Here’s what I always use:
- Griddle or Large Skillet: A griddle cooks multiple pancakes at once.
- Wide Spatula: Essential for flipping without breaking.
- Piping Bag: Makes adding the swirl so much easier.
- Wire Whisk: For smooth batter mixing.
- Large Mixing Bowl: You need plenty of room to mix.
- Measuring Cups and Spoons: Accuracy matters in baking.
- Small Bowl: For mixing the cream cheese swirl.
Serving Suggestions
These pancakes are delicious on their own, but toppings take them to another level. I love serving them with warm maple syrup. The classic combination never gets old. Fresh berries add a nice tart contrast to the sweetness.
You can also add extra cream cheese swirl on top. My kids love chocolate chips sprinkled over them. Whipped cream makes them feel extra special. Powdered sugar dusted on top looks beautiful for photos.
Storage, Variations & FAQs
How to Store Leftovers
Leftover pancakes store beautifully, which I love. Let them cool completely first. This prevents condensation from making them soggy. Stack them with parchment paper between each pancake. This keeps them from sticking together.
Place the stack in a resealable plastic bag or airtight container. They’ll keep in the refrigerator for up to 3 days. Reheat them in the microwave for 20-30 seconds. You can also warm them in a toaster for crispy edges.
Freezing Instructions
I often make a double batch and freeze extras. These pancakes freeze exceptionally well. Arrange cooled pancakes in a single layer on a baking sheet. Freeze until solid, about 1-2 hours. This prevents them from sticking together.
Transfer the frozen pancakes to a freezer-safe bag. Remove as much air as possible before sealing. They’ll last up to 3 months in the freezer. Label the bag with the date for easy tracking.
To reheat, you have several options. Microwave individual pancakes for 45-60 seconds. Use a toaster for a crispier texture. Or warm them in a 350°F oven for about 10 minutes.
Recipe Variations
I love experimenting with this basic recipe. Here are some variations I’ve tried and loved:
Chocolate Chip Addition: Sprinkle mini chocolate chips onto the batter after pouring. They melt slightly during cooking, creating pockets of chocolate. This makes the pancakes even more decadent.
White Chocolate Swirl: Replace the cream cheese swirl with melted white chocolate. Drizzle it over the cooked pancakes. The sweetness pairs beautifully with the cocoa.
Red Velvet Waffles: Use the same batter in a waffle maker. Cook according to your waffle maker’s instructions. The crispy edges are incredible.
Mini Pancakes: Make silver dollar-sized pancakes for kids. They’re easier to handle and fun to eat. Cook time reduces to about 1 minute per side.
Common Questions
Can I make the batter ahead of time?
I recommend making the batter fresh for best results. However, you can prepare it up to 2 hours in advance. Store it in the refrigerator. Give it a gentle stir before using. The pancakes may be slightly less fluffy.
What if I don’t have red food coloring?
The pancakes will still taste delicious without it. They’ll be brown instead of red. The flavor remains the same. Red food coloring is purely for appearance.
Can I use a different type of milk?
Yes, absolutely. I’ve used almond milk, oat milk, and buttermilk successfully. Buttermilk adds extra tang and fluffiness. Plant-based milks work perfectly fine. The results are nearly identical.
Why are my pancakes dense?
Overmixing is usually the culprit. Mix the batter just until combined. Lumps are okay and expected. Also, check that your baking powder isn’t expired. Old baking powder won’t provide enough lift.
Can I skip the cream cheese swirl?
Of course! The pancakes are delicious on their own. You can add the swirl on top after cooking instead. Or serve with regular cream cheese frosting on the side. The choice is yours.
Troubleshooting Guide
Pancakes Burning Outside, Raw Inside: Your heat is too high. Reduce to medium-low. Pancakes need gentle, even heat to cook through properly.
Batter Too Thick: Add milk one tablespoon at a time. Mix gently after each addition. The batter should pour easily but not run.
Color Not Vibrant Enough: Add more food coloring gradually. Gel food coloring produces more intense colors. Liquid coloring works but requires more product.
Cream Cheese Swirl Too Thick: Add milk in small amounts until pourable. The mixture should flow easily through the piping bag. It shouldn’t be runny though.
Final Thoughts
These Red Velvet Pancakes have become a family favorite in my home. I love how they transform ordinary mornings into special occasions. The combination of flavors and textures is absolutely perfect. They’re impressive enough for guests but simple enough for everyday cooking.
The best part is watching everyone’s faces when they take their first bite. The fluffy texture and cream cheese swirl create an unforgettable breakfast experience. I hope your family loves them as much as mine does.
Don’t be intimidated by the red color or the swirl. Everything comes together easily with a little practice. Soon, you’ll be making these as effortlessly as regular pancakes. They’re worth every minute of preparation.
Frequently Asked Questions
1. Can I substitute cocoa powder with melted chocolate?
I don’t recommend this substitution. Cocoa powder provides the right consistency for the batter. Melted chocolate adds too much fat and liquid. This changes the texture significantly. Stick with cocoa powder for best results.
2. How do I prevent the pancakes from sticking to the griddle?
Make sure your griddle is properly heated before adding batter. Use enough butter to coat the surface lightly. A well-seasoned or non-stick griddle works best. If they still stick, your heat might be too low.
3. Can I make these dairy-free?
Yes, with some modifications. Use non-dairy milk and vegetable oil as the recipe calls. For the swirl, use dairy-free cream cheese. The results are slightly different but still delicious.
4. What’s the best way to get an even red color?
Mix the food coloring thoroughly into the batter. Use gel food coloring for more intense color with less product. Liquid coloring works but requires more. Add gradually until you reach your desired shade.
5. Can kids help make these pancakes?
Absolutely! Kids can help measure ingredients and mix the batter. They can also add the cream cheese swirl with supervision. It’s a fun family activity. Just keep them away from the hot griddle.
Nutritional Information (Per Serving): Calories: 520 | Protein: 10g | Carbohydrates: 68g | Fat: 24g | Fiber: 3g | Sugar: 28g
Note: Nutritional values are approximate and may vary based on specific ingredients used.
Enjoy your delicious Red Velvet Pancakes!
Red Velvet Pancakes with Cream Cheese Swirl
Ingredients
- For the Pancakes:
- 2 1/2 cups all-purpose flour
- 3 tablespoons granulated sugar
- 3/4 teaspoon salt
- 2 tablespoons baking powder
- 2 large eggs room temperature preferred
- 2 1/4 cups milk
- 3/4 cup vegetable oil or coconut oil
- 1/2 cup unsweetened cocoa powder
- Red food coloring gel or liquid as needed
- 2 tablespoons butter for cooking
- For the Cream Cheese Swirl:
- 4 ounces cream cheese softened
- 1 cup powdered sugar
- 1/2 teaspoon pure vanilla extract
- 1 tablespoon milk
Instructions
- Prepare the Wet Ingredients:
- Crack the eggs into a large mixing bowl and whisk thoroughly for about 30 seconds. Add the granulated sugar and whisk vigorously until light and slightly fluffy. Pour in 2 1/4 cups milk and vegetable oil. Whisk everything together until smooth and uniform.
- Add the Dry Ingredients:
- Add the flour and baking powder to the wet ingredients. Mix gently using a wooden spoon or whisk in a folding motion. The batter will be lumpy, which is perfectly fine. Do not overmix.
- Create the Red Velvet Base:
- Stir in the cocoa powder gradually until evenly distributed. Add 1-2 tablespoons of red food coloring (add more for deeper color) and mix until consistent throughout. Let the batter rest for 5 minutes.
- Make the Cream Cheese Swirl:
- While the batter rests, combine softened cream cheese, powdered sugar, vanilla, and 1 tablespoon milk in a small bowl. Beat until smooth and creamy. The mixture should be thick but pourable. Transfer to a piping bag or zip-top bag with a corner snipped off.
- Cook the Pancakes:
- Heat griddle to medium heat. Add butter and let it melt completely. When the butter sizzles, pour about 1/2 cup of batter onto the griddle for each pancake, leaving space between them.
- Add the Swirl:
- Immediately squeeze the cream cheese mixture onto each pancake in a swirling motion, starting from the center and spiraling outward.
- Flip and Finish:
- When edges look set and small bubbles form on the surface (about 2-3 minutes), flip the pancakes carefully with a wide spatula. Cook for another 1-2 minutes on the second side until pancakes spring back when lightly pressed.
- Serve:
- Serve warm with maple syrup, fresh berries, whipped cream, or additional cream cheese swirl.
Notes
Reheating: Microwave for 20-30 seconds, toast for crispy edges, or warm in a 350°F oven for 10 minutes.
Pro Tips: Don’t overmix the batter – lumps are okay. Maintain medium heat for even cooking. Ensure cream cheese is truly softened (room temperature for 30 minutes) for a smooth swirl.
Variations: Add mini chocolate chips, use buttermilk for extra tang, make waffles with the same batter, or create mini silver dollar pancakes.
Substitutions: Any milk works (almond, oat, buttermilk). Food coloring is optional – pancakes will be brown but taste the same.Claude can make mistakes. Please double-check responses.


