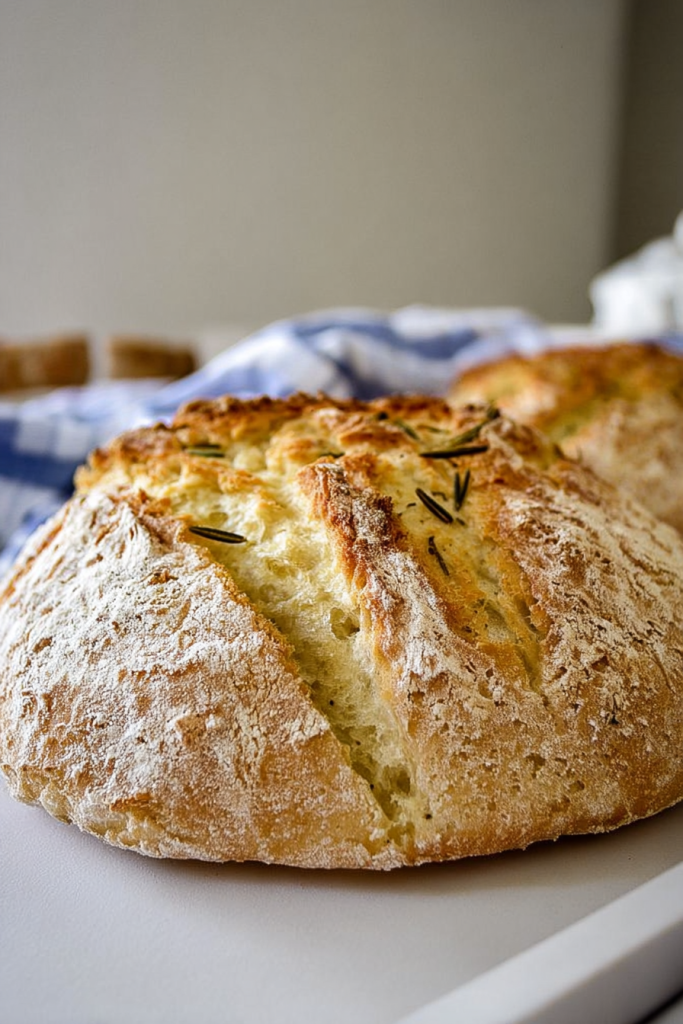
You know that moment when you pull a fresh loaf from the oven?
The crust crackles. The smell hits you. Your whole kitchen transforms into something out of a French bakery.
That’s what we’re making today.
I’m talking about crusty roasted garlic and rosemary bread that looks fancy but honestly? It’s so easy. Like, surprisingly easy.
Here’s my story with this bread. I used to be intimidated by artisan loaves. I thought you needed years of practice or some expensive mixer sitting on your counter. Wrong. So wrong.
Then I tried this recipe.
Now? I make it almost every week. My kids ask for it. My husband requests it. Even my neighbor “accidentally” stops by on baking days.
Why You’ll Love This Recipe
Look, I’m not going to sugarcoat it. Bread baking can be tricky.
But this one? It’s forgiving.
You don’t need fancy equipment. No stand mixer. No breadmaker collecting dust in your garage. Just your hands, a bowl, and patience. About three hours worth.
The Dutch oven method does something special here. It traps steam while baking. And that steam? That’s your secret weapon for getting that restaurant-quality crust.
Let me tell you about the roasted garlic situation. Raw garlic can be harsh and punchy. But roast it? Everything changes. It becomes sweet. Buttery. Almost caramelized. Those soft cloves melt right into your dough.
And the rosemary. Oh, the rosemary.
Fresh rosemary has this piney, earthy thing going on. It balances the sweetness of the garlic perfectly. You get these little flavor bursts in every bite.
Now, fair warning. This dough is wetter than what you might be used to.
Don’t freak out when it looks sticky.
That’s on purpose. That moisture is what creates the soft, airy inside. You want that contrast – crunchy outside, tender inside. Trust me on this.
When I Make This Bread
I serve this alongside pretty much anything. Soup? Yes. Pasta? Absolutely.
Just good olive oil for dipping? Even better.
It turns a regular Tuesday dinner into something special. And when guests come over? They think I spent hours. Little do they know.
Here’s the breakdown:
- Roasting garlic: 40 minutes (mostly hands-off)
- Mixing dough: 15 minutes
- First rise: 1 hour (walk away, do your thing)
- Shaping: 5 minutes
- Second rise: 30 minutes (perfect for tidying up)
- Baking: 40-50 minutes
The actual work? Under 30 minutes.
Everything else happens while you’re doing laundry or scrolling through your phone. Perfect for busy people.
Mix It Up
This recipe is flexible.
No fresh rosemary? Dried works fine. Feeling fancy? Throw in some parmesan cheese. Want to swap rosemary for thyme? Go for it.
I’ve even added black pepper when I’m feeling spicy.
Every version tastes amazing.
About the Dutch Oven Thing
A Dutch oven creates the perfect little baking environment. That heavy lid locks in steam. Steam equals crispy crust.
But here’s the thing.
Don’t own one? No problem. I’ve got workarounds. You can still make incredible bread with a regular baking dish or cast iron skillet.
The beauty here is simplicity.
First-time bread baker? You can do this.
Experienced home cook? You’ll love how reliable this is.
Let’s get into the details and start baking.
How to Actually Make This Bread
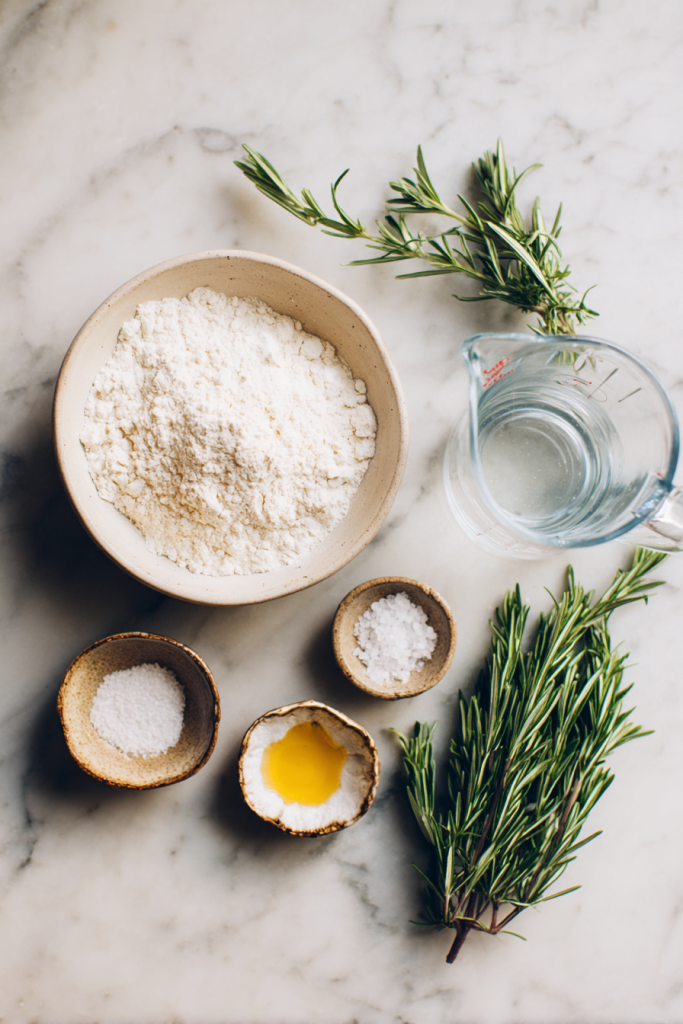
What You Need
The Timeline:
Prep: 20 minutes | Cook: 1 hour 20 minutes | Waiting around: 2 hours | Total: 3 hours 40 minutes
Makes: 8 slices (1 loaf) | Difficulty: Honestly, easy
| Ingredient | Amount | Quick Notes |
|---|---|---|
| Garlic (whole head) | 1 head | The star of the show |
| Olive oil (for garlic) | 1 teaspoon | Extra virgin if you’ve got it |
| Salt | To taste | Just a pinch for the garlic |
| Active dry yeast | 2¼ teaspoons | Check that expiration date |
| Honey or sugar | 1 teaspoon | Wakes up the yeast |
| Warm water | 1¼ cups | Think bathwater temp, around 100°F |
| Kosher salt | 1½ teaspoons | For the actual dough |
| Fresh rosemary (chopped) | 2 tablespoons | Or 1 tbsp dried |
| Roasted garlic cloves | 8-10 cloves | Roughly chopped |
| All-purpose flour | 3 cups (360g) | Keep extra nearby |
| Olive oil (for dough) | 1 tablespoon | Keeps things from sticking |

Let’s Do This
Getting That Garlic Roasted
Crank your oven to 400°F.
Grab your garlic head. Slice off the top – maybe a quarter inch. You want to see all those cloves peeking out.
Pop it in a small oven-safe dish. Something with a lid is perfect.
Drizzle that olive oil over the top. Watch it seep into those cloves. Add a tiny pinch of salt.
Cover it tight. Foil works if you don’t have a lid.
Into the oven it goes. Set a timer for 30 minutes, but it might need up to 45.
How do you know it’s done?
The cloves should be soft. Golden. When you squeeze the head, they should slip out easily. And the smell? Sweet and nutty. Not sharp at all.
Let them cool down completely. Don’t touch them yet – they’re lava-hot.
Pro tip: I usually roast my garlic ahead of time. Even a day or two before. Makes everything smoother on baking day.
Making the Dough
Get yourself a big mixing bowl.
Toss in the yeast, honey, and warm water. Give it a gentle stir. Now walk away for five minutes.
Seriously. Leave it alone.
When you come back, it should look foamy. Bubbly. Like beer foam. That’s your yeast saying “I’m alive and ready to work.”
No bubbles? Your yeast might be dead. Start over with fresh yeast.
Now add the kosher salt, your chopped rosemary, and those cooled roasted garlic cloves. Mix it around a bit.
Time for the flour.
I like adding it in three batches. Makes mixing easier. Grab a wooden spoon or a sturdy spatula.
Mix after each addition. You’re looking for a shaggy dough. It’ll look messy. Sticky. Like it’s not quite right.
That’s perfect.
Don’t overmix. Just bring it together until you don’t see dry flour anymore.
Drizzle that tablespoon of olive oil over the whole thing. Turn the dough a few times. You want oil on all sides. This stops it from sticking to your bowl later.
Grab a clean kitchen towel. Cover the bowl.
The First Wait
Find a warm spot. Somewhere without drafts.
I usually stick mine on the counter near my stove. Not on the stove. Just nearby where it’s cozy.
Set a timer for an hour.
The dough needs to double. It should puff up and get full of air bubbles.
When you peek under that towel (and you will – we all do), you should see lots of bubbles. The dough looks alive.
That’s exactly what we want.
Don’t poke it too much. Just let it do its thing.
Shaping Time
Dust your cutting board with flour. Be generous.
Tip that risen dough out onto the board. Gently. Easy does it.
Here’s where people mess up. Do not punch it down.
I repeat: Don’t punch it.
All those beautiful air bubbles? We’re keeping them.
Think about folding an envelope. Pull one edge toward the middle. Then another edge. Keep going around. Do this four or five times.
Watch what happens. The dough tightens up. Gets stronger. More structured.
Now flip it over.
Cup both hands around the dough. Rotate it gently. Pull it toward yourself at the same time. This creates tension on the surface. Helps your loaf hold its shape.
You’ll end up with a smooth, round ball. Pretty satisfying, honestly.
Dust a small bowl with flour. Or use a proofing basket if you’re fancy.
Place your dough inside. Seam side down. Cover it again.
Another 30-minute wait.
Getting Ready to Bake
While your dough is chilling, put your empty Dutch oven in the oven.
Yes, empty. Trust me.
Crank the heat to 450°F.
This is important. That pot needs to be screaming hot. That’s how you get the crust.
Baking the Bread
Oven’s hot. Pot’s hot. Let’s do this.
Grab your thickest oven mitts. Carefully pull out that Dutch oven. Remove the lid. Set it somewhere safe.
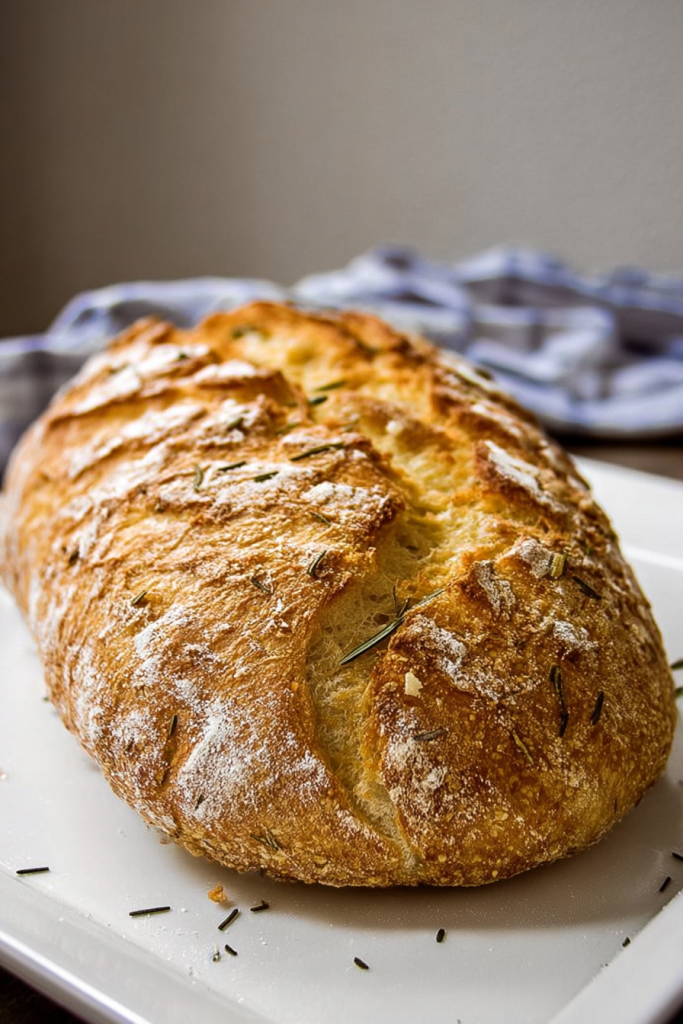
Gently tip your dough back onto your floured cutting board. This time, seam side faces up. That creates those rustic cracks everyone loves.
Now comes the scary part.
Lower that dough into the hot pot. Carefully. Maybe use parchment paper if you’re nervous. I won’t judge.
Slam that lid back on. Slide the whole thing into your oven.
Set your timer. 30 minutes covered.
When the timer goes off, take off the lid. Your bread should be pale golden.
Keep baking. No lid now. Another 10-20 minutes.
You’re watching for color. Deep golden brown. Gorgeous.
When it looks right, pull it out. Use a long spatula to lift the bread onto a cooling rack.
I know it’s tempting. I know it smells incredible.
But wait. At least 20 minutes.
The inside is still cooking. Still setting. Cut too early and you’ll have gummy bread.
No Dutch Oven? No Problem
Option 1: Deep baking dish
Any oven-safe dish works. Cover it with a cookie sheet. Don’t even preheat the dish. Just room temp is fine.
Option 2: Cast iron skillet
Put a small pan of water on your bottom oven rack. Preheat a cast iron skillet like you would a Dutch oven. Bake your bread in the skillet on the rack above.
Steam from that water pan does the magic.
Option 3: Pizza stone
Same deal as the skillet. Water pan below. Stone above.
Making It Work Every Time
Things I’ve Learned the Hard Way
Your yeast needs to be fresh.
Old yeast = flat bread. Just buy new yeast. I keep mine in the freezer. Lasts way longer.
Water temperature is picky.
Too hot? Dead yeast. Too cold? Nothing happens. Aim for lukewarm. Should feel comfortable on your wrist. Like testing baby formula.
Around 100°F if you want to be exact.
Sticky dough is good dough.
This is the hardest thing for people to accept. The dough feels wet. Sticky. Wrong.
It’s not wrong.
That moisture creates the light, open crumb. Only add extra flour if you absolutely can’t handle it during shaping.
Sometimes dough takes longer.
Your kitchen is cold? It’ll take longer than an hour to double.
My kitchen gets chilly in winter. Sometimes my dough needs 90 minutes. That’s fine. Just give it time.
You don’t need to score.
The seam-side-up trick creates natural cracks. Looks rustic. Perfect. No knife skills required.
Storing Your Bread
Same day:
This bread is best fresh. Like, within a few hours.
Leave it uncovered on your counter. Or throw a tea towel over it loosely.
Next few days:
Slice it first. Makes life easier.
Put slices in an airtight container. Into the fridge.
When you want a slice, toast it. Comes right back to life.
Freezer storage:
Slice before freezing. Seriously. You’ll thank me later.
Freezer bags work great. Keeps for three months.
Thaw at room temp. Or toast straight from frozen.
Reheating a whole loaf:
Pop it in a 350°F oven. 5-10 minutes. That fresh-baked texture returns.
One important thing. That roasted garlic means this bread doesn’t last long on the counter. Don’t leave it out overnight.
Fridge or freezer for leftovers.
Questions People Always Ask Me
Can I use dried rosemary?
Yep. Use one tablespoon instead of two. Dried herbs pack more punch. You need less.
The bread tastes just as good.
My dough didn’t rise. What happened?
A few things to check:
First, your yeast. Is it expired? Buy new yeast.
Second, water temperature. Too hot or too cold both cause problems.
Third, where did you put it? Cold rooms mean slow (or no) rising.
Find a warmer spot and try again.
I want to add cheese. How much?
Half a cup of grated parmesan works perfectly. Or asiago if you’re feeling fancy.
Fold it in when you add the flour.
The cheese melts into little pockets throughout. Creates this savory richness that’s just… chef’s kiss.
How do I know when it’s actually done?
Look at the color. Deep golden brown.
Tap the bottom. Should sound hollow.
Got a thermometer? Internal temp should hit around 200°F.
All these together? Perfect bread.
Can I prep stuff ahead?
Absolutely. Roast your garlic a day or two early. Store it in a container in your fridge.
Makes baking day faster and easier.
I actually roast multiple heads at once. Use them throughout the week in different recipes. Pasta. Mashed potatoes. Everything.
My Final Thoughts
This bread has changed my kitchen game.
Sounds dramatic, I know. But it’s true.
It looks impressive. People think you slaved away. But you didn’t. It’s just time and a little patience.
The roasted garlic and rosemary combo is pure magic. Sweet and earthy. Warm and comforting.
Here’s what I want you to do.
Try this recipe soon. Like, this weekend.
Your kitchen will smell incredible. You’ll feel like a real baker pulling that loaf out. Serve it warm with good olive oil. Or next to soup. Or just eat it straight up.
And here’s the secret nobody tells you about bread baking.
It’s forgiving.
Your loaf doesn’t look perfect? Who cares. It’ll still taste amazing.
Each time you make it, you learn something new. The dough feels different. You understand the process better.
Before you know it, you’ll be eyeballing measurements. Making this bread without even glancing at the recipe.
That’s when you know you’ve got it.
Now get in that kitchen and start baking.
You’ve got this.
Crusty Roasted Garlic and Rosemary Bread
Ingredients
Roasted Garlic
- 1 head garlic whole head
- 1 teaspoon olive oil extra virgin
- salt pinch for roasting
Bread Dough
- 2¼ teaspoons active dry yeast
- 1 teaspoon honey or sugar
- 1¼ cups warm water around 100°F
- 1½ teaspoons kosher salt
- 2 tablespoons fresh rosemary chopped, or 1 tbsp dried
- 8-10 cloves roasted garlic roughly chopped
- 3 cups all-purpose flour 360g
- 1 tablespoon olive oil for dough
Instructions
- Preheat oven to 400°F. Slice off the top quarter inch of the garlic head to expose the cloves.
- Place garlic in a small oven-safe dish, drizzle with 1 teaspoon olive oil, and add a pinch of salt. Cover tightly with lid or foil.
- Roast for 30-45 minutes until cloves are soft, golden, and sweet-smelling. Let cool completely, then squeeze out the roasted cloves and chop roughly.
- In a large mixing bowl, combine yeast, honey, and warm water. Stir gently and let sit for 5 minutes until foamy and bubbly.
- Add kosher salt, chopped rosemary, and roasted garlic cloves to the yeast mixture. Stir to combine.
- Add flour in three batches, mixing with a wooden spoon after each addition until a shaggy, sticky dough forms with no dry flour visible.
- Drizzle 1 tablespoon olive oil over the dough and turn several times to coat all sides. Cover bowl with a clean kitchen towel.
- Let dough rise in a warm, draft-free spot for 1 hour or until doubled in size and full of air bubbles.
- Generously dust a cutting board with flour. Gently tip risen dough onto the board without punching it down.
- Fold the dough like an envelope, pulling edges toward the center 4-5 times. Flip over and cup hands around dough, rotating gently while pulling toward you to create surface tension. Form into a smooth ball.
- Place dough seam-side down in a flour-dusted bowl or proofing basket. Cover and let rise for 30 minutes.
- Meanwhile, place empty Dutch oven with lid in the oven and preheat to 450°F.
- Carefully remove hot Dutch oven using thick oven mitts. Remove lid and gently tip dough into pot seam-side up (this creates rustic cracks).
- Cover with lid and bake for 30 minutes.
- Remove lid and continue baking uncovered for 10-20 minutes until deep golden brown.
- Carefully transfer bread to a cooling rack. Let cool for at least 20 minutes before slicing to allow the interior to set.