

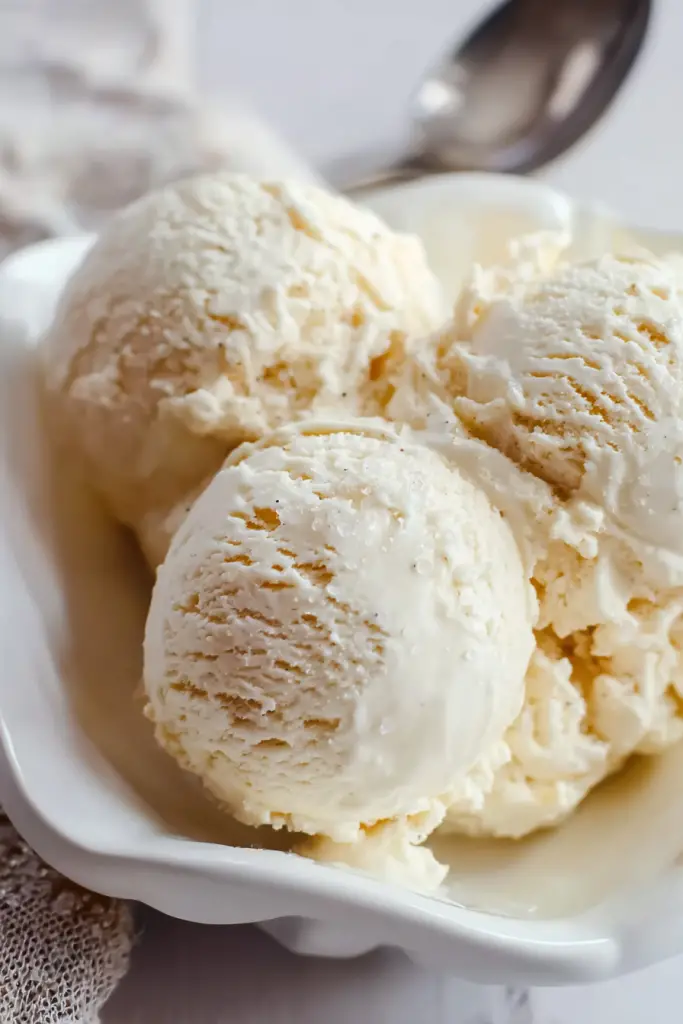
There’s something magical about homemade ice cream that transports you back to simpler times. I’ve been making this salted malted vanilla ice cream for years now. It’s become my go-to dessert when I want something nostalgic yet elevated.
The best part? You don’t need an ice cream maker for this recipe. I know that might sound too good to be true, but trust me on this one. This no-churn method creates incredibly creamy ice cream using just a whisk and an electric mixer.
What Makes This Salted Malted Vanilla Ice Cream Stand Out
I’ve tested dozens of ice cream recipes over the years. This one consistently gets the most enthusiastic reactions from family and friends. Here’s what makes it different from your standard vanilla ice cream.
The Malt Factor
Adding malted milk powder transforms ordinary vanilla ice cream into something extraordinary. It brings a toasted, caramelized sweetness that reminds me of classic malted milkshakes. The flavor is subtle but unmistakable, creating depth you won’t find in regular vanilla.
Sweet and Salty Balance
This recipe contains more salt than typical ice cream. I use both kosher salt in the base and flaky finishing salt on top. The result is a sophisticated balance that keeps you coming back for another spoonful. The salt cuts through the richness beautifully.
No Special Equipment Required
I developed this recipe specifically for home cooks without ice cream makers. You probably have everything you need already in your kitchen. The no-churn method relies on whipped cream for that luxurious, creamy texture.
Incredibly Versatile
While this ice cream shines on its own, it’s also a perfect canvas for add-ins. I’ve mixed in everything from crushed cookies to chocolate chunks. You can customize it to suit any craving or occasion.
Why I Love This Recipe
I started making no-churn ice cream during a particularly hot summer. My ice cream maker had broken, and I refused to go without homemade dessert. After some experimentation, I landed on this winning combination.
The malt powder was actually a happy accident. I had some leftover from making malted chocolate chip cookies. One night, I stirred it into my vanilla ice cream base. The result exceeded my expectations completely.
Now I make this ice cream at least twice a month. It’s perfect for impromptu gatherings since it comes together so quickly. The hardest part is waiting overnight for it to freeze properly.
Recipe Overview: Your Roadmap to Success
Let me walk you through the simple process. This recipe has just four main steps, and none of them are complicated.
Step 1: Create the Base
You’ll whisk together sweetened condensed milk, malted milk powder, vanilla extract, and salt. This forms the foundation of flavor. Make sure the malted milk powder dissolves completely to avoid any lumps.
Step 2: Whip the Cream
Using an electric mixer, whip the heavy cream until stiff peaks form. This step is crucial for achieving that creamy, scoopable texture. Don’t rush it – properly whipped cream makes all the difference.
Step 3: Fold Everything Together
Gently combine the condensed milk mixture with the whipped cream. Use a folding motion to maintain the airiness. This technique ensures your ice cream stays light and creamy rather than dense.
Step 4: Freeze Overnight
Transfer the mixture to a freezer-safe container and let it set. I prefer using a metal loaf pan for easy scooping. The ice cream needs at least eight hours to firm up properly.
Prep Time: 10 minutes | Freeze Time: 8 hours | Total Time: 8 hours 10 minutes
Servings: 8 | Difficulty: Easy
Detailed Recipe Instructions & Success Tips
Ingredients You’ll Need
| Ingredient | Quantity | Notes |
|---|---|---|
| Sweetened condensed milk | 14 oz can | One standard can works perfectly |
| Malted milk powder | ⅓ cup | Carnation or Ovaltine brands work well |
| Pure vanilla extract or vanilla bean paste | 1½ teaspoons | Bean paste adds visible vanilla specks |
| Kosher salt | ½ teaspoon | Diamond Crystal preferred; adjust if using Morton’s |
| Chilled heavy whipping cream | 2½ cups | Must be cold for proper whipping |
| Flaky finishing salt | To taste | Optional garnish – Maldon or fleur de sel |
Step-by-Step Instructions
Preparing the Base Mixture
First, grab a medium mixing bowl and add the sweetened condensed milk. Pour in the malted milk powder, measuring it carefully. Use a whisk to combine these two ingredients thoroughly.
The malted milk powder can clump initially, so whisk vigorously. I like to press any stubborn lumps against the side of the bowl. Continue whisking until you see a smooth, uniform mixture with no dry powder remaining.
Add the vanilla extract and kosher salt to the bowl. Whisk everything together until completely incorporated. The mixture should be silky and aromatic. Set this bowl aside while you whip the cream.
Whipping the Heavy Cream
Pour the chilled heavy cream into a large mixing bowl. Make sure your bowl and beaters are clean and dry. Any residual moisture or fat can prevent proper whipping.
Using an electric mixer on medium-high speed, begin whipping the cream. Start slowly to prevent splattering, then increase the speed gradually. Watch the cream transform from liquid to soft peaks.
Continue whipping until you achieve stiff peaks. The cream should hold its shape firmly when you lift the beaters. This usually takes about four to five minutes. Don’t over-whip, or you’ll end up with butter.
Combining the Mixtures
Here’s where your ice cream comes together. Add about one-third of the whipped cream to the condensed milk mixture. Use a rubber spatula to fold it in gently.
This initial addition lightens the base mixture. It makes the final folding much easier. Once incorporated, add the remaining whipped cream to the bowl.
Fold everything together using a gentle motion. Scrape along the bottom and sides of the bowl. Lift and turn the mixture over itself repeatedly. Continue until you see no streaks remaining.
The final mixture should be light, airy, and uniform in color. You want to maintain as much volume as possible. Aggressive stirring will deflate the whipped cream and create dense ice cream.
Freezing and Storage
Transfer the ice cream mixture to your chosen freezer-safe container. I recommend a metal loaf pan for the best results. Metal conducts cold efficiently and makes scooping easier later.
Smooth the top with a spatula and cover tightly with plastic wrap. Press the wrap directly onto the surface to prevent ice crystals. Then cover the entire pan with aluminum foil for extra protection.
Place the pan in your freezer on a flat surface. Let it freeze for at least eight hours or overnight. The ice cream needs this time to set properly.
My Essential Success Tips
Tip #1: Plan Ahead
This ice cream requires overnight freezing. Make it at least one day before you plan to serve it. I often prepare it two days ahead for important gatherings.
Tip #2: Choose the Right Container
Metal loaf pans are my preferred storage vessel. They freeze the ice cream evenly and make scooping significantly easier. Avoid deep containers that make reaching the bottom difficult.
Tip #3: Keep It Cold
No-churn ice cream softens quickly at room temperature. Leave it in the freezer until the moment you’re ready to serve. Take out only what you’ll eat immediately.
Tip #4: Use Quality Vanilla
Since vanilla is a primary flavor here, use the good stuff. Pure vanilla extract or vanilla bean paste makes a noticeable difference. Skip the imitation vanilla if possible.
Tip #5: Adjust Salt to Taste
Salt preferences vary widely among people. Start with the recommended amount, then adjust in future batches. Some people love extra salt; others prefer less.
Tip #6: Let Your Mixer Do the Work
Whipping cream by hand is exhausting and inconsistent. Use a stand mixer or hand mixer for reliable results. Your arm will thank you.
Customization Options, FAQs & Final Tips
Creative Ways to Customize Your Ice Cream
This base recipe is wonderfully adaptable. I’ve experimented with countless variations over the years. Here are my favorite ways to make it your own.
Mix-In Ideas
You can fold mix-ins into the ice cream base before freezing. I add them right after combining the cream and condensed milk mixtures. Here are some combinations I love:
- Crushed chocolate sandwich cookies for a cookies and cream variation
- Chopped dark chocolate and tart cherries for sophistication
- Crushed toffee bits and pretzel pieces for extra crunch
- Swirls of caramel sauce or fudge ripple
- Chopped nuts like pecans, almonds, or pistachios
Keep mix-ins to about one cup total. Too many additions can prevent proper freezing. Distribute them evenly throughout the mixture for balanced bites.
Topping Suggestions
After the ice cream freezes, you can add toppings when serving. This ice cream leans sweet, so I prefer toppings that add contrast:
- Dark chocolate shavings or chocolate sauce
- Fresh berries or fruit compote
- Homemade whipped cream with a touch of vanilla
- Crushed graham crackers or gingersnaps
- Amarena cherries for an Italian-inspired touch
Serving and Storage Guidelines
Scooping Made Easy
No-churn ice cream can be firmer than churned versions. Let it sit at room temperature for five minutes before scooping. This brief wait makes all the difference.
I also run my ice cream scoop under hot water between servings. The warm metal glides through frozen ice cream more smoothly. Wipe the scoop dry before each dip.
Storage Best Practices
This ice cream keeps well in the freezer for up to two weeks. After that, ice crystals may begin forming. Always press plastic wrap directly onto the surface before covering.
If you notice ice crystals developing, scrape them off before serving. The ice cream underneath remains perfectly creamy. Transfer to a smaller container as you consume it.
Frequently Asked Questions
Can I use a different type of milk powder?
Malted milk powder is essential for this specific recipe’s flavor. Regular powdered milk won’t give you the same toasted, malty taste. If you can’t find malted milk powder, Ovaltine works as a substitute.
Why is my ice cream icy instead of creamy?
Icy texture usually means the cream wasn’t whipped enough. Make sure you achieve stiff peaks before folding. Also, ensure your freezer maintains proper temperature. Ice crystals can form if it’s too warm.
Can I reduce the sugar in this recipe?
Sweetened condensed milk is already quite sweet and provides necessary structure. Reducing sugar significantly affects texture and freeze time. I don’t recommend making major adjustments.
What’s the difference between kosher salt and flaky finishing salt?
Kosher salt dissolves into the base mixture and distributes flavor evenly. Flaky finishing salt adds textural interest and bright salt bursts. Use both for the full experience.
How do I prevent the whipped cream from deflating?
Fold gently using a rubber spatula rather than stirring vigorously. Work slowly and deliberately to maintain air bubbles. The technique matters more than speed here.
Can I make this without an electric mixer?
Technically yes, but I strongly discourage it. Whipping cream by hand to stiff peaks requires significant time and effort. An electric mixer ensures consistent, reliable results.
Final Thoughts and Serving Suggestions
This salted malted vanilla ice cream has become a staple in my dessert rotation. It’s elegant enough for dinner parties yet comforting enough for weeknight treats. The combination of malt and salt creates something truly special.
I love serving this ice cream alongside warm desserts. It pairs beautifully with fruit crisps, brownies, or pound cake. The temperature contrast enhances both the dessert and the ice cream.
For a nostalgic touch, serve it in vintage sundae glasses. Add a drizzle of hot fudge and some whipped cream. Finish with a cherry on top for a classic presentation.
The best part about this recipe is its simplicity. You don’t need professional equipment or advanced techniques. Just quality ingredients and a little patience while it freezes.
I hope this becomes a favorite in your kitchen like it has in mine. There’s something deeply satisfying about homemade ice cream. It tastes like summer, childhood, and celebration all at once.
Make a batch this weekend and see for yourself. Let it freeze overnight, then scoop yourself a generous serving. Don’t forget that final sprinkle of flaky sea salt on top.
Storage Reminder
Remember to store any leftover ice cream properly. Press plastic wrap directly onto the surface before sealing the container. This prevents ice crystals and maintains that creamy texture.
Enjoy your homemade salted malted vanilla ice cream! It’s proof that the best things in life don’t require complicated equipment or techniques.

Salted Malted Vanilla Ice Cream (No-Churn)
Ingredients
- 14 oz sweetened condensed milk 1 standard can
- ⅓ cup malted milk powder Carnation or Ovaltine brands
- 1½ teaspoons pure vanilla extract or vanilla bean paste
- ½ teaspoon kosher salt Diamond Crystal preferred
- 2½ cups chilled heavy whipping cream
- Flaky finishing salt to taste Maldon or fleur de sel, optional
Instructions
- Prepare the Base Mixture:
- In a medium mixing bowl, whisk together the sweetened condensed milk and malted milk powder until smooth and no lumps remain. Press any stubborn lumps against the side of the bowl with your whisk.
- Add the vanilla extract and kosher salt to the mixture. Whisk until completely incorporated and set aside.
- Whip the Heavy Cream:
- Pour the chilled heavy cream into a large mixing bowl. Using an electric mixer on medium-high speed, whip the cream until stiff peaks form, about 4-5 minutes. The cream should hold its shape firmly when you lift the beaters.
- Combine the Mixtures:
- Add about one-third of the whipped cream to the condensed milk mixture. Gently fold together with a rubber spatula to lighten the base.
- Add the remaining whipped cream and fold gently until no streaks remain, using a lifting and turning motion to maintain airiness. Avoid over-mixing to keep the texture light and creamy.
- Freeze:
- Transfer the mixture to a metal loaf pan or freezer-safe container. Smooth the top with a spatula.
- Press plastic wrap directly onto the surface to prevent ice crystals, then cover the entire pan with aluminum foil.
- Freeze for at least 8 hours or overnight until firm.
- Serve:
- Let the ice cream sit at room temperature for 5 minutes before scooping. Sprinkle with flaky finishing salt just before serving if desired.
Notes
Scooping Tip: Run your ice cream scoop under hot water between servings for easier scooping.
Salt Adjustment: If using Morton’s kosher salt instead of Diamond Crystal, reduce the amount by half as it’s saltier.
Mix-In Ideas: Fold in up to 1 cup of add-ins like crushed cookies, chocolate chunks, toffee bits, or chopped nuts after combining the cream and base mixture.
Vanilla Upgrade: Use vanilla bean paste instead of extract for visible vanilla specks and enhanced flavor.
Container Choice: Metal loaf pans freeze ice cream more evenly and make scooping easier than plastic containers.Claude can make mistakes. Please double-check responses.


