

Snickerdoodle cookie bars have completely transformed my baking routine. These soft, chewy treats deliver all the classic cinnamon-sugar goodness without the tedious cookie-rolling process. I discovered this recipe when I needed dessert for a potluck but was short on time.
What Makes These Cookie Bars Special
Traditional snickerdoodle cookies require chilling dough and rolling individual portions. These bars eliminate that hassle completely. I simply spread the dough in one pan and bake everything together. The result is consistently thick, chewy bars with that signature tangy flavor.
The cream of tartar creates the distinctive snickerdoodle taste. This ingredient reacts with baking soda to produce the perfect texture. Without it, you’d have regular cinnamon sugar bars instead of authentic snickerdoodles.
Why I Love This Recipe
These bars save me at least 30 minutes compared to traditional cookies. No rolling, no chilling, no spacing cookies on multiple baking sheets. I can have warm snickerdoodle bars ready in under 40 minutes from start to finish.
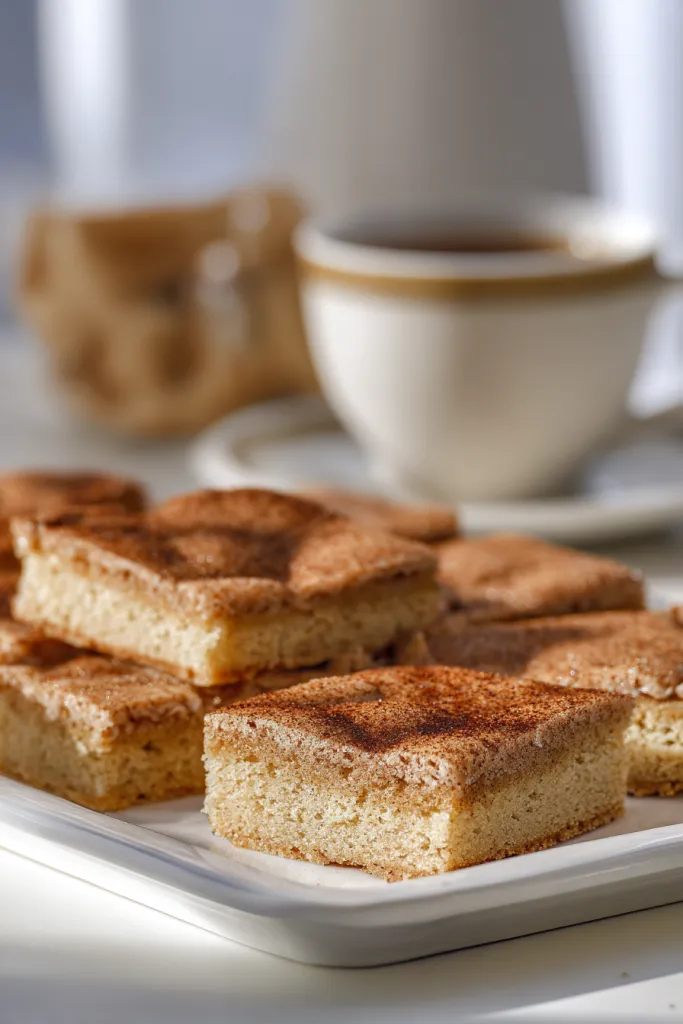
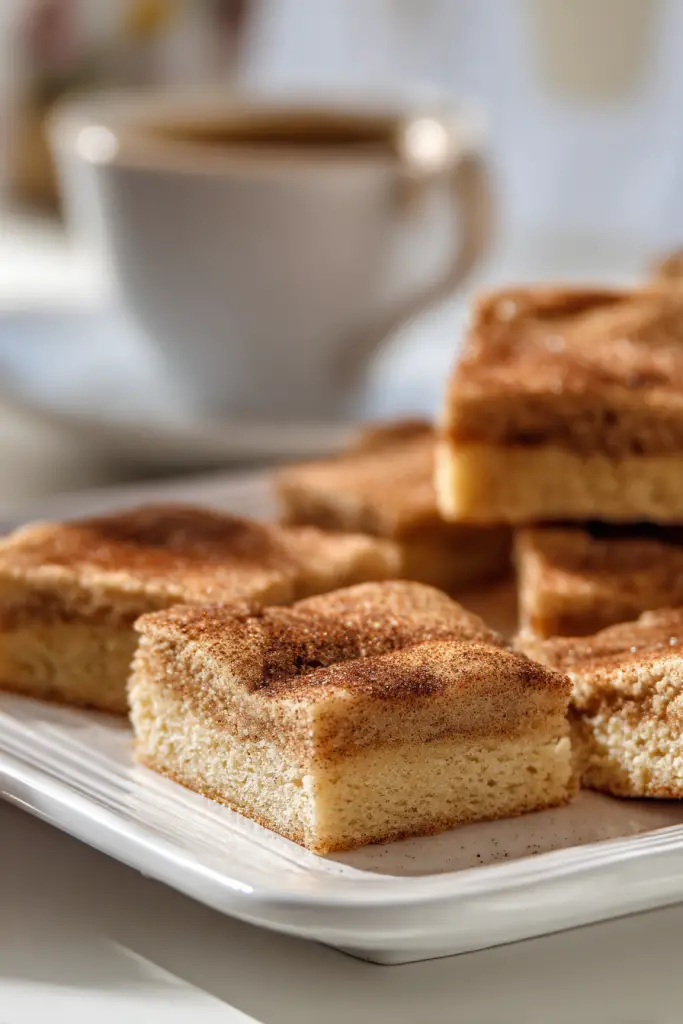
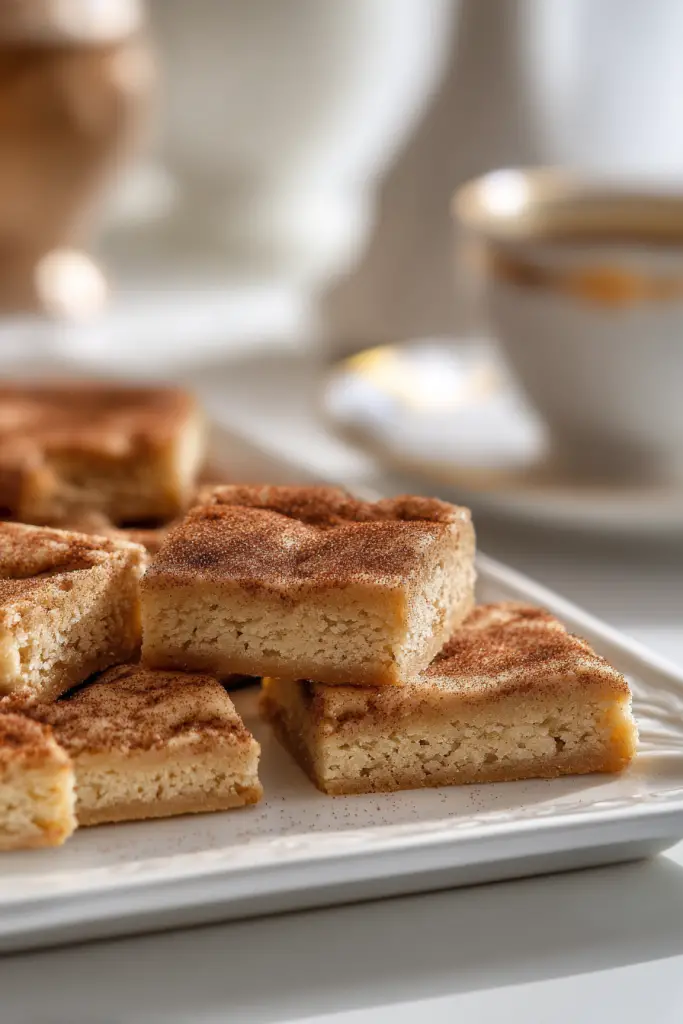
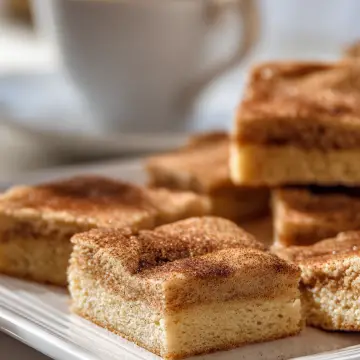
The texture is absolutely perfect – soft in the center with slightly crisp edges. The cinnamon-sugar topping creates a delightful contrast. Every bite delivers that comforting spice blend that makes snickerdoodles so beloved.
Perfect for Any Occasion
I’ve served these bars at family gatherings, office parties, and casual weeknight dinners. They’re sophisticated enough for special events yet simple enough for everyday treats. Kids love them just as much as adults do.
The bars store beautifully for several days. I often make a double batch and freeze half for unexpected guests. They thaw quickly and taste just as fresh as the day I baked them.
Prep Time: 10 minutes | Cook Time: 25 minutes | Total Time: 35 minutes
Servings: 24 bars | Difficulty: Easy
Ingredients, Instructions & Techniques
Essential Ingredients
| Ingredient | Quantity | Notes |
|---|---|---|
| Unsalted butter | 1 cup | Must be softened to room temperature |
| Granulated sugar | 1½ cups | For sweetness and structure |
| Brown sugar | ½ cup packed | Adds moisture and depth |
| Large eggs | 2 | Room temperature works best |
| Vanilla extract | 1 teaspoon | Pure vanilla preferred |
| All-purpose flour | 2¾ cups | Don’t over-pack when measuring |
| Cream of tartar | 1 teaspoon | Essential for authentic flavor |
| Baking soda | ½ teaspoon | Works with cream of tartar |
| Salt | ¼ teaspoon | Enhances all flavors |
| Cinnamon | 1 tablespoon | For the signature topping |
| Granulated sugar (topping) | 3 tablespoons | Mixed with cinnamon |
Step-by-Step Instructions
Preparation Phase I always start by preheating my oven to 350°F (175°C). Then I grease a 9×13 inch baking pan thoroughly. Parchment paper makes removal easier, but it’s not essential if you grease well.
Mixing the Base In my large mixing bowl, I cream the softened butter with both sugars. This takes about 3-4 minutes with an electric mixer. The mixture should look light and fluffy, not just combined.
I add eggs one at a time, beating well after each addition. Then comes the vanilla extract. This wet mixture forms the foundation for perfectly textured bars.
Incorporating Dry Ingredients I whisk together flour, cream of tartar, baking soda, and salt in a separate bowl. Adding dry ingredients gradually prevents overmixing. I stop mixing as soon as everything comes together.
Pro tip: Overmixed dough creates tough, dense bars instead of the tender texture we want.
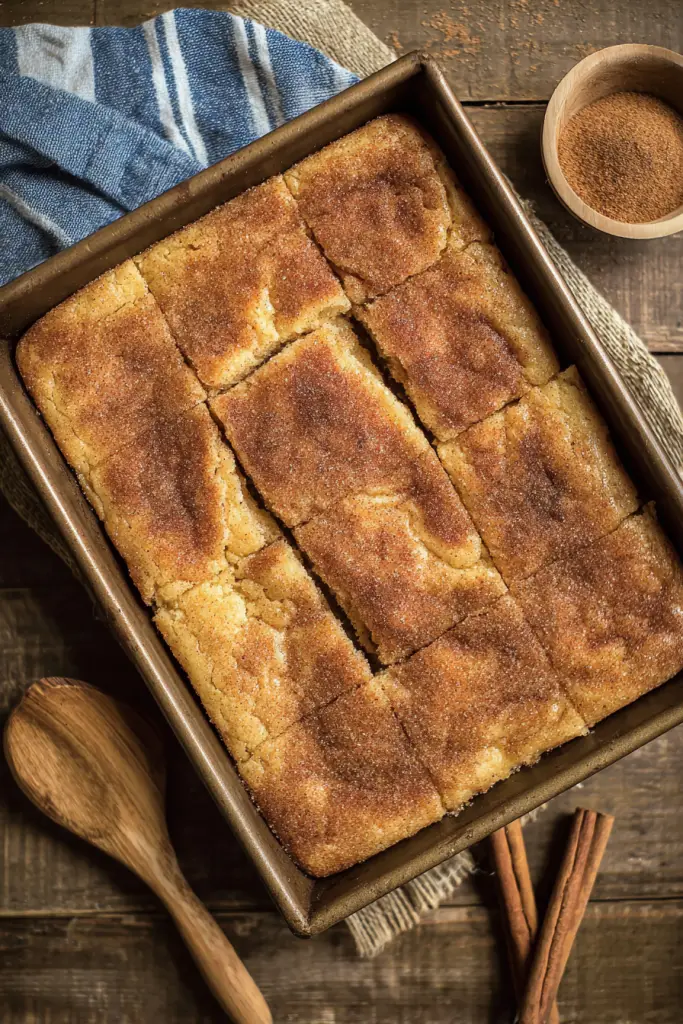
Assembly and Topping The dough will be thick but spreadable. I press it evenly into my prepared pan using a spatula. For the signature topping, I mix cinnamon with the remaining granulated sugar and sprinkle it generously over the surface.
Baking to Perfection I bake for 25-30 minutes until edges are lightly golden. The center should look set but still soft. A toothpick inserted in the center comes out with just a few moist crumbs.
Cooling is crucial – I let the bars rest in the pan for at least 20 minutes. This prevents crumbling when I cut them into squares.
Key Techniques for Success
Temperature Matters Room temperature ingredients blend more easily. I take eggs and butter out 2 hours before baking. Cold ingredients can cause the mixture to curdle or mix unevenly.
Don’t Overbake These bars continue cooking slightly after removal from the oven. Slightly underbaked bars will be perfectly chewy once cooled. Overbaked bars become dry and crumbly.
Even Distribution I use an offset spatula to spread dough evenly. Uneven thickness causes some areas to overbake while others remain underdone.
Variations, Storage & FAQs
Creative Variations I’ve Tried
Chocolate Chip Addition I fold in 1 cup of mini chocolate chips before spreading the dough. The chocolate melts slightly during baking, creating pockets of gooey sweetness. Semi-sweet chips work best with the cinnamon flavor.
Maple Glaze Version For special occasions, I drizzle cooled bars with maple glaze. I mix ½ cup powdered sugar with 2 tablespoons maple syrup and 1 tablespoon milk. The maple complements the cinnamon beautifully.
Cream Cheese Swirl I’ve created a marbled version using 4 oz softened cream cheese mixed with ¼ cup sugar. I drop spoonfuls over the dough and swirl with a knife before adding the cinnamon topping.
Storage Solutions That Work
Room Temperature Storage I store completely cooled bars in an airtight container for up to 5 days. Placing parchment paper between layers prevents sticking. A slice of bread in the container keeps them soft.
Freezing Instructions These bars freeze exceptionally well. I wrap individual portions in plastic wrap, then store in freezer bags for up to 3 months. They thaw at room temperature in about 30 minutes.
Maintaining Freshness Never store warm bars – condensation makes them soggy. I always wait until they’re completely cool before covering. Proper storage keeps them just as chewy as day one.
Serving Suggestions
I love serving these bars with vanilla ice cream for an indulgent dessert. They’re also perfect with coffee or hot chocolate. For elegant presentation, I dust them with additional cinnamon before serving.
Frequently Asked Questions
Can I substitute the cream of tartar? Cream of tartar is essential for authentic snickerdoodle flavor. In a pinch, you can use 1 teaspoon lemon juice, but the taste won’t be quite the same. The tangy flavor and proper texture really depend on this ingredient.
Why are my bars too dry? Overbaking is the most common cause. These bars should look slightly underdone when you remove them. They’ll finish cooking as they cool. Also check that your oven temperature is accurate.
Can I make these gluten-free? Yes! I substitute the all-purpose flour with a 1:1 gluten-free flour blend. The texture is nearly identical. Make sure your blend contains xanthan gum for proper binding.
How do I get clean cuts? Let bars cool completely before cutting. I use a sharp knife wiped clean between cuts. For extra-clean edges, I sometimes chill the bars for 30 minutes before slicing.
Can I double the recipe? Absolutely! I use two 9×13 pans or one large sheet pan. Baking time remains the same. This recipe scales perfectly for large gatherings.
Final Thoughts
These snickerdoodle cookie bars have become my go-to dessert when I need something quick but impressive. The combination of convenience and classic flavor makes them perfect for any baker’s repertoire.
The forgiving nature of this recipe means even beginner bakers can achieve perfect results. Once you try these bars, you’ll understand why I choose them over traditional snickerdoodle cookies every time.
Whether you’re baking for a crowd or just treating your family, these bars deliver consistent results with minimal effort. The warm cinnamon aroma alone makes the kitchen feel like home.
Easy Snickerdoodle Cookie Bars
Ingredients
- For the Bars:
- 1 cup unsalted butter softened to room temperature
- 1½ cups granulated sugar
- ½ cup brown sugar packed
- 2 large eggs room temperature
- 1 teaspoon vanilla extract pure vanilla preferred
- 2¾ cups all-purpose flour
- 1 teaspoon cream of tartar
- ½ teaspoon baking soda
- ¼ teaspoon salt
- For the Topping:
- 3 tablespoons granulated sugar
- 1 tablespoon cinnamon
Instructions
- Preheat and Prepare: Preheat oven to 350°F (175°C). Grease a 9×13 inch baking pan thoroughly or line with parchment paper.
- Cream Butter and Sugars: In a large mixing bowl, cream the softened butter with granulated sugar and brown sugar using an electric mixer for 3-4 minutes until light and fluffy.
- Add Wet Ingredients: Add eggs one at a time, beating well after each addition. Mix in vanilla extract until fully incorporated.
- Combine Dry Ingredients: In a separate bowl, whisk together flour, cream of tartar, baking soda, and salt.
- Mix Dough: Gradually add dry ingredients to wet ingredients, mixing until just combined. Do not overmix – stop as soon as everything comes together.
- Spread in Pan: Press the thick dough evenly into the prepared pan using a spatula or offset spatula.
- Add Topping: Mix cinnamon with 3 tablespoons granulated sugar. Sprinkle generously over the dough surface.
- Bake: Bake for 25-30 minutes until edges are lightly golden and center looks set but still soft. A toothpick inserted in the center should come out with a few moist crumbs.
- Cool and Cut: Let bars rest in the pan for at least 20 minutes before cutting into 24 squares.
Notes
Don’t overbake – bars should look slightly underdone when removed from oven. They’ll continue cooking as they cool.
Use an offset spatula for even dough distribution to prevent uneven baking.
Cream of tartar is essential for authentic snickerdoodle flavor and cannot be omitted. Variations: Chocolate Chip: Fold in 1 cup mini chocolate chips before spreading dough
Maple Glaze: Drizzle cooled bars with glaze made from ½ cup powdered sugar, 2 tablespoons maple syrup, and 1 tablespoon milk
Cream Cheese Swirl: Drop spoonfuls of mixture (4 oz cream cheese + ¼ cup sugar) over dough and swirl before topping Storage: Room temperature: Store in airtight container for up to 5 days
Freezer: Wrap individual portions in plastic wrap, store in freezer bags for up to 3 months
Place parchment paper between layers to prevent sticking Substitutions: Gluten-free: Use 1:1 gluten-free flour blend with xanthan gum
Cream of tartar substitute: 1 teaspoon lemon juice (flavor will differ slightly)


