

I’ve always been mesmerized by the elegance of French crepes. There’s something magical about those paper-thin delicacies that transport you straight to a Parisian café. When I first attempted making crepes at home, I’ll admit I was intimidated. But then I discovered this Better Than Paris Crepes recipe, and everything changed. These aren’t just any crepes. They’re lighter, more delicate, and surprisingly easier to make than you’d think.

What makes these crepes truly special is their simplicity. You don’t need fancy equipment or hard-to-find ingredients. Just a blender, a good skillet, and pantry staples you probably already have. I’ve made these countless times for breakfast, brunch, and even dessert. Each time, they turn out perfectly golden and delicious. The secret? Room temperature eggs and properly chilled batter. These two simple steps make all the difference.
I love how versatile these crepes are. Some mornings, I fill them with fresh strawberries and whipped cream. Other times, I go savory with cheese and ham. My kids request them every weekend, and honestly, I never get tired of making them. They’re that good. Plus, you can make the batter the night before and cook them fresh in the morning.
Why This Recipe Works
Let me share why this recipe has become my go-to crepe method. First, using a blender eliminates lumps completely. No whisking required! You simply add all your ingredients and blend for about a minute. The result is a silky-smooth batter every single time. I’ve tried the traditional whisking method, and while it works, the blender is just so much faster.
The refrigeration step is crucial. When you chill the batter for at least an hour, the flour absorbs the liquid properly. This creates crepes that are tender, not tough. I’ve skipped this step in a rush before, and the crepes were noticeably less delicate. Trust me, the wait is worth it. If you have two hours, even better.
Another reason this recipe shines is the fat content. The melted butter adds richness and helps achieve that beautiful golden color. You can substitute canola oil if you prefer, but I find butter gives the best flavor. Room temperature eggs blend more easily and create a better texture overall.
Why You’ll Love This Better Than Paris Crepes Recipe
These crepes will quickly become a household favorite, I promise you that. They’re impressive enough to serve guests but easy enough for a casual Tuesday breakfast. I’ve served them at brunch parties, and everyone asks for the recipe. The best part? I can honestly say they’re simple to make.
The versatility factor is huge. Sweet or savory, breakfast or dessert – these crepes adapt to any meal. I’ve filled them with everything from Nutella and bananas to scrambled eggs and cheese. Each combination works beautifully. You’re really only limited by your imagination here.
They’re also incredibly economical. The entire batch costs just a few dollars to make. You get about 12-15 crepes from one recipe, which easily feeds four people. For special occasions, I double the batch and freeze half. They reheat wonderfully, maintaining their delicate texture.
Time-wise, these crepes are a win. Yes, you need to chill the batter, but the actual cooking time is only about 15 minutes. Once you get your rhythm down, you’ll be flipping crepes like a pro. My first attempt was clumsy, but by the third crepe, I had it figured out.
Ingredients, Instructions & Cooking Process
Ingredients for Better Than Paris Crepes Recipe
Here’s everything you need to create these delightful crepes. I always make sure my ingredients are measured and ready before I start. It makes the whole process smoother and more enjoyable.
| Ingredient | Quantity | Notes |
|---|---|---|
| Large eggs | 4 | Room temperature works best |
| Milk | 2 1/4 cups | Whole milk preferred for richness |
| All-purpose flour | 2 cups | Spooned and leveled, not packed |
| Granulated sugar | 1 tablespoon | Adds subtle sweetness |
| Melted butter or canola oil | 1/4 cup | Butter gives better flavor |
| Salt | Good pinch | Enhances overall flavor |
Recipe Timing:
Prep Time: 10 minutes | Cook Time: 15 minutes | Total Time: 25 minutes (plus 1-2 hours chilling)
Servings: 12-15 crepes (4 servings) | Difficulty: Easy
Make sure your eggs are at room temperature. I usually set them out about 30 minutes before I start cooking. Cold eggs don’t blend as smoothly and can affect the batter’s consistency. This small detail makes a noticeable difference in the final texture.
Preparing the Crepe Batter
Combine All Ingredients in Blender
Now for the fun part! Grab your blender and add the eggs first. Then pour in the milk, followed by the flour, sugar, melted butter, and salt. I like to add the flour gradually to avoid creating air pockets. Secure the lid tightly and blend on medium-high speed for about one minute.

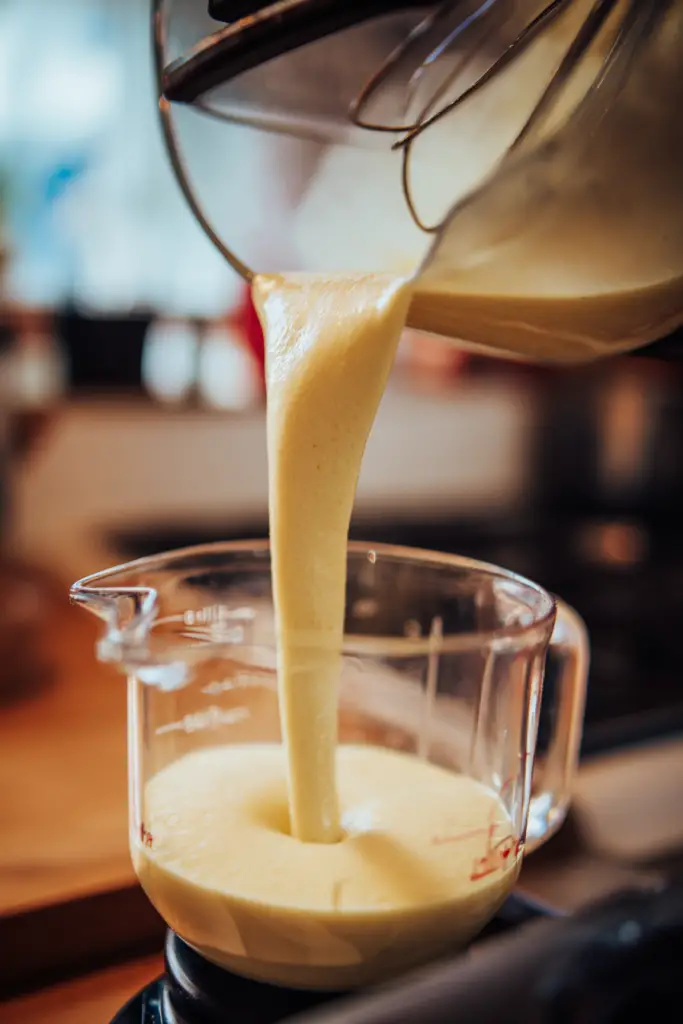
Stop the blender and check for any flour stuck to the sides. This happens sometimes, especially in the corners. Use a spatula to scrape down the sides thoroughly. Blend again for another 10-15 seconds until completely smooth. The batter should have a consistency similar to heavy cream.
Pro tip: Don’t over-blend the batter. Once it’s smooth, stop. Over-blending can incorporate too much air, which creates bubbles in your crepes. You want a silky, bubble-free batter for the most delicate results.
Refrigerate for Optimal Results
Transfer your batter to a pitcher or large measuring cup. Cover it with plastic wrap, pressing the wrap directly onto the surface. This prevents a skin from forming on top. Refrigerate for at least one hour, though two hours is ideal.
During this chilling time, the flour fully hydrates. The gluten relaxes, resulting in tender crepes that aren’t tough or chewy. I often make the batter the night before and cook the crepes fresh for breakfast. The overnight rest works beautifully.
Before cooking, give the batter a gentle stir. Some settling is normal. Don’t whisk vigorously – just a gentle stir to reincorporate everything. The batter should pour easily but still coat the back of a spoon.
Cooking the Crepes
Preheat Your Skillet
Heat a 10-inch nonstick or well-seasoned cast iron skillet over medium heat. I prefer medium to medium-high, but every stove is different. You’ll need to find your sweet spot. The skillet is ready when a drop of water sizzles and evaporates quickly.
Add about 1/2 teaspoon of butter to the skillet. Swirl it around to coat the entire bottom surface. This prevents sticking and adds flavor. For subsequent crepes, you’ll only need a light coating between each one.
Pour and Tilt the Batter
Hold your skillet in one hand and your batter container in the other. Pour about 1/4 cup of batter into the center of the hot skillet. Immediately lift the pan off the heat and tilt it in a circular motion. Work quickly here. The batter should spread out into a thin, even layer covering the entire bottom.
This tilting motion is key to achieving those beautiful, paper-thin crepes. Don’t worry if your first attempt isn’t perfect. The first crepe is almost always a test run. I call it the “practice crepe,” and it usually gets eaten by whoever’s in the kitchen.
Cook Until Set
Place the skillet back on the heat. Cook the crepe for about 45-60 seconds. You’ll see the edges start to turn golden and pull away slightly from the pan. The surface will look matte rather than shiny. These are your visual cues that it’s ready to flip.
Use an offset spatula or thin turner to gently lift one edge. Slide the spatula under the crepe, then quickly but carefully flip it over. The second side cooks much faster – only about 30 seconds. You’re just setting it, not browning it heavily.

Repeat the Process
Continue cooking crepes, adjusting heat as needed. If they’re browning too quickly, lower the heat slightly. If they’re pale and taking too long, increase it a bit. Stack finished crepes on a plate as you go.
I like to cover the stack with a clean kitchen towel. This keeps them warm and prevents them from drying out. You can also use aluminum foil or plastic wrap. The residual heat keeps them soft and pliable.
Don’t stress if your crepes aren’t all identical. Even in French restaurants, they vary slightly. What matters is that they’re thin, tender, and delicious. By your fifth or sixth crepe, you’ll have developed a nice rhythm.
Serving, Tips, Variations & FAQs
Serving Suggestions
The beauty of crepes lies in their versatility. Let me share my favorite ways to serve them. For a classic sweet preparation, I fold the crepes into quarters and dust them with powdered sugar. A squeeze of fresh lemon juice adds a lovely brightness.
Fresh berries are always a hit. Strawberries, blueberries, and raspberries all work wonderfully. Top with a dollop of whipped cream or a drizzle of chocolate sauce. Sometimes I spread Nutella inside, roll them up, and garnish with sliced bananas. Pure heaven!
For savory crepes, the options are endless. My go-to filling includes sautéed mushrooms, gruyere cheese, and fresh thyme. Ham and cheese is another classic combination. You can also try scrambled eggs with chives, or spinach with ricotta cheese.
I often set up a crepe bar when entertaining. I cook all the crepes ahead of time, then let guests fill their own. Provide sweet and savory options, and everyone’s happy. It’s interactive, fun, and honestly takes the pressure off me as the host.
Tips for Success
Let me share some tips I’ve learned through trial and error. Temperature control is everything. Your skillet needs to be hot enough to set the batter quickly but not so hot that it burns. Medium heat works for most stoves.
The first crepe rarely turns out perfect. Use it to gauge your heat level and batter consistency. If it’s too thick, add a tablespoon or two of milk. If it’s too thin and tears easily, you might need a touch more flour.
Don’t flip the crepe too early. Wait until the edges are set and the surface looks matte. Premature flipping results in a torn, messy crepe. Patience is your friend here. When in doubt, wait another 15 seconds.
Use the right tools. An offset spatula makes flipping so much easier. If you don’t have one, a thin, wide turner works well too. Some people flip with their fingers, but I find that risky for beginners.
Variations
Once you’ve mastered the basic recipe, try these variations. For chocolate crepes, add 2 tablespoons of cocoa powder to the batter. These are incredible with vanilla ice cream and hot fudge sauce.
Add a teaspoon of vanilla extract for extra flavor depth. A pinch of cinnamon works beautifully in sweet applications. For savory crepes, try adding fresh herbs like parsley or chives directly to the batter.
Buckwheat flour can replace up to half the all-purpose flour. This creates traditional Breton galettes with a lovely nutty flavor. They’re especially good with savory fillings. The texture is slightly heartier but still delicate.
You can also play with liquids. Replace some milk with orange juice for citrusy crepes. A tablespoon of liqueur like Grand Marnier adds sophistication. Just reduce the milk by the same amount you add of the other liquid.
Storage Tips
Leftover crepes store beautifully, which makes this recipe perfect for meal prep. Let them cool completely first. Then stack them with a piece of parchment paper between each crepe. This prevents them from sticking together.
Place the stack in an airtight container or zip-top bag. They’ll keep in the refrigerator for up to three days. To reheat, simply warm them in a dry skillet for about 15 seconds per side. They taste freshly made!
For longer storage, freeze them. Use the same parchment paper method, then wrap the entire stack tightly in plastic wrap and aluminum foil. They’ll stay good for up to two months. Thaw in the refrigerator overnight before reheating.
I often make a double batch specifically for freezing. It’s wonderful having crepes ready to go for quick breakfasts. Just pull out what you need, heat them up, and you’ve got a special meal in minutes.
Pairing Ideas
These crepes pair wonderfully with various beverages. A hot cup of coffee is my personal favorite for breakfast. The slight bitterness complements the subtle sweetness perfectly. Earl Grey tea is another excellent choice, especially with lemon-filled crepes.
For brunch, consider serving mimosas or Bellinis alongside. The fruity, bubbly nature works beautifully with both sweet and savory preparations. Fresh orange juice is always appreciated too, especially by kids and non-drinkers.
Side dishes can round out your meal nicely. A simple mixed green salad with vinaigrette balances rich, sweet crepes. Fresh fruit salad adds color and nutrition. For savory crepes, roasted asparagus or sautéed green beans are perfect companions.
If you’re making this for dessert, vanilla ice cream is the ultimate pairing. The contrast of warm crepes with cold ice cream is simply divine. Add some caramel sauce and toasted pecans for an extra-special treat.
Frequently Asked Questions
Can I make the batter ahead of time?
Absolutely! In fact, I recommend it. The batter actually improves with resting time. You can make it up to 24 hours in advance. Keep it covered and refrigerated. Just give it a gentle stir before using. This is perfect for entertaining or busy mornings.
Why are my crepes tearing?
This usually happens for a few reasons. Your batter might be too thin – add a tablespoon of flour. You might also be flipping too early before the crepe sets properly. Lastly, your pan might not be hot enough. The crepe needs to cook quickly to develop structure.
Can I use a different type of milk?
Yes, you can substitute with your preferred milk. Almond milk, oat milk, or soy milk all work. Keep in mind that non-dairy milks create slightly different textures. Whole dairy milk produces the richest, most tender crepes. But alternatives definitely work in a pinch.
Do I need a special crepe pan?
Not at all! While traditional crepe pans are lovely, a regular nonstick skillet works perfectly. I use a 10-inch nonstick skillet with excellent results. Cast iron works well too if it’s properly seasoned. The key is a flat bottom and sloped sides for easy flipping.
How do I know when the skillet is the right temperature?
The water droplet test is reliable. Flick a few drops of water onto the hot skillet. If they sizzle and evaporate within a second or two, you’re ready. If they just sit there, the pan needs more time. If they bounce violently, it’s too hot.

Better Than Paris Crepes
Ingredients
- 4 large eggs room temperature
- 2 1/4 cups milk
- 2 cups all-purpose flour
- 1 tablespoon granulated sugar
- 1/4 cup melted butter or canola oil
- A good pinch of salt
- Butter or oil for cooking
Instructions
- Prepare the Batter:
- Add eggs, milk, flour, sugar, melted butter, and salt to a blender.
- Blend on medium-high speed for about 1 minute until completely smooth.
- Stop and scrape down the sides with a spatula to catch any flour clumps.
- Blend again for 10-15 seconds until the batter is silky and lump-free.
- Chill the Batter:
- Transfer batter to a pitcher or large measuring cup.
- Cover with plastic wrap, pressing it directly onto the surface.
- Refrigerate for at least 1 hour (2 hours is ideal) to allow flour to hydrate.
- Before cooking, give the batter a gentle stir to reincorporate.
- Cook the Crepes:
- Heat a 10-inch nonstick or cast iron skillet over medium to medium-high heat.
- Add 1/2 teaspoon butter to the skillet and swirl to coat the bottom.
- Pour about 1/4 cup of batter into the center of the hot skillet.
- Immediately lift the pan and tilt in a circular motion to spread batter thinly and evenly.
- Cook for 45-60 seconds until edges turn golden and the surface looks matte.
- Use an offset spatula to gently flip the crepe.
- Cook the second side for about 30 seconds until lightly set.
- Transfer to a plate and cover with a clean kitchen towel to keep warm.
- Repeat with remaining batter, adding a light coating of butter between each crepe.
- Serve:
- Fill crepes with your choice of sweet fillings (fresh berries, Nutella, whipped cream) or savory fillings (cheese, ham, mushrooms).
- Fold into quarters or roll up and serve immediately.
Notes
Chilling Time: Don’t skip the refrigeration step! This allows the flour to fully absorb the liquids, resulting in tender, delicate crepes.
Temperature Control: If crepes brown too quickly, lower heat slightly. If they’re pale and taking too long, increase heat. The first crepe is usually a test to gauge proper temperature.
Storage: Stack cooled crepes with parchment paper between each one. Store in an airtight container in the refrigerator for up to 3 days, or freeze for up to 2 months.
Make-Ahead: Batter can be made up to 24 hours in advance. Store covered in the refrigerator.
Batter Consistency: The batter should be the consistency of heavy cream and coat the back of a spoon. If too thick, add 1-2 tablespoons of milk.


