

The moment that pan of Buffalo Chicken Mac and Cheese emerges from the oven, my kitchen transforms into a sanctuary of irresistible aromas. There’s something magical about the way the tangy buffalo sauce cuts through the richness of melted cheeses, creating that perfect balance that keeps me coming back for just one more bite. This isn’t just dinner – it’s a celebration in a casserole dish!
I first created this recipe during a particularly brutal winter when comfort food wasn’t just wanted, it was needed. What began as a simple experiment combining two of my favorite indulgences – creamy mac and cheese and spicy buffalo chicken – quickly became my most requested dish for game days, potlucks, and those evenings when friends unexpectedly drop by.
Why You’ll Love This Recipe
This Buffalo Chicken Mac and Cheese hits all the right notes – it’s creamy, cheesy, spicy, and incredibly satisfying. The elbow macaroni provides the perfect little pockets to hold that luxurious cheese sauce, while the shredded chicken soaks up the buffalo flavor in every bite. The panko breadcrumb topping adds a delightful textural contrast that takes this dish from delicious to downright addictive.
What I love most is how versatile this dish can be. Dial up the buffalo sauce for heat seekers or tone it down for sensitive palates. Serve it as a hearty main dish or as a side that will upstage any entrée. It even reheats beautifully for lunch the next day – if there are any leftovers, which in my house is rare!
Key Ingredients
Pro tip: The quality of your buffalo sauce makes a huge difference here! I prefer one with a good balance of heat and tang rather than pure fire.
| Ingredient | Quantity | Notes |
|---|---|---|
| Elbow macaroni | 3 cups | Approximately 12 oz dry |
| Chicken breasts, cooked & shredded | 2 cups | Boneless, skinless |
| Buffalo sauce | 1 cup | Adjust according to heat preference |
| Sharp cheddar cheese, shredded | 2 cups | Freshly grated melts better than pre-shredded |
| Cream cheese | 8 oz | Softened at room temperature |
| Milk | 2 cups | Whole milk creates the richest sauce |
| Butter | 1/4 cup | Unsalted (plus extra for topping) |
| All-purpose flour | 1/4 cup | For creating the roux base |
| Panko breadcrumbs | 1 cup | For that perfect crispy topping |
| Butter (for topping) | 1/4 cup | Melted |
| Green onions | To taste | Chopped, for garnish |
Prep Time: 15 minutes | Cook Time: 30 minutes | Total Time: 45 minutes
Servings: 6 | Difficulty: Medium
Preparation Overview
Before diving into the full cooking process, I always prepare by measuring out all ingredients and positioning them within arm’s reach. The cheese sauce comes together quickly, so having everything ready ensures the perfect creamy consistency without any scrambling around the kitchen.
For the chicken, I often cook it a day ahead or use a time-saving rotisserie chicken from the store. The key is ensuring it’s properly shredded to absorb maximum buffalo flavor throughout the dish. When cooked with intention and care, this Buffalo Chicken Mac and Cheese transforms from a simple pasta dish into the ultimate expression of comfort food with a kick.
Step-by-Step Cooking Instructions
Creating the Perfect Buffalo Chicken Mac and Cheese
When I’m craving that perfect blend of creamy comfort and spicy kick, this Buffalo Chicken Mac and Cheese never disappoints. The process isn’t complicated, but paying attention to a few key steps ensures that restaurant-quality result every time. Let me walk you through exactly how I create this crowd-pleaser in my kitchen.
Step 1: Prepare the Pasta
I start by bringing a large pot of water to a rolling boil. Salt it generously—the water should taste like the sea. This is your only chance to season the pasta itself! I add the 3 cups of elbow macaroni and cook it for about 2 minutes less than the package instructions suggest. We want it al dente (with a slight bite) since it will continue cooking in the oven. I then drain it well but don’t rinse it—that starchy exterior helps the sauce cling to each pasta piece.
Step 2: Create the Cheese Sauce Base
While the pasta is cooking, I melt the 1/4 cup of butter in a large saucepan over medium heat. Once it’s completely melted and starting to bubble slightly, I sprinkle in the 1/4 cup of flour while whisking constantly. This is the roux—the thickening base for our sauce. I continue whisking for about 2 minutes until it turns a light golden color and gives off a slightly nutty aroma. This step is crucial for eliminating the raw flour taste.
Step 3: Develop the Creamy Sauce
Next comes the transformation! I slowly pour in the 2 cups of milk while continuing to whisk vigorously to prevent any lumps. I maintain medium heat and keep stirring until the mixture thickens enough to coat the back of a spoon—usually about 5 minutes. Patience is key here; rush this step and your sauce might remain too thin.
Once thickened, I reduce the heat to low and add the 8 oz of softened cream cheese in chunks, stirring until completely melted. Then I gradually fold in the 2 cups of shredded sharp cheddar, adding about 1/2 cup at a time and ensuring each addition is fully melted before adding more. This gradual approach prevents the cheese from clumping or becoming stringy.
Step 4: Incorporate the Buffalo Flavor
Here’s where the magic happens! I pour in the 1 cup of buffalo sauce and stir thoroughly to incorporate it into the cheese mixture. The sauce immediately transforms into this gorgeous orange-hued creation with a tantalizing aroma that fills the kitchen. I always taste at this point and adjust if needed—sometimes adding a little more buffalo sauce if I’m in the mood for extra heat.
Step 5: Combine Everything Together
Once my sauce has reached that perfect flavor balance, I fold in the 2 cups of shredded chicken, making sure each piece gets coated in the buffalo cheese sauce. Then I add the drained pasta and gently fold everything together until the pasta is evenly coated. The texture should be creamy but not runny—thick enough to cling generously to the pasta.
Step 6: Prepare for Baking
I preheat my oven to 375°F and lightly grease a 9×13 inch baking dish. The entire mixture gets transferred into the dish and spread in an even layer. For the topping, I mix the 1 cup of panko breadcrumbs with the 1/4 cup of melted butter in a small bowl until the crumbs are evenly moistened, then sprinkle this mixture evenly over the mac and cheese. This will become that irresistible golden crust that adds the perfect textural contrast.
Step 7: Bake to Perfection
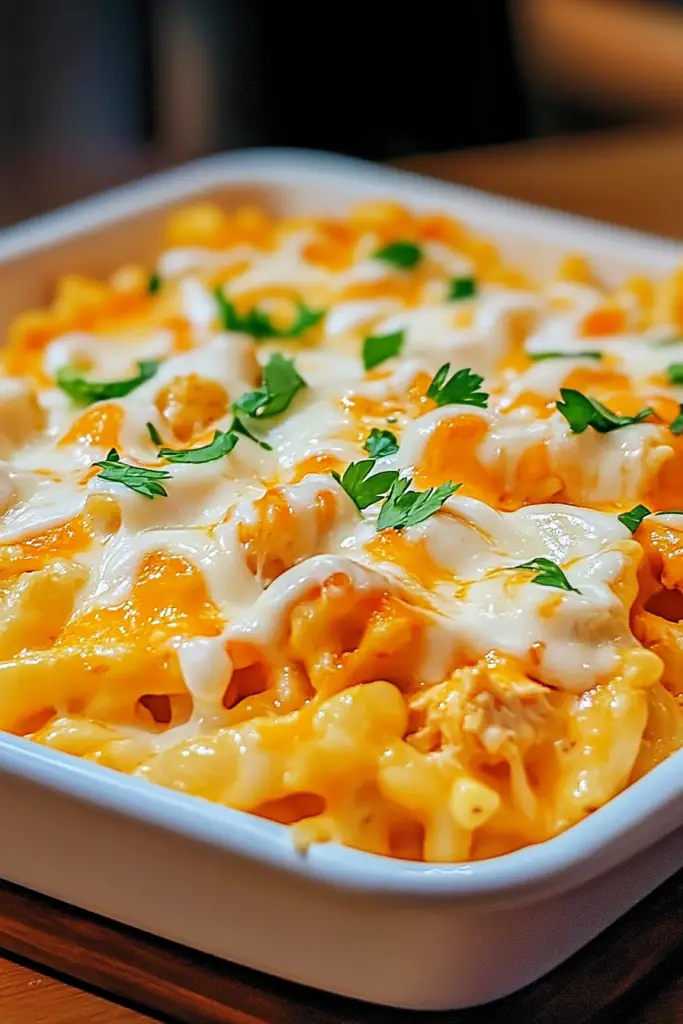
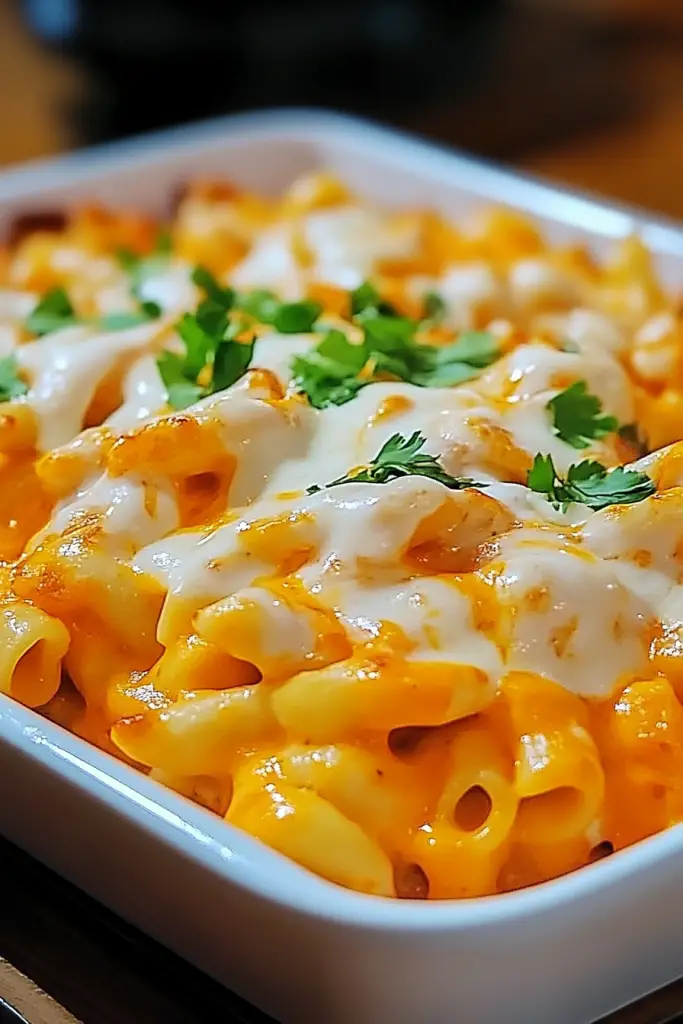
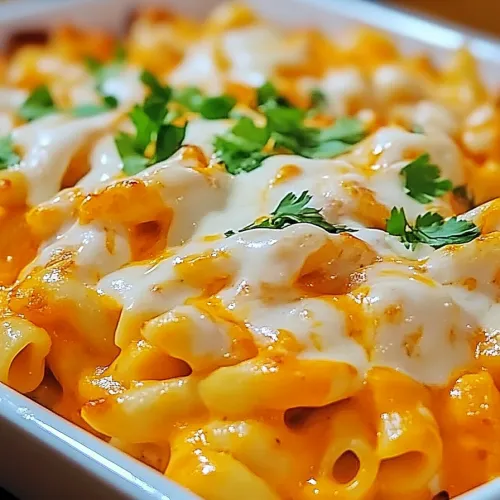
The dish goes into the oven uncovered for about 20-25 minutes, until the edges are bubbling and the topping has turned a beautiful golden brown. I’ve learned the hard way that every minute counts here—check at the 20-minute mark to prevent over-browning! Once it’s done, I let it rest for about 5 minutes before serving. This brief resting period allows the sauce to set slightly so it doesn’t run all over the plate.
Pro tip: If the top is browning too quickly but the casserole needs more time to heat through, simply lay a piece of foil loosely over the top for the remaining cook time!
Serving Suggestions, Variations & Expert Tips
Serving Your Buffalo Chicken Mac and Cheese
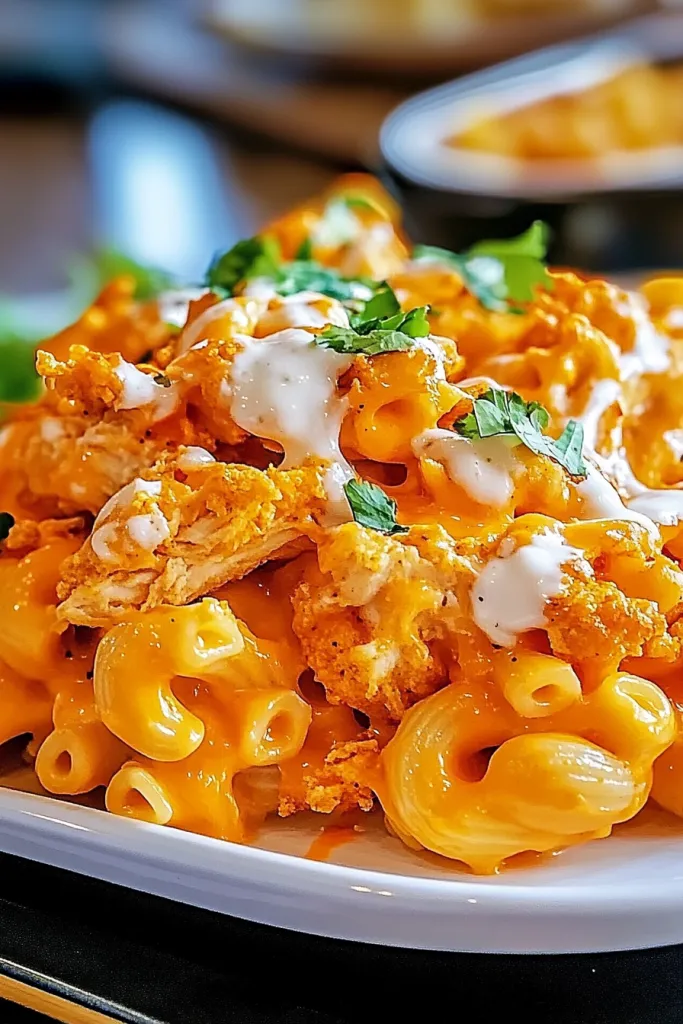
I love serving this Buffalo Chicken Mac and Cheese straight from the oven, while the top is still crackling and the inside is molten perfection. I sprinkle freshly chopped green onions over each portion for a pop of color and fresh flavor that beautifully contrasts with the rich, creamy base. For special occasions, I place the baking dish on a wooden board surrounded by small bowls of extra buffalo sauce, blue cheese dressing, and celery sticks—allowing guests to customize each bite to their preferred heat level and texture.
This dish works beautifully as a standalone main course paired with a simple green salad dressed with lemon vinaigrette to cut through the richness. For more casual gatherings, I’ve served it alongside crispy baked chicken wings for the ultimate game day spread that always disappears before halftime!
The texture is best when fresh, but don’t worry if you have leftovers. This mac and cheese reheats remarkably well—I store it in an airtight container in the refrigerator for up to 3 days. When reheating, I add a splash of milk and cover with foil for the first few minutes to restore that creamy consistency.
Delicious Variations
While I adore this recipe exactly as written, I’ve developed several variations over the years that have become family favorites:
Blue Cheese Boost: For buffalo purists who love that classic wing combo, fold 1/2 cup of crumbled blue cheese into the sauce along with the cheddar, then sprinkle another 1/4 cup on top before adding the breadcrumb mixture.
Ranch Remix: Replace 1/2 cup of the milk with ranch dressing for an extra layer of tangy flavor that complements the buffalo sauce beautifully.
Veggie Boost: Add 1 cup of finely diced celery and carrots to the sauce (traditional buffalo wing accompaniments) for added nutrition and texture contrast. Just sauté them briefly in a separate pan until slightly softened before incorporating.
Extra Crispy Topping: For texture enthusiasts, mix 1/4 cup crushed potato chips with the panko breadcrumbs for an even more substantial crunch factor.
Meal Prep Modification: This recipe also works wonderfully as individual portions. I sometimes prepare it in a muffin tin for perfectly portioned servings that freeze exceptionally well. These mini mac and cheese “cupcakes” make fantastic grab-and-go lunches or after-school snacks.
Storage and Make-Ahead Tips
On particularly busy weeks, I prepare this dish up to the baking point, cover it tightly, and refrigerate for up to 2 days. When ready to serve, I simply let it sit at room temperature for 30 minutes, then bake as directed, adding an extra 5-10 minutes to the cooking time.
For freezing, I’ve found the best method is cooling it completely, cutting into portions, and wrapping each portion individually in plastic wrap and then foil. They’ll keep for up to 3 months. I thaw overnight in the refrigerator before reheating in a 350°F oven until warmed through.
One crucial trick I’ve learned: the sauce may appear to break when reheating frozen portions, but gently stirring in a tablespoon of warm milk usually brings it back to its creamy glory.
Common Mistakes to Avoid
Over my years of perfecting this recipe, I’ve encountered some pitfalls worth sharing:
- Overcooked pasta: Remember, it continues cooking in the oven, so keeping it firmly al dente initially is crucial.
- Impatient cheese melting: Add cheese gradually off the heat to prevent graininess.
- Skipping the resting period: Those 5 minutes after baking allow the sauce to set and prevent a runny consistency.
Frequently Asked Questions
Can I make this Buffalo Chicken Mac and Cheese ahead of time?
Absolutely! You can prepare it up to the baking stage, cover, and refrigerate for up to 2 days. When ready to serve, let it sit at room temperature for 30 minutes before baking, adding 5-10 extra minutes to the cooking time to ensure it’s heated through.
How spicy is this dish, and can I adjust the heat level?
The spice level depends entirely on your choice of buffalo sauce. For milder palates, I recommend using 3/4 cup of buffalo sauce and 1/4 cup of plain tomato sauce. For heat lovers, use a spicier buffalo sauce or add 1-2 teaspoons of cayenne pepper to the cheese mixture.
Can I use rotisserie chicken instead of cooking chicken breasts?
Definitely! Rotisserie chicken is a fantastic time-saver. Simply remove the skin, shred the meat, and measure out 2 cups. It adds a wonderful roasted flavor dimension to the dish.
What can I substitute for panko breadcrumbs?
Regular breadcrumbs work well, though they create a slightly denser topping. For a gluten-free option, crushed corn flakes or gluten-free breadcrumbs make excellent substitutes. You could also use crushed butter crackers for a rich, buttery topping.
Can I make this vegetarian?
Yes! Simply omit the chicken and replace it with 2 cups of roasted cauliflower florets or 2 cups of plant-based chicken substitute. The buffalo cheese sauce is so flavorful that the dish remains delicious even without real chicken.
I hope this Buffalo Chicken Mac and Cheese becomes a staple in your home as it has in mine! It’s that perfect dish that bridges comfort food and exciting flavors—proving that sometimes the best recipes are creative combinations of classics we already love.
Buffalo Chicken Mac and Cheese
Ingredients
- 3 cups elbow macaroni approx. 12 oz dry
- 2 cups cooked shredded chicken (boneless, skinless or rotisserie)
- 1 cup buffalo sauce adjust to taste
- 2 cups sharp cheddar cheese shredded (freshly grated preferred)
- 8 oz cream cheese softened at room temperature
- 2 cups whole milk
- 1/4 cup unsalted butter plus extra for topping
- 1/4 cup all-purpose flour
- 1 cup panko breadcrumbs
- 1/4 cup unsalted butter melted, for topping
- Green onions to taste, chopped for garnish
Instructions
- Cook the Pasta:
- Bring a large pot of salted water to a boil. Cook elbow macaroni 2 minutes less than package instructions (until al dente). Drain and set aside.
- Make the Roux:
- In a large saucepan, melt 1/4 cup butter over medium heat. Whisk in 1/4 cup flour and cook for 2 minutes, until light golden and nutty smelling.
- Prepare the Sauce:
- Slowly whisk in the 2 cups of milk. Cook, stirring frequently, until thickened (about 5 minutes). Reduce heat to low.
- Add Cheeses:
- Stir in cream cheese until melted. Gradually add cheddar, 1/2 cup at a time, stirring until smooth after each addition.
- Add Buffalo Flavor:
- Mix in the buffalo sauce. Taste and adjust for heat.
- Combine:
- Fold in shredded chicken and drained pasta. Stir gently until evenly coated.
- Assemble:
- Preheat oven to 375°F (190°C). Lightly grease a 9×13 inch baking dish. Pour in the pasta mixture and spread evenly.
- Topping:
- Mix panko breadcrumbs with 1/4 cup melted butter. Sprinkle evenly over the casserole.
- Bake:
- Bake uncovered for 20–25 minutes, until bubbling and golden brown on top. Let rest for 5 minutes before serving.
- Garnish & Serve:
- Sprinkle with chopped green onions before serving. Optional: serve with extra buffalo sauce, ranch or blue cheese dressing, and celery sticks.


